Connecting Hardware Devices
CPU module
73
8
Reinstall the exhaust fan module. For instructions, see
Removing and replacing the
redundant exhaust fan
on page 63.
9
Reinstall the access panel, reconnect all signal and power cables, then turn on the
server. For instructions, read steps 7 through 9 in
Maintenance overview
on page
53.
10
Press the power button to turn on the server.
11
Follow the on-screen messages to confirm that the installed CPU module is
recognized. If the CPU module is properly recognized, the information on the CPU is
displayed on two lines.
The following sample screen shows a 1.13 GHz, dual-CPU configuration.
12
If the processing speeds do not match, the following error message will appear:
8181: Mismatch among Processors Detected
13
Perform CMOS Clear process per information provided in
Preset jumper switch
settings
on page 264. Then, reset the Toshiba Factory CMOS settings. For more
information, refer to
BIOS settings
on page 101.
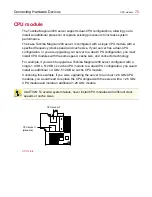
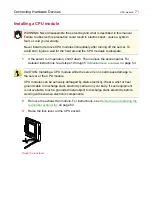
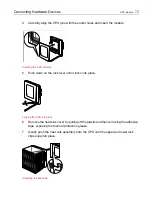
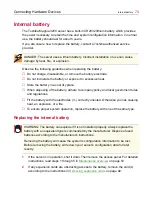
CAUTION: To avoid damaging the CPU/heat sink assembly, never apply pressure to
the heat sink when installing the CPU module.
Phoenix BIOS 4.0 Release 6.0
Copyright 1985-2000 Phoenix Technologies Ltd.,
All Rights Reserved
TigerBird II Server BIOS-Version X.XX
BMC firmware Revision X.XX
CPU-2 Pentium (R) III Processor 1.13 GHZ
XXXK System RAM Passed
XXXM Extended RAM Passed
TECHNICAL NOTE: If the server is running Windows NT, you may need to reinstall
and configure Windows NT to support a dual-processor configuration. For more
information, refer to your operating system documentation.
Summary of Contents for 3200
Page 1: ... ...
Page 309: ...309 ...

