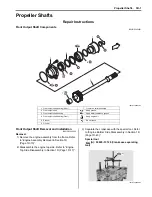
Propeller Shafts: 3D-9
Assembly
Assemble the rear output shaft in the reverse order of
disassembly. Pay attention to the following points:
NOTE
Apply engine oil to each running part before
reassembling.
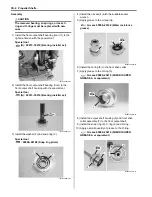
• Install the shim(s) (1) and bearing (2).
NOTE
The bearing knock-pin “A” should be
positioned inside.
• Apply grease to the oil seal (3).
: Grease 99000–25160 (Water resistance
grease)
• Install the oil seal to the rear output shaft yoke (4).
CAUTION
!
Replace the oil seal (3) with a new one.
• Apply thread lock to the thread part of the output shaft.
: Thread lock cement 99000–32030
(THREAD LOCK CEMENT SUPER 1303 or
equivalent)
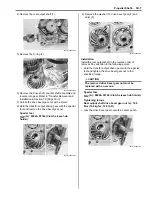
• After installed rear output shaft yoke to the rear output
shaft, install the washer (5) and tighten the output
shaft nut (6) to the specified torque.
CAUTION
!
Do not reuse the output shaft nut (6).
Tightening torque
Rear output shaft nut (a): 100 N·m (10.0 kgf-m,
72.5 lb-ft)
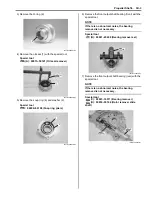
• Lock the rear output shaft nut with a center punch.
• Install the rear output shaft driven bevel gear (7) and
bearing (8).
NOTE
The wider side “a” of the bearing should be
positioned bevel gear side.
• With the rear output shaft held immovable with a vise,
tighten the rear output shaft driven gear nut (9) to the
specified torque.
CAUTION
!
The removed nut must be replaced with a
new one.
Tightening torque
Rear output shaft driven gear nut (b): 100 N·m (
10.0 kgf-m, 72.5 lb-ft)
1
2
“A”
I831G1340035-02
3
4
I831G1340101-02
5
(a)
6
I831G1340102-03
7
8
“ a ”
I831G1340033-02
Summary of Contents for 2009 LT-A750XK9
Page 2: ......
Page 4: ......
Page 5: ...SUPPLEMENTS L LT A750XK9 09 MODEL 10 LT A750XPK9 09 MODEL 11 ...
Page 29: ...0A 15 General Information 99565 01010 013 CD ROM Ver 13 ...
Page 57: ...0B 28 Maintenance and Lubrication 09915 40610 Oil filter wrench Page 0B 12 Page 0B 12 ...
Page 68: ...0C 11 Service Data ...
Page 310: ...1K 5 Exhaust System ...
Page 482: ...4D 6 Parking Brake ...
Page 528: ...6B 13 Steering Handlebar ...
Page 581: ......


