


Maintenance and Lubrication: 0B-5
5) Drain a small amount of engine coolant and
disconnect the radiator upper hose of thermostat
side. Refer to “Cooling System Inspection (Page 0B-
15)”.
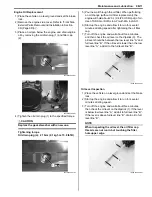
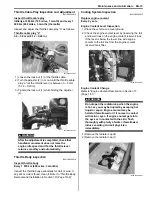
6) Remove the spark plug cap (4) and spark plug (5).
Refer to “Spark Plug Cap and Spark Plug Removal
and Installation in Section 1H (Page 1H-3)”.
7) Remove the valve timing inspection plug (6).
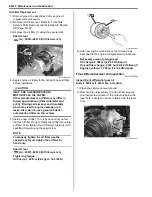
8) Turn the crankshaft to bring the “TDC” line “A” on the
generator rotor to the lug mark “B”.
9) Remove the cylinder head cover. Refer to “Engine
Top Side Disassembly in Section 1D (Page 1D-17)”.
NOTE
• Check the engraved lines “C” on the
camshafts, so it is parallel with the mating
surface “D” on the cylinder head cover.
• The valve clearance should be taken
cylinder is at Top Dead Center (TDC) of
compression stroke.
• The clearance specification is for COLD
state.
• To turn the crankshaft for clearance
checking, be sure to use a wrench, and
rotate in the normal running direction.
I831G1020012-01
5
4
I831G1020085-03
6
I831G1020011-02
“A”
“B”
I831G1140086-03
“C”
“C”
“D”
“D”
“C”
“C”
EX
IN
“D”
“D”
I831G1020013-03
Summary of Contents for 2009 LT-A750XK9
Page 2: ......
Page 4: ......
Page 5: ...SUPPLEMENTS L LT A750XK9 09 MODEL 10 LT A750XPK9 09 MODEL 11 ...
Page 29: ...0A 15 General Information 99565 01010 013 CD ROM Ver 13 ...
Page 57: ...0B 28 Maintenance and Lubrication 09915 40610 Oil filter wrench Page 0B 12 Page 0B 12 ...
Page 68: ...0C 11 Service Data ...
Page 310: ...1K 5 Exhaust System ...
Page 482: ...4D 6 Parking Brake ...
Page 528: ...6B 13 Steering Handlebar ...
Page 581: ......


