25
Multi shot
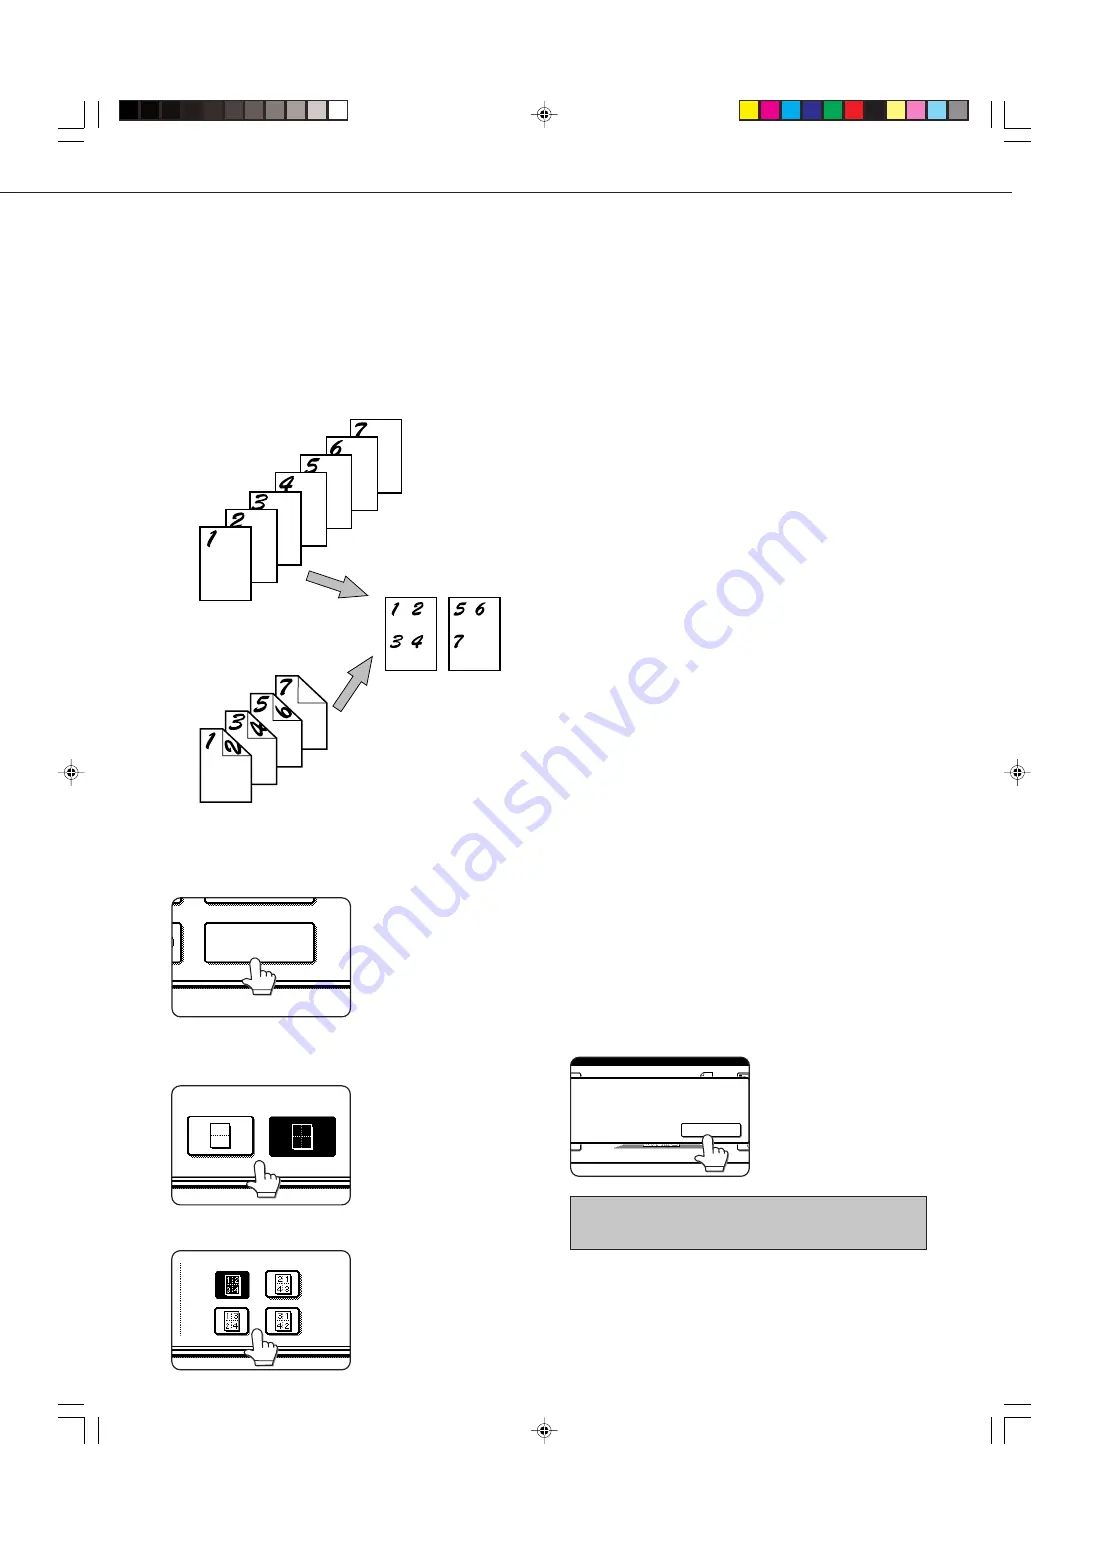
The multi shot function is used to copy up to four originals, collectively in a specified order, per sheet of copy paper in
any one of four layout patterns.
[Example] Copying seven originals using the 4 in 1 MULTI SHOT selection in a layout pattern starting from the upper
left to lower right.
●
When using the multi shot function, place the originals,
select the desired paper size, and select the copying
mode (page 9) before selecting the multi shot function
on the special modes screen.
●
When using the multi shot function, the appropriate
copy ratio will be automatically set based on the original
size, paper size, and the number of originals to be
copied onto one sheet. The minimum reduction ratio
is 25%. Depending on the original size, paper size,
and the number of originals to be copied onto one
sheet, the appropriate copy ratio may be smaller than
25%. In this case, portions of original images may not
be copied.
1
Touch the [MULTI SHOT] key on the SPECIAL
MODES screen.
MULTI SHOT
The multi shot setting
screen will appear.
2
Select the number of originals to be copied onto
one sheet of copy paper on the multi shot
selection screen.
2in1
4in1
The orientation of copy
paper and the image of the
originals may be rotated as
needed.
3
Select the layout.
LAYOUT
Select the order in which
the originals will be
arranged on the copy.
Copies
One-sided copies from
one-sided originals
One-sided copies from
two-sided originals
4
[When using the automatic document feeder:]
Copying will start after all originals have been scanned.
(The next step is not needed.)
[When using the document glass:]
Replace the original with the next original and press
the [START] key. Repeat this operation until all originals
have been scanned.
5
If scanning is being done from the document
glass, touch the [READ-END] key after the last
original has been scanned to start copying.
PLACE NEXT ORIGINAL. PRESS [START].
WHEN FINISHED
,
PRESS [READ-END].
READ-END
To cancel the multi shot function, touch the [CANCEL] key
on the multi shot setting screen.
SPECIAL FUNCTIONS
copy-2_Ep.P65
2/04/01, 19:18
25
Summary of Contents for AR-M350 Imager
Page 2: ......
Page 10: ......
Page 18: ...1 8 Part names and functions of peripheral units PART NAMES AND FUNCTIONS ...
Page 36: ......
Page 56: ......
Page 117: ......
Page 118: ......
Page 120: ...cover1 p65 2 04 01 19 17 2 ...
Page 155: ...cover4 p65 2 04 01 19 18 1 ...
Page 176: ......
Page 184: ......
Page 206: ......
Page 212: ......
Page 245: ...9 3 9 NOTE ...
Page 246: ...9 4 NOTE ...
Page 247: ......
Page 250: ......
Page 279: ......


