C
HAPTER
7:
P
ORT
C
ONFIGURATION AND
P
ORT
A
CCESS
A
PPLICATION
33
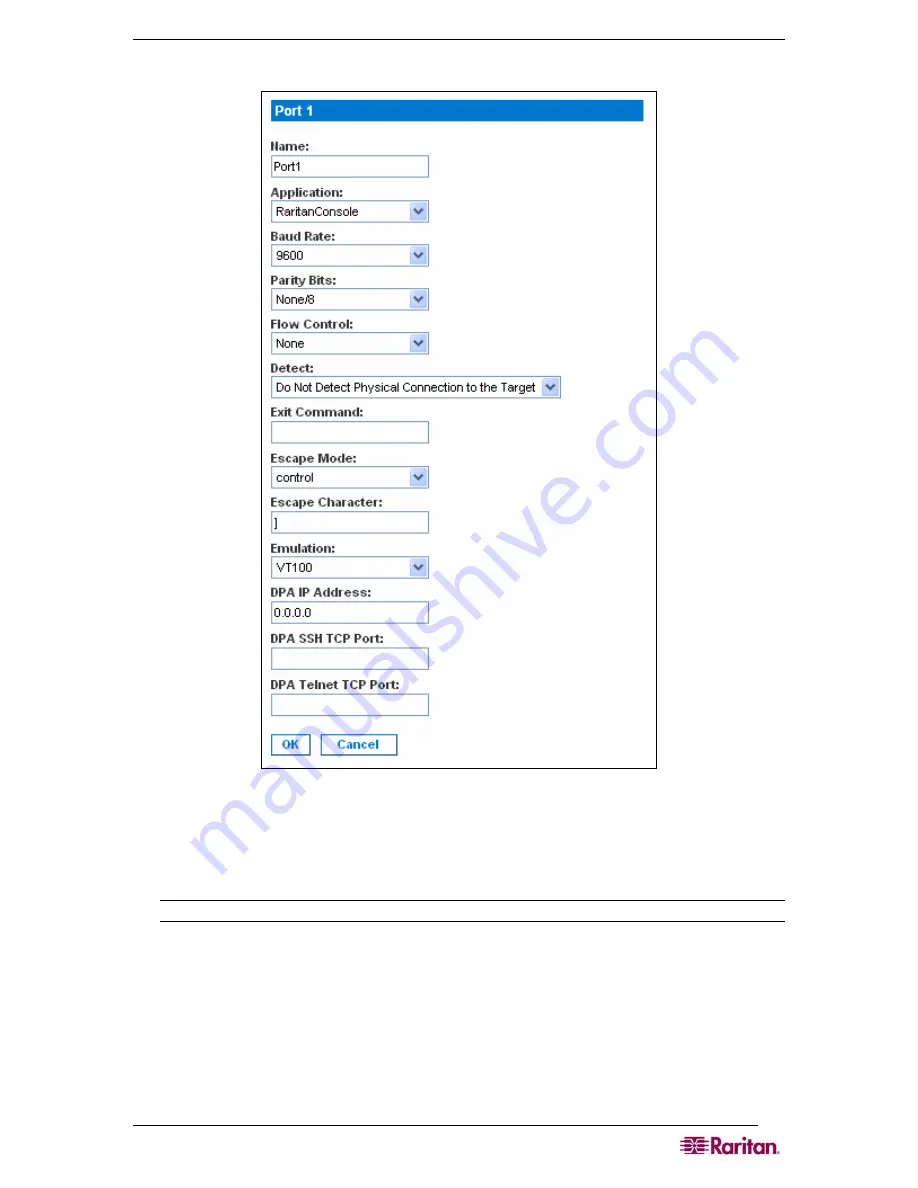
The Edit Port screen appears.
Figure 27 Edit
Port
Screen
3.
Make sure the port values match the target system’s serial port configuration for the first
three values.
•
Select the
Baud Rate
from the
Baud Rate
drop-down menu.
Note: The minimum baud rate supported for local port access is 9600.
•
Select the
Parity Bits
from the
Parity Bits
drop-down menu.
•
Select the
Flow Control
from the
Flow Control
drop-down menu.
4.
In the
Detect
field, indicate whether you want the Dominion SX to detect or not detect the
physical connection to the target. The default is Not detect. Change by selecting Detect
Physical Connection to the Target from the drop-down menu in the
Detect
field.
5.
Type a command in the
Exit Command
field. This is the command that will be sent to your
system when a port disconnection occurs, for example, logout.
Summary of Contents for DOMINION SX -
Page 2: ...This page intentionally left blank...
Page 18: ...This page intentionally left blank...
Page 22: ...4 DOMINION SX USER GUIDE This page intentionally left blank...
Page 44: ...26 DOMINION SX USER GUIDE...
Page 48: ...30 DOMINION SX USER GUIDE...
Page 83: ...CHAPTER 8 SECURITY 65 Figure 59 SSL Client Certificate Screen...
Page 104: ...86 DOMINION SX USER GUIDE...
Page 170: ...152 DOMINION SX USER GUIDE...
Page 174: ...156 DOMINION SX USER GUIDE...
Page 196: ...178 DOMINION SX USER GUIDE Install the Dominion SX Server Certificate section that follows...
Page 203: ...APPENDIX C CERTIFICATES 185...
Page 204: ...186 DOMINION SX USER GUIDE...
Page 212: ...194 DOMINION SX USER GUIDE...
Page 225: ...APPENDIX F TROUBLESHOOTING 207 255 60 2000 00...


