51
7
Ableton Live (MCU)
7.1
Getting Started
FaderPort™ Multichannel Production Controllers
Owner’s Manual
7
Ableton Live (MCU)
7.1
Getting Started
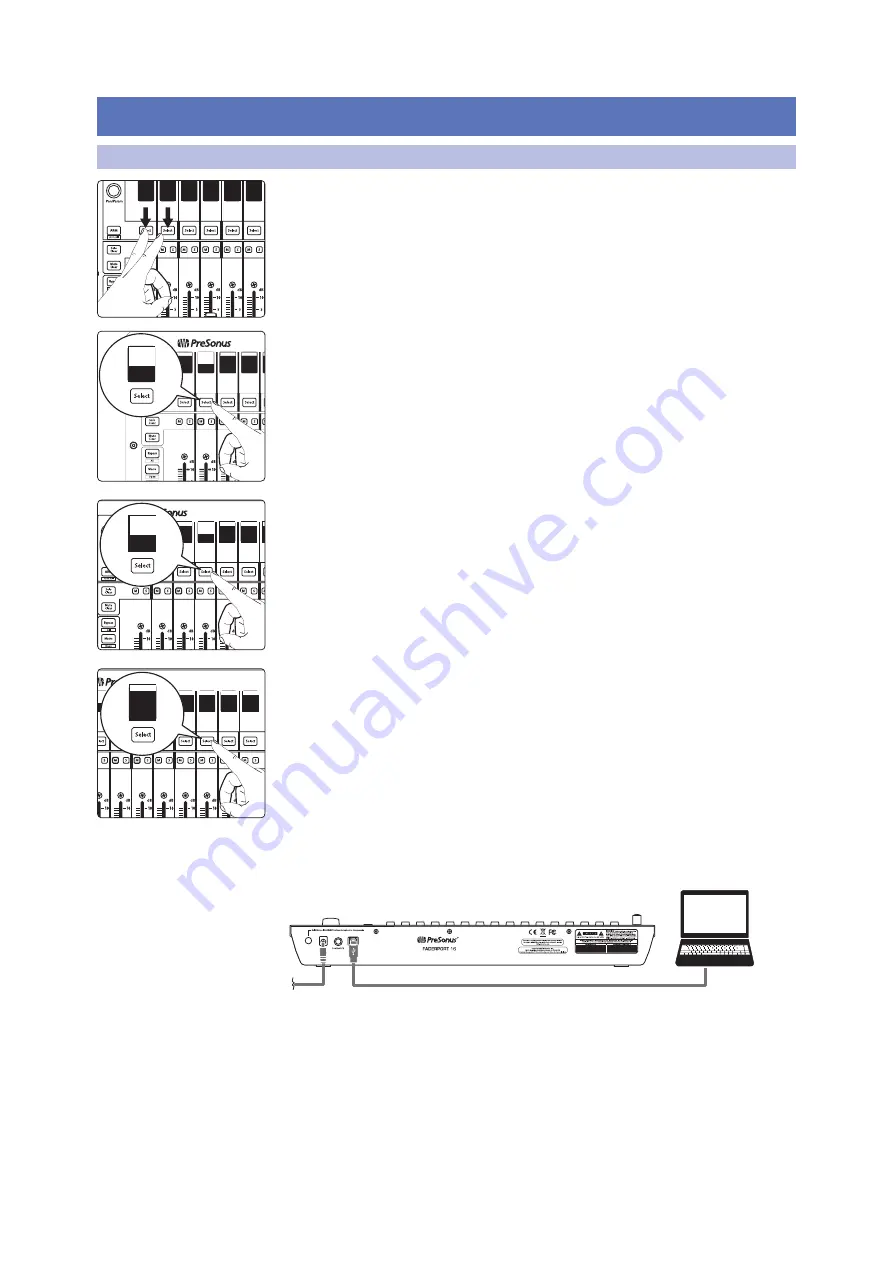
By default, the operation mode on the FaderPort is set Studio One. To switch to
Ableton Live operation, power on the unit while pressing the first two select buttons.
This will open the boot mode screen, and you will be given the opportunity to select
which mode of operation you’d like to use. Press the Select button below MCU to
view the customized MCU operation modes.
When using the FaderPort with Live, select MCU (Ableton) by pressing the Select
button below its scribble strip.
Once you have selected your mode, press the Select button below the “Exit” screen
to reboot your FaderPort. This mode will be selected automatically every time you
boot your FaderPort.
If you would like to change the mode at any point, power on the
unit while holding down the first two Select buttons.
Power User Tip:
From this menu, you can also adjust the fader sensitivity and speed to
fine tune your FaderPort to work the way you want it.
Please see Section 10 for more
information on the customized setup modes
.
The FaderPort is a class-compliant device in both macOS® and
Windows®. Simply connect your FaderPort to a free USB port
on your computer. No further installation is necessary.
Once you have connected your FaderPort to your computer
and the power supply, power it on and, launch Live to set up
the FaderPort as a Mackie Control Universal device.
Studio
One
MCU
HUI
MIDI
Mode
SE
Select
Control
MCU
Control
MCU
(Logic)
MCU
(Cubase)
MCU
(Sonar)
MCU
(Ableton)
Back
Restart
FaderPort
Control
Mode
EXIT
MCU
(Ableton)
tudio
One
MCU
HUI
MIDI
Mode
SETUP
Restart
FaderPort
lect
Control
EXIT
EXIT
Restart
FaderPort


