5-42
DA80F/DA95F AddressRight™ Printers Service Manual (SV61962 Rev. A)
5 • Removal and Replacement
DA95F (WF96) - Standard Feeder (WF9S) Parts Removal
1. Disengage the feeder assembly from the printer and remove the side
guides, deck, and rear cover (see section 5.22).
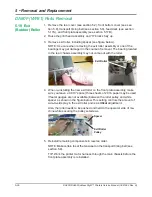
2. At the rear, loosen the four quick screws securing the feeder cover sub
assembly on the feeder assembly. Pull the feeder cover sub assembly
out from the feeder assembly.
5.24 Top
Sensor
(Emitter)
Assembly
on Standard
Feeder
6. Reinstall in reverse order.
NOTE: Replacing the feeder top sensor assembly will require an adjust-
ment. Refer to section 6.3
Feeder Sensor Test and Calibration
for more
information.
Screws For
Feeder Cover
Sub Assembly
(Circled)
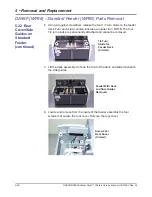
3. From inside, disconnect the feeder top sensor assembly (emitter) from
the harness.
4. Cut the wire tie holding the sensor cables.
5. Unfasten the screw securing the feeder top sensor assembly (emitter)
and remove the sensor from the feeder assembly.
Top Sensor
Emitter


