A-26
DA80F/DA95F AddressRight™ Printers Service Manual (SV61962 Rev. A)
Appendix A • Printer Control Panel Menus and Utilities
A.5 LCD
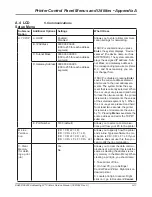
Service Menu
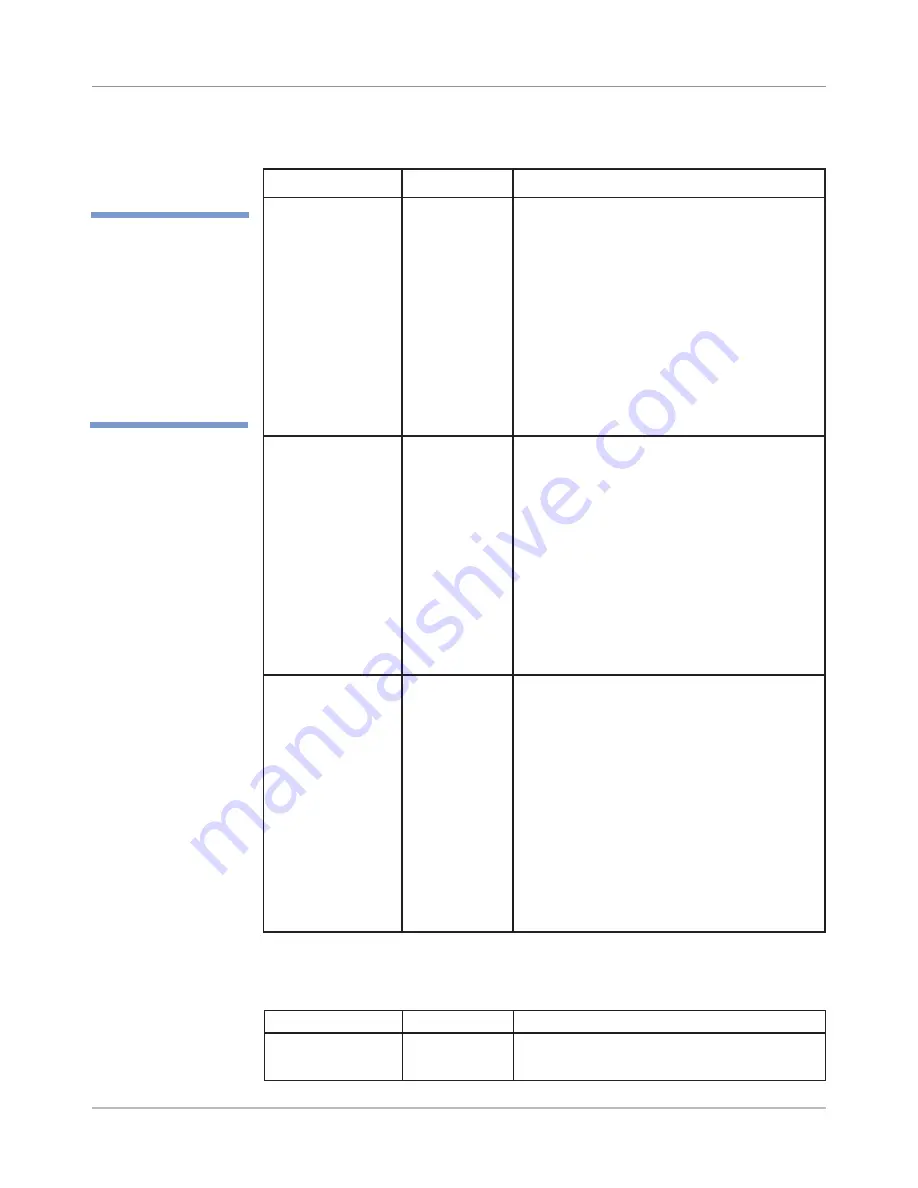
Submenu Option
Settings
What It Does
Brand
Pitney Bowes,
Secap
Allows you to select Pitney Bowes or Secap
as the basis for the printer model
5. Brand
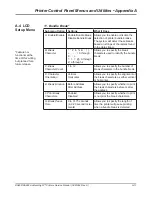
Menu Option
Settings
What It Does
A. Paper Sensor
Allows you to calibrate the Paper sensor on
the printer.
1. “Clear Sensors” displays when the menu
item is selected. Press
Enter.
2. At the “Raise paper guide” prompt, raise
the paper guide (blue knob) to maximum
height and press
Enter
.
3. The system automatically calibrates the
paper sensor. During the calibration, the
“Please wait” screen is displayed.
4. When complete, a “Calibration complete”
screen is shown. Press
Enter
to return to
the submenu.
B. Exit Sensor
[DA95F only]
Allows you to calibrate the Exit sensor on the
printer.
1. “Clear Sensors” displays when the menu
item is selected. Press
Enter.
2. At the “Raise head assembly” prompt,
raise the head assembly to maximum
height and press
Enter
.
3. The system automatically calibrates the
paper sensor. During the calibration, the
“Please wait” screen is displayed.
4. When complete, a “Calibration complete”
screen is shown. Press
Enter
to return to
the submenu.
C. Feeder Sensor
Allows you to calibrate the Feeder sensor on
the printer.
1. “Clear Sensors” displays when the menu
item is selected. Press
Enter.
2. The system automatically calibrates the
paper sensor. During the calibration, the
“Please wait” screen is displayed.
3. When complete, a “Calibration complete”
screen is shown. Press
Enter
to return to the
submenu.
NOTE: This option is not applicable for the
DA95F when it is configured with an external
high-speed feeder.
4. Calibrate Sensors
✍
TIP:
The sensors
must
remain unblocked and
the paper guide (blue
knob)
must
be set at
the maximum height
(maximum paper thick-
ness) in order for the
calibration procedure
to work properly.


