– 74 –
Chapter 5 Basic Operations — KEY
Setting the trimming
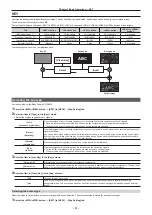
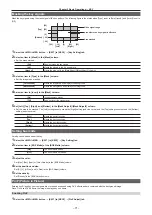
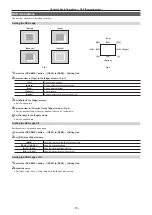
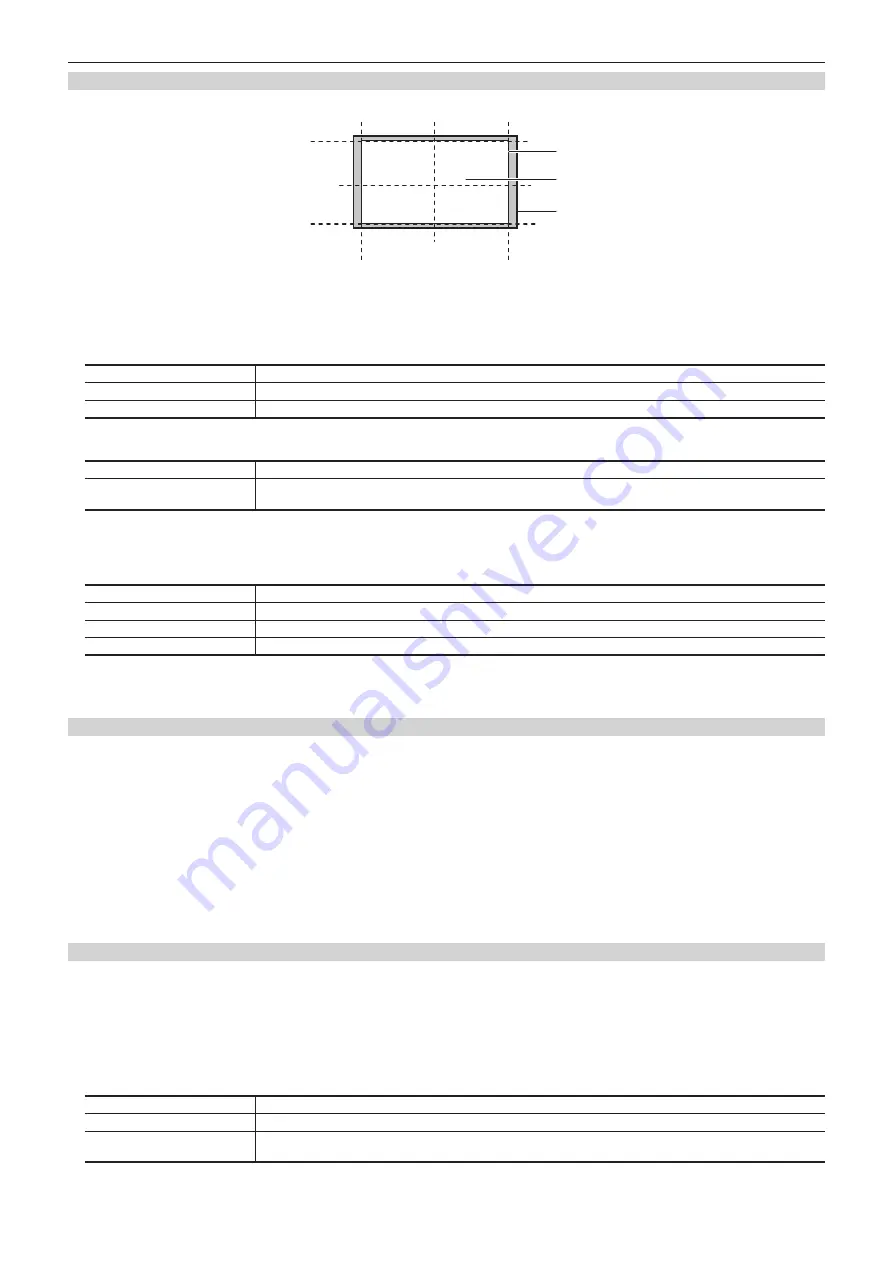
Set the trimming type and values as well as operation for when manual is set. The default setting is as shown in the following figure.
PinP effective area
Area trimmed
Original size of PinP
[Right]
[Left]
[Top]
[Bottom]
[50]
[40]
[0]
[
−
40]
[
−
50]
[
−
50]
[0]
[50]
[
−
40]
[40]
1
Select the <ME1>/<ME2> button
→
[KEY1] to [KEY4]
→
[PinP Adjust] tab.
2
Select an item in [Trim] in the [Trim] column.
[Off]
Does not perform trimming.
[4:3]
Trims automatically so that the aspect ratio is 4:3.
[Manual]
Trims using the values set with [Trim Adjust1] and [Trim Adjust2].
3
Select an item in [Manual] in the [Trim] column.
[Free]
Sets the amount of trimming for [Left], [Right], [Top], and [Bottom] separately.
[Pair]
Changes the settings in such a way that the [Left] and [Right] trimming amounts, and the [Top] and [Bottom] trimming
amounts are the same. (This makes for a top-bottom and left-right symmetry.)
4
Set [Left], [Top], [Right], and [Bottom] in [Trim Adjust1]/[Trim Adjust2].
f
Set the trimming value. The [Left] setting cannot exceed the [Right] setting (and vice versa), and the [Top] setting cannot exceed the [Bottom]
setting (and vice versa).
[Left]
Sets the left trimming value.
[Top]
Sets the top trimming value.
[Right]
Sets the right trimming value.
[Bottom]
Sets the bottom trimming value.
5
Set [WipeAspect] in the [Trim] column.
f
The aspect ration of the wipe pattern is changed when anything other than [Off] is selected in [WipeMask] in the [Mode] column.
Copying the PinP setting
The setting for PinP can be copied.
1
Select the <ME1>/<ME2> button
→
[MISC]
→
[Misc] tab.
2
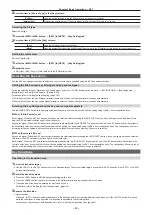
Select an item in [Key1 From] to [Key4 From] in the [PinP Copy] column.
f
Select the channel of the key to be the copy source of the PinP setting.
3
Select [Execute] in the [PinP Copy] column.
f
, settings of the PinP for each key are copied.
f
Settings inside the <ME1>/<ME2> button
→
[KEY1] to [KEY4]
→
[PinP Adjust] are copied.
However, the settings of [Sync] and [Sync Mode] in the [Mode] column are not copied.
f
The copy is not executed to the channel of the key set to [No Assign] in Step
Wipe transition of PinP
SQ or SL can be set as the wipe transition effect when PinP is enabled.
The settings other than the wipe transition effect are the same as when PinP is disabled. Refer to “Setting the key transition mode” (page 63).
r
Setting the wipe transition of PinP
1
Select the <ME1>/<ME2> button
→
[KEY1] to [KEY4]
→
[Key Pattern] tab.
2
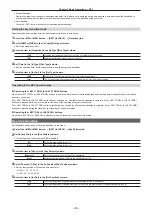
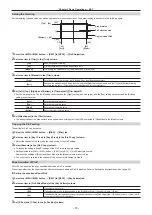
Select an item in [PinP Wipe Mode] of the [Key Pattern] column.
[Off]
Transitions with cut, mix.
[SQ]
Transitions from size 0 to size specified in the [PinP Adjust] tab
→
[Position] column
→
[Size].
[SL]
Transitions while moving without changing the size specified in the [PinP Adjust] tab
→
[Position] column
→
[Size]. It will
key on/key off with the cut operation.
3
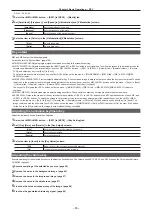
Set [X‑Pos] and [Y‑Pos] in the [In Position] column.
Summary of Contents for AV-HS60C1E
Page 5: ...Please read this chapter and check the accessories before use Chapter 1 Overview ...
Page 52: ...This chapter describes menu operations Chapter 5 Basic Operations ...
Page 162: ...This chapter describes the difference with the Standard mode Chapter 9 3G mode 4K mode ...
Page 168: ...This chapter describes the terminals and signals of the unit Chapter 10 External Interfaces ...
Page 184: ...This chapter describes the setting menu table and terms Chapter 12 Appendix ...
Page 206: ...Web Site http www panasonic com Panasonic Corporation 2014 ...


