– 108 –
Chapter 5 Basic Operations — Video memory
Offset
(bytes)
Length
(bytes)
Header
Description of setting
Setting
8
2
X coordinate of image
No restrictions
―
10
2
Y coordinate of image
No restrictions
―
12
2
Width of image
Varies depending on the image size.
―
14
2
Height of image
Varies depending on the image size.
―
16
1
Color depth
24 bits
18H
32 bits
20H
17
1
Image descriptor
No restrictions
―
r
Specification of audio file
f
Only the audio file that matches following specification can be used.
-
Sampling frequency: 48 kHz
-
Quantized: Linear PCM, 16 bits
-
Number of channels: 2 channels
-
WAV format (extension .wav)
f
An audio data with silent data added to the end will be embedded to the clip file when the length of the audio data contained in the audio file is shorter
than the length of the image data.
f
An audio data with end deleted will be embedded to the clip file when the length of the audio data contained in the audio file is longer than the length
of the image data.
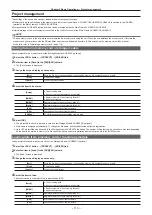
Playing back moving images (Clip)
f
Image data created using a computer can be loaded.
For details, refer to “Operating the register memory” (page 105).
f
This operation can be also performed in the multi-selection panel area.
For details, refer to “Video memory menu” (page 43).
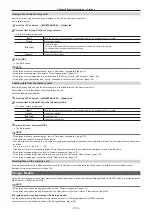
Playing back moving images
1
Select the <MEM> button
→
[CLIP]
→
[Play Clip1] to [Play Clip4] tabs.
2
Select [Play] in the [Play1] column.
f
Playback of the moving images starts.
f
[Current Time] displays the current playback position (time).
f
When [Pause] is selected, playback of moving images is suspended. To resume playback, select [Play].
3
Select [Stop] in the [Play1] column.
f
Playback stops.
Moving to the first frame or last frame
1
Select the <MEM> button
→
[CLIP]
→
[Play Clip1] to [Play Clip4] tabs.
2
Select [<<Lead]/[>>Last] in the [Play1] column.
[<<Lead]
Moves to the first frame.
[>>Last]
Moves to the last frame.
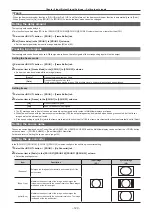
Setting the playback mode
1
Select the <MEM> button
→
[CLIP]
→
[Play Clip1] to [Play Clip4] tabs.
2
Select an item in [Link Target] in the [Play2] column.
f
Set the link playback of Clip.
[Off]
Does not perform link playback.
[Auto]
Starts playback with the <AUTO> button in the transition area of ME set in [Link ME].
[KEY1] ‑ [KEY4]
Starts playback with the <KEY1 ON> to <KEY4 ON> buttons, and <KEY1 TRNS> to <KEY4 TRNS> buttons of the ME
set in [Link ME].
Starts playback only when the key corresponding to each button is off.
[Rec]
Playback starts if [Rec] is selected from the <MEM> button on the top menu
→
[CLIP]
→
[Rec] tab
→
[Rec1] column.
Image data recorded in a different channel can be copied.
[Fader]
Links to the fader lever operation in the transition area of ME set in [Link ME], as well as the operation of the <AUTO>
button. In this case, the playback speed of Clip changes according to the fader lever operation or the transition period
from the operation of the <AUTO> button.
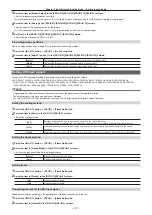
3
Select an item in [Link ME] in the [Play2] column.
f
Select the ME where link playback of Clip is performed. Transitions can be executed using the fader lever or the <AUTO> button.
[ME1]
Links with ME1 transition operation.
Summary of Contents for AV-HS60C1E
Page 5: ...Please read this chapter and check the accessories before use Chapter 1 Overview ...
Page 52: ...This chapter describes menu operations Chapter 5 Basic Operations ...
Page 162: ...This chapter describes the difference with the Standard mode Chapter 9 3G mode 4K mode ...
Page 168: ...This chapter describes the terminals and signals of the unit Chapter 10 External Interfaces ...
Page 184: ...This chapter describes the setting menu table and terms Chapter 12 Appendix ...
Page 206: ...Web Site http www panasonic com Panasonic Corporation 2014 ...

