Installing Options 5-61
Installing a 5 1/4-Inch Device
Use the following procedure to install a 5 1/4-inch device
into a 5 1/4-inch accessible device slot.
NOTE
A 3 1/2-inch hard disk drive can also be
installed in a 5 1/4-inch device slot if the device is
fitted into a 5 1/4-inch frame (form factor) first. See
“Installing a 3 1/2-Inch Device in a 5 1/4-Inch Slot.”
1.
Follow the preinstallation instructions that come with the
device, such as setting jumpers and switches.
2.
Remove the system unit cover (see “Removing the
Desktop Cover” or “Removing the Minitower Cover”).
3.
Remove the front panel (see “Removing the Front
Panel”).
4.
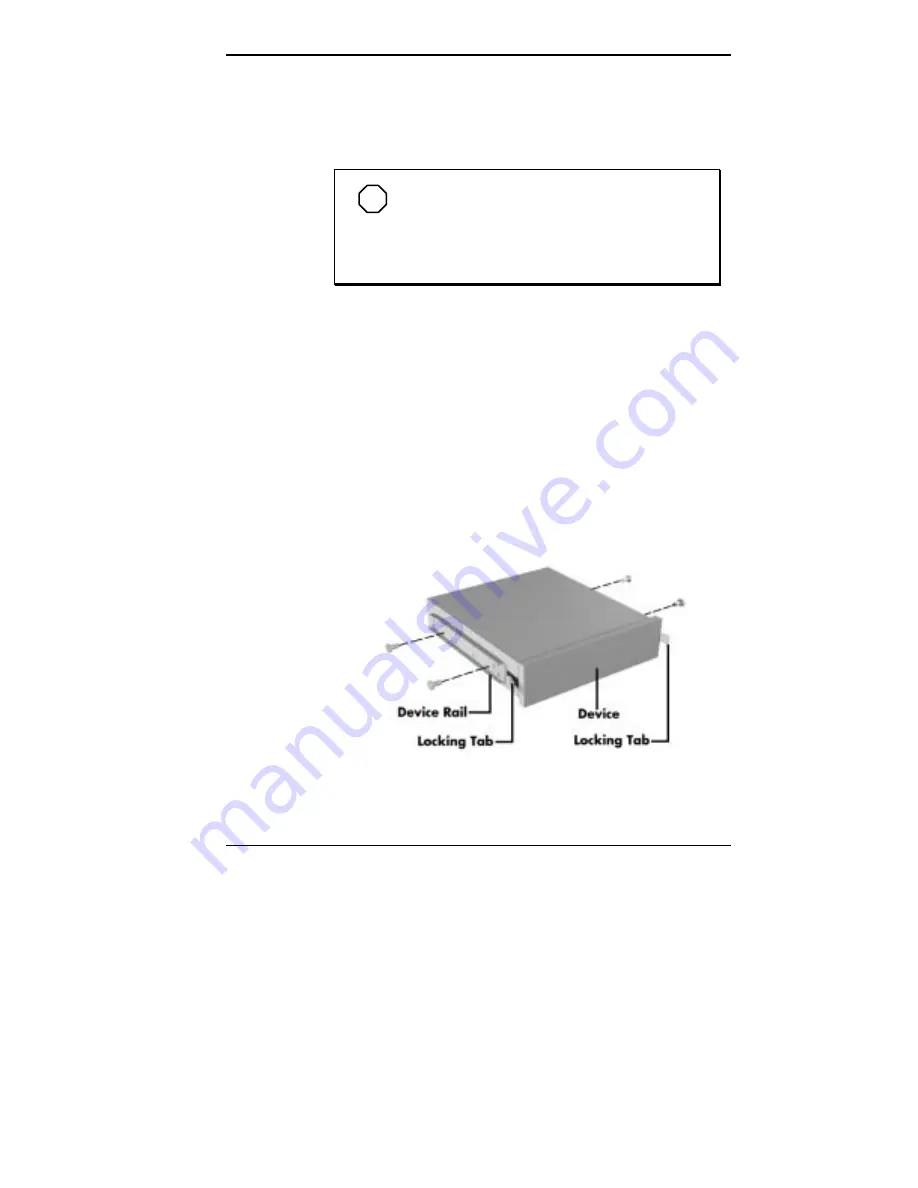
Locate the device rails that ship with your system.
Attach the device rails to the sides of the device with the
four screws that come with the device.
Attaching device rails
Summary of Contents for POWERMATE ENTERPRISE - 09-1997
Page 34: ...Introducing Your Computer 1 19 Audio connectors desktop Audio connectors minitower ...
Page 37: ...1 22 Introducing Your Computer Power supply features desktop Power supply features minitower ...
Page 43: ...Using Your Computer 2 5 Keyboard features Windows 95 keys ...
Page 146: ...5 18 Installing Options Installing Options 5 ...
Page 147: ...Installing Options 5 19 Locating desktop expansion slots Locating minitower expansion slots ...
Page 149: ...Installing Options 5 21 Removing a slot cover desktop Removing a slot cover minitower ...
Page 156: ...Installing Options 5 27 Installing Options 5 ...
Page 168: ...5 38 Installing Options Installing Options 5 ...
Page 185: ...5 54 Installing Options Installing Options 5 ...
Page 187: ...5 56 Installing Options Removing the front panel desktop Removing the front panel minitower ...


