Upgrading Your Server 9-23
6.
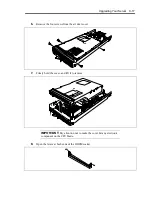
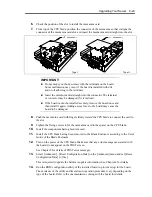
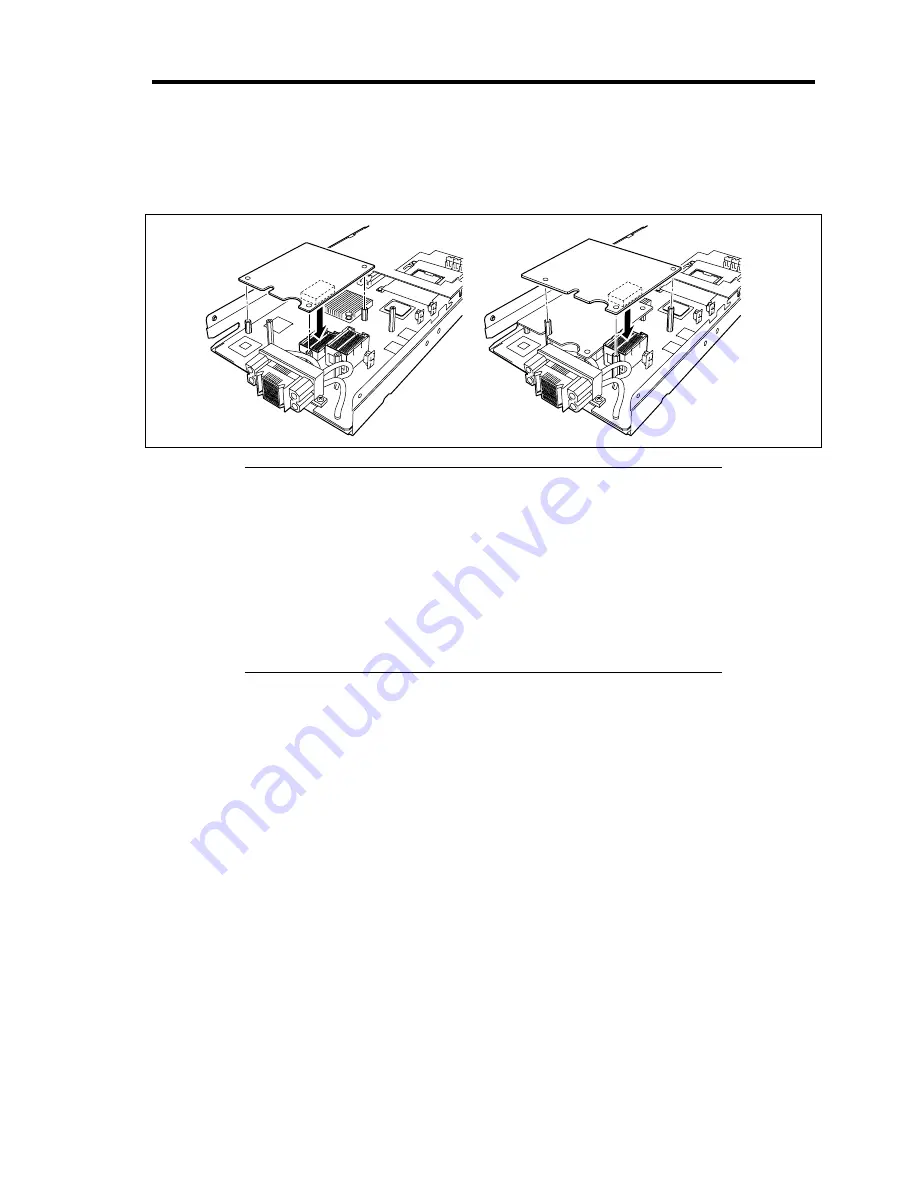
Check the position of the slot to install the mezzanine card.
7.
From top of the CPU blade, position the connector of the mezzanine so that it aligns the
connector of the mezzanine card slot, and insert the mezzanine card straight into the slot.
IMPORTANT:
Do not make your body contact with the terminals on the board.
Some malfunction may occur if the board is installed with dirt
and/or oil adhering to the terminals.
Insert the mezzanine card straight into the connector. The terminal
or connector may be damaged if it is inclined.
If the board cannot be installed securely, remove the board once and
then install it again. Adding excess force to the board may cause the
board to be damaged.
8.
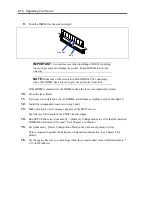
Push the mezzanine card with fingers firmly toward the CPU blade to connect the card to
the slot.
9.
Tighten the fixing screws to fix the mezzanine card to the spacer on the CPU blade.
10.
Install the components having been removed.
11.
Install the CPU blade having been removed to the Blade Enclosure according to the User's
Guide of the Blade Enclosure.
12.
Turn on the power of the CPU blade. Make sure that any error messages associated with
the board do not appear on the POST screen.
See Chapter 8 for details of POST error messages.
13.
Select [Advanced] – [Reset Configuration Data] on the [Advanced] menu and set [Reset
Configuration Data] to [Yes].
This is required to update the hardware update information. See Chapter 4 for details.
14.
Run the BIOS configuration utility of the installed board to provide setup for the board.
The existence of the utility and its start and operation procedures vary depending on the
type of the board. Refer to the documentation coming with the board for details.
Type I
Type II
Summary of Contents for N8400-086F
Page 14: ...viii This page is intentionally left blank...
Page 44: ...2 20 General Description This page is intentionally left blank...
Page 152: ...6 24 Installing and Using Utilities This page is intentionally left blank...
Page 158: ...7 6 Maintenance This page is intentionally left blank...
Page 218: ...A 2 Specifications This page is intentionally left blank...
Page 290: ...B 72 Installing the Operating System 4 Activate Windows The Windows activation is complete...

