Setting Up the System 2-11
Powering On Your System
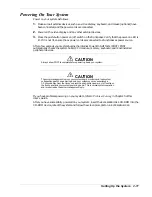
Power on your system as follows.
1.
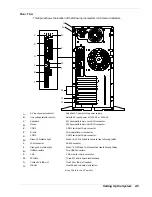
Make sure all external devices, such as a video display, keyboard, and mouse (optional) have
been connected, and the power cords are connected.
2.
Power on the video display and any other external devices.
3.
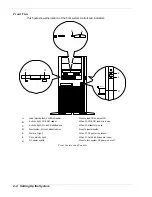
Press the push-button power on/off switch on the front panel. Verify that the power-on LED is
lit. If it is not lit, ensure the ac power cords are connected to a functional ac power source.
After a few seconds your system begins the internal Power-On Self Tests (POST). POST
automatically checks the system board, CPU module, memory, keyboard, and most installed
peripheral devices.
CAUTION
Always allow POST to complete before powering down your system.
CAUTION
The server management logic on your system board monitors and logs system
voltage changes. When powering down your system you may experience a
1–5 second delay from the time you press the push-button power on/off switch on
the front panel and your system powering down. This is normal system operation
and is required by the server management logic.
If you have problems powering on your system, refer to
Problem Solving
in Chapter 5 of this
User’s Guide.
After you have successfully powered on your system, insert the E
XPRESS
B
UILDER
CD-ROM into the
CD-ROM device, reboot the system and follow the screen prompts to run E
XPRESS
B
UILDER
.
Summary of Contents for EXPRESS 5800 ES1400 SERIES Online
Page 1: ...EXPRESS5800 ES1400 SERIES ONLINE SERVICE GUIDE...
Page 8: ...Using This Guide xv...
Page 21: ......
Page 33: ...2 12 Setting Up the System...
Page 60: ...Configuring Your System 3 27...
Page 130: ...Problem Solving 5 21...
Page 131: ......
Page 132: ......
Page 142: ...6 10 Illustrated Parts Breakdown...
Page 149: ...System Cabling A 7 WIDE SCSI CABLE 68 pins IDE CABLE 40 pins Standard System Cable Routing...
Page 160: ...System Setup Utility B 9 Adding and Removing ISA Cards Window...
Page 163: ...B 12 System Setup Utility System Resource Usage Window...


