


ANEXO 1. SOFTWARE ESA S630
A33
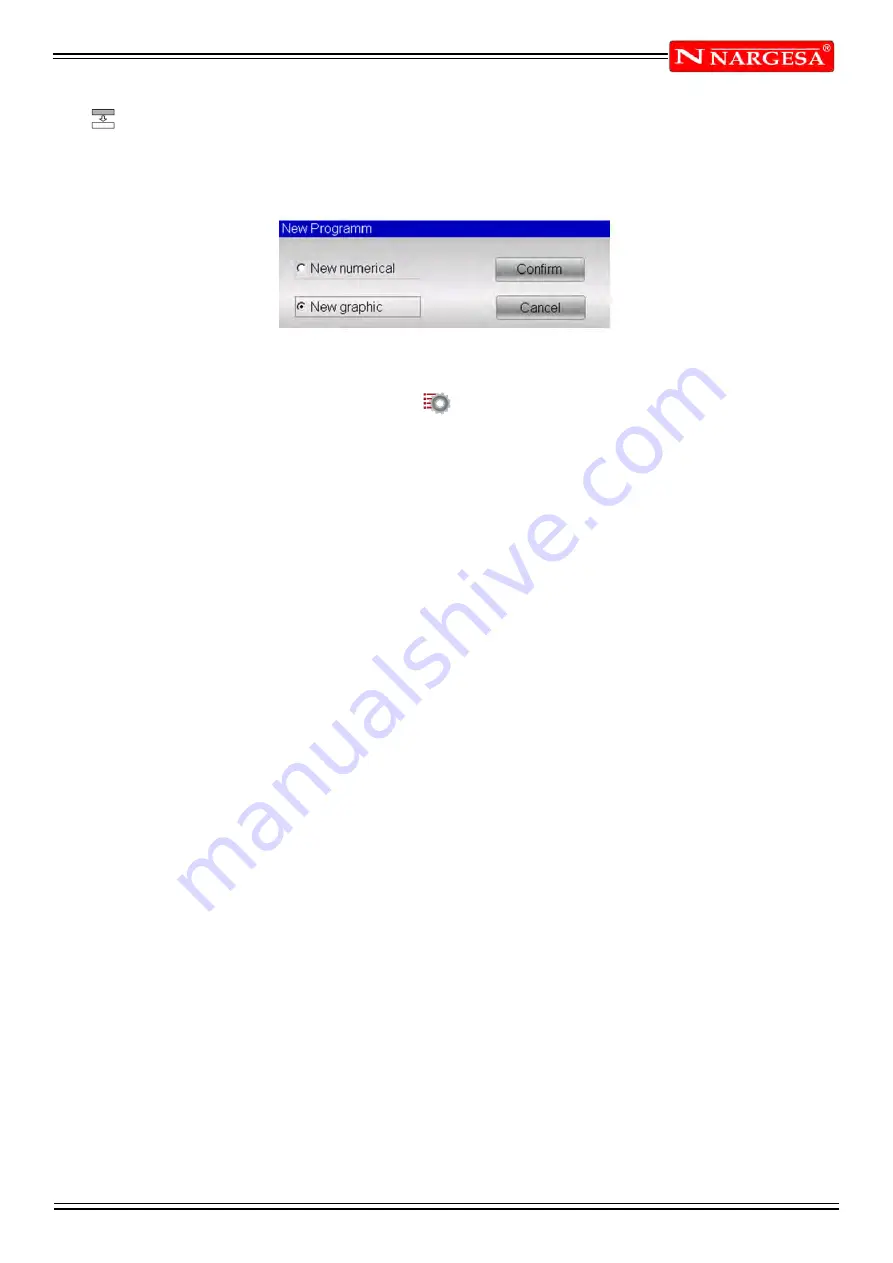
3.3 Entering a graphic program (Optional in the S630 model)
To enter a new graphic program press
[New Programm]
from the Editor page of a numerical program and
select
[New graphic]:
Figure 24 New Graphic program
Or it can be create from the program list pressing and [New graphic] .
Setting of the general data
A window will open to enter the general data of the program.
If these data are not entered, access will not be permitted to the drawing function:
- Enter the
width
of the metal sheet to be bent, touching with a finger on the field and selecting
[Ok].
- Enter the
thickness
of the metal sheet to be bent, touching with a finger on the field and selecting
[Ok].
- Enter the
resistance
of the material to be bent, touching with a finger on the field and selecting
[Ok],
like
described in the chapter 3.2
- The
material
is calculated automatically depending of its resistance.
- Enter the
work station
if more than one or if they are defined, otherwise leave 0
- Enter the
die
that will be used from the list touching with a finger on the field, scrolling the toolbar in order
to choose the die and pressing the button
[Insert]
(the die must already have been drawn).
- Enter the
V-die
of the die that will be used for the bend, touching with a finger on the field and
selecting
[Ok]
(a die can have more than one V-die; in the event of only having one, enter 1).
- Enter the
Die Orient. (0 = standard, 1 = rotated by 180°).
- Enter the punch that will be used from the list touching with a finger on the field, scrolling the toolbar in
order to choose the punch and pressing the button
[Insert]
(the punch must already have been drawn).
- Enter the Punch
Orient (0 = standard, 1 = rotated by 180°).
- Enter a
Comment
if desired.
- Enter the
measures
parameter desired.
- Select the
[Ok]
button.
Summary of Contents for MP3003 CNC
Page 2: ...Thank you for choosing our machines www nargesa com...
Page 18: ...Annex 1 Software ESA S630...
Page 19: ......
Page 68: ...Annex 2 Technical data...
Page 69: ......
Page 71: ...ANEX 2 TECHNICAL DATA MP3003CNC B3 1 List of parts...
Page 72: ...ANEX 2 TECHNICAL DATA MP3003CNC B4...
Page 73: ...ANEX 2 TECHNICAL DATA MP3003CNC B5...
Page 74: ...ANEX 2 TECHNICAL DATA MP3003CNC B6...
Page 75: ...ANEX 2 TECHNICAL DATA MP3003CNC B7...
Page 76: ...ANEX 2 TECHNICAL DATA MP3003CNC B8...
Page 77: ...ANEX 2 TECHNICAL DATA MP3003CNC B9...
Page 78: ...ANEX 2 TECHNICAL DATA MP3003CNC B10...
Page 79: ...ANEX 2 TECHNICAL DATA MP3003CNC B11...
Page 80: ...ANEX 2 TECHNICAL DATA MP3003CNC B12 2 Hydraulic group...
Page 81: ...ANEX 2 TECHNICAL DATA MP3003CNC B13...
Page 82: ...ANEX 2 TECHNICAL DATA MP3003CNC B14...
Page 83: ...ANEX 2 TECHNICAL DATA MP3003CNC B15 3 Upper cylinder...
Page 84: ...ANEX 2 TECHNICAL DATA MP3003CNC B16...
Page 85: ...ANEX 2 TECHNICAL DATA MP3003CNC B17 4 Main cylinder...
Page 86: ...ANEX 2 TECHNICAL DATA MP3003CNC B18...
Page 87: ...ANEX 2 TECHNICAL DATA MP3003CNC B19 5 Electric box...
Page 88: ...ANEX 2 TECHNICAL DATA MP3003CNC B20 6 Control panel box...
Page 89: ...ANEX 2 TECHNICAL DATA MP3003CNC B21 7 Electric maps...
Page 90: ...ANEX 2 TECHNICAL DATA MP3003CNC B22...
Page 91: ...ANEX 2 TECHNICAL DATA MP3003CNC B23...
Page 92: ...ANEX 2 TECHNICAL DATA MP3003CNC B24...
Page 93: ...ANEX 2 TECHNICAL DATA MP3003CNC B25...
Page 94: ...ANEX 2 TECHNICAL DATA MP3003CNC B26...
Page 95: ...ANEX 2 TECHNICAL DATA MP3003CNC B27...
Page 96: ......
Page 98: ...Annex 3 Laser devices...
Page 99: ......
Page 109: ...ANNEX 3 LASER DEVICE C11 15 List of parts right laser...
Page 110: ...ANNEX 3 LASER DEVICE C12...
Page 111: ...ANNEX 3 LASER DEVICE C13...