[
VIII
Test Run Mode ]
- 100 -
HWE10060
GB
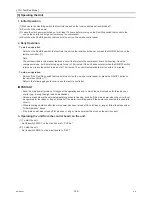
[3] Operating the Unit
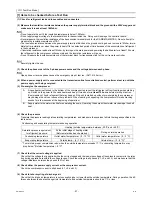
1. Initial Operation
(1) Make sure the Run/Stop switch that controls the unit on the local control panel is switched off.
(2) Switch on the main power.
(1) To start the unit
(2) To stop the unit
Set the switch SWS1 on the circuit board to "LOCAL."
Set the switch SWS1 on the circuit board to "OFF."
(3) Leave the main power switched on for at least 12 hours before turning on the Run/Stop switch that controls the
unit on the on-site control panel to warm up the compressor.
(4) Switch on the Run/Stop switch that controls the unit on the on-site control panel.
2. Daily Operation
3. Operating the unit from the control board on the unit.
To start an operation
Switch on the Run/Stop switch that controls the unit on the local control panel, or press the ON/OFF button on the
remote controller. (*1)
Note
The unit described in this manual features a circuit that protects the compressor from short-cycling. Once the
compressor stops, it will not start up again for up to 10 minutes. If the unit does not start when the ON/OFF switch
is turned on, leave the switch turned on for 10 minutes. The unit will automatically start up within 10 minutes.
To stop an operation
Switch off the Run/Stop switch that controls the unit on the on-site control panel, or press the ON/OFF button on
the remote controller. (*1)
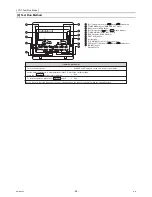
Refer to the following pages for how to use the remote controller.
IMPORTANT
• Keep the main power turned on throughout the operating season, in which the unit is stopped for three days or
shorter (e.g., during the night and on weekends).
• Unless in areas where the outside temperature drops to freezing, switch off the main power when the unit will not
be operated for four days or longer. (Switch off the water circulating pump if the pump is connected to a separate
circuit.)
• When resuming operation after the main power has been turned off for a full day or longer, follow the steps under
“Initial Operation” above.
• If the main power was turned off for six days or longer, make sure that the clock on the unit is correct.
Summary of Contents for CAHV-P500YA-HPB
Page 1: ...Service Handbook Service Handbook CAHV P500YA HPB Model 2011 HOT WATER HEAT PUMP ...
Page 7: ...CONTENTS HWE10060 GB ...
Page 9: ... 2 HWE10060 GB ...
Page 19: ... 12 HWE10060 GB ...
Page 37: ... 30 HWE10060 GB ...
Page 46: ... 39 HWE10060 GB IV Remote Controller 1 Using the Remote Controller 41 2 Function Settings 46 ...
Page 47: ... 40 HWE10060 GB ...
Page 55: ... IV Remote Controller 48 HWE10060 GB ...
Page 56: ... 49 HWE10060 GB V Electrical Wiring Diagram 1 Electrical Wiring Diagram 51 ...
Page 57: ... 50 HWE10060 GB ...
Page 61: ... V Electrical Wiring Diagram 54 HWE10060 GB ...
Page 63: ... 56 HWE10060 GB ...
Page 67: ... VI Refrigerant Circuit 60 HWE10060 GB ...
Page 69: ... 62 HWE10060 GB ...
Page 101: ... VII Control 94 HWE10060 GB ...
Page 103: ... 96 HWE10060 GB ...
Page 109: ... VIII Test Run Mode 102 HWE10060 GB ...
Page 111: ... 104 HWE10060 GB ...
Page 155: ... IX Troubleshooting 148 HWE10060 GB ...
Page 156: ... 149 HWE10060 GB X Attachments 1 R407C saturation temperature table 151 ...
Page 157: ... 150 HWE10060 GB ...
Page 159: ... X Attachments 152 HWE10060 GB ...

