3-20
4. Selecting the Finishing
Chapt
e
r 3
M
a
king
Copi
es
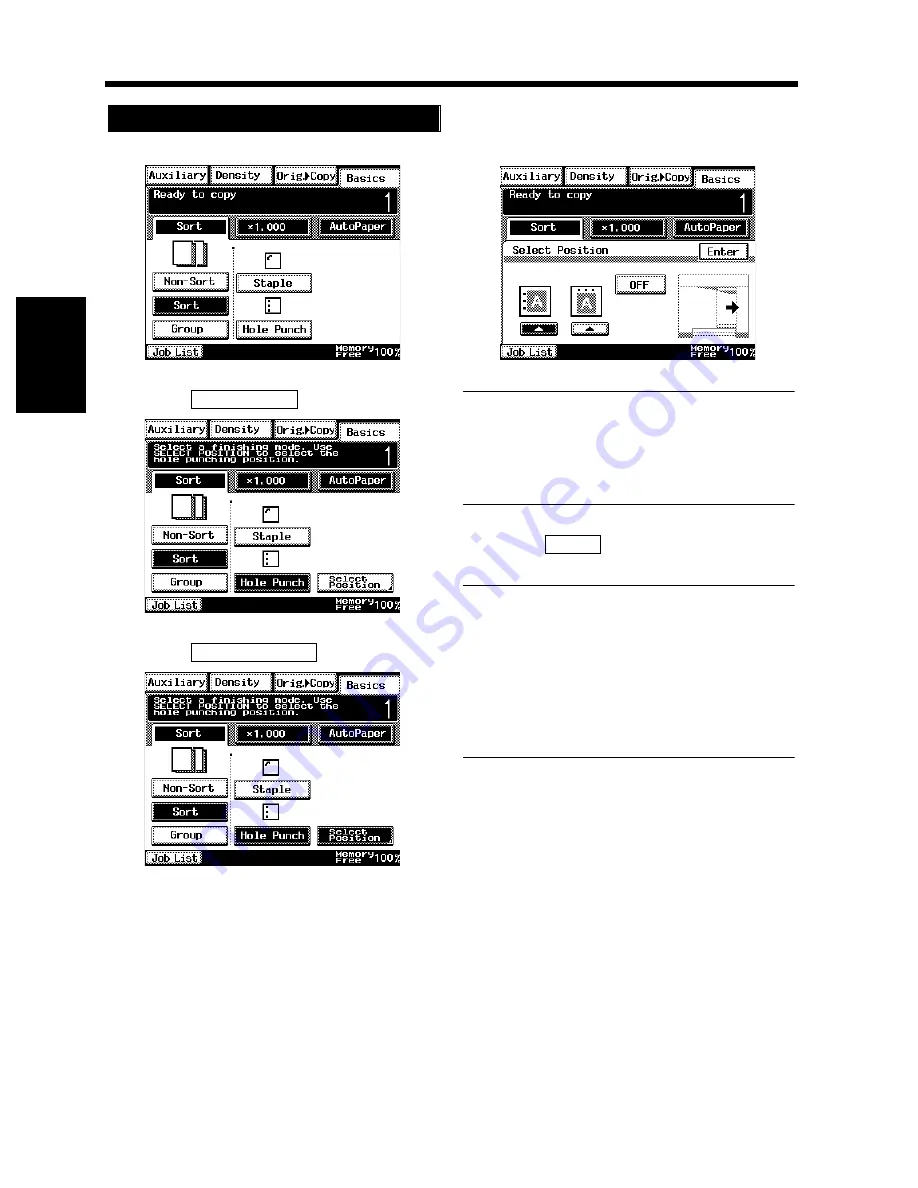
Touch the desired finishing function key.
Touch
.
Touch
.
Touch the desired hole-punching position.
Useful Tip
If you do not select a hole-punching position,
the copier automatically sets the Hole-Punch
position according to the original feeding
direction.
Touch
.
NOTES
• Good copy paper sizes for Hole Punch are
11”
×
17”L and LetterC.
• Hole Punch is not possible in the Interrupt
mode.
• When making copies in the Hole Punch Mode,
note the correct direction of the originals.
☞
p. 3-21
Hole Punch
1
1170P026EB
2
Hole Punch
1170P028EB
3
Select Position
1170P029EB
4
1170P030EB
5
Enter
Summary of Contents for DL260
Page 9: ...v Contents...
Page 13: ......
Page 14: ...1 1 Chapter 1 Safety Notes Chapter 1 Safety Notes...
Page 18: ...2 1 Chapter 2 Getting to Know Your Copier Chapter 2 Getting to Know Your Copier...
Page 46: ...3 1 Chapter 3 Making Copies Chapter 3 Making Copies...
Page 60: ...3 15 3 Selecting the Zoom Chapter 3 Making Copies...
Page 88: ...3 43 7 Auxiliary Functions Chapter 3 Making Copies...
Page 101: ...3 56 9 Selecting Job List Chapter 3 Making Copies...
Page 102: ...4 1 Chapter 4 Using the Utility Mode Chapter 4 Using the Utility Mode...
Page 129: ...4 28 6 Settings in Admin Management Chapter 4 Using the Utility Mode...
Page 130: ...5 1 Chapter 5 When a Message Appears Chapter 5 When a Message Appears...
Page 160: ...6 1 Chapter 6 Troubleshooting Troubleshooting Chapter 6...
Page 164: ...7 1 Chapter 7 Miscellaneous Chapter 7 Miscellaneous...
Page 179: ......


