


-28-
GENERAL INFORMATION
- 28 -
and/or the inner race will damage them.
b. Always make sure the press arm
(Figure
44)
aligns with the center of the shaft. If the
arm is not centered, it may damage the
bearing and/or shaft.
c. The moment the shaft is free of the bearing.
It drops to the floor. Secure or hold the
shaft to prevent it from falling.
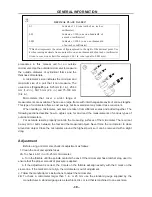
Installation
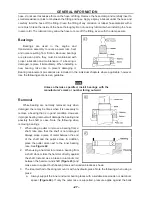
1. When installing a bearing in a housing, apply
pressure to the outer bearing race
(Figure 45).
When installing a bearing on a shaft, apply
pressure to the inner bearing race
(Figure 46).
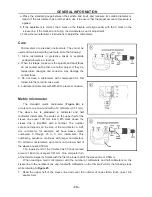
2. When installing a bearing as described in Step 1,
some type of driver is required. Never strike the
bearing directly with a hammer or it will damage
the bearing. When installing a bearing, use a
piece of pipe or a driver with a diameter that
matches the bearing inner race.
Figure 47
Shows
the correct way to use a driver and hammer to
install a bearing.
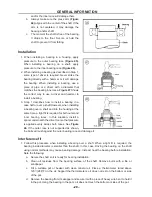
3. Step 1 describes how to install a bearing in a
case half or over a shaft However, when installing
a bearing over a shaft and into the housing at the
same time, a tight fit is required for both outer and
inner bearing races. In this situation, install a
spacer underneath the driver tool so that pressure
is applied evenly across both races. See
Figure
48.
If the outer race is not supported as shown,
the balls will push against the outer bearing race and damage it
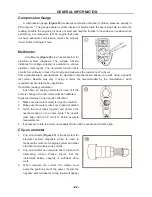
Interference fit
1. Follow this procedure when installing a bearing over a shaft. When a tight fit is
required, the
bearing inside diameter is smaller than the shaft. In this case. Driving the bearing on the shaft
using normal methods may cause bearing damage. Instead, heat the bearing before installation.
Note the following:
a. Secure the shaft so it is ready for bearing installation.
b. Clean all residues from the bearing surface of the shaft. Remove burrs with a file or
sandpaper.
c. Fill a suitable pot or beaker with clean mineral oil. Place a thermometer rated above
120
℃
(248°F) in the oil. Support the thermometer so it does not rest on the bottom or side
of the pot.
d. Remove the bearing from its wrapper and secure it with a piece of heavy wire bent to hold it
in the pot. Hang the bearing in the pot so it does not touch the bottom or sides of the pot.
Summary of Contents for HS200UTV
Page 3: ......
Page 15: ......
Page 94: ... 79 SPECIFICATIONS 79 HYDROGRAPHIC CHART Hydrographic chart Pressure ...
Page 95: ... 80 SPECIFICATIONS 80 LUBRICATION OIL WAY LUBRICATION OIL WAY Pressure splashing oil ...
Page 248: ... 233 CHASSIS 233 Fuel tank cap Remove the fuel tank cap by turning it counterclockwise ...
Page 263: ... 248 ...
Page 304: ... 289 ...
Page 305: ... 290 ...
Page 306: ... 291 ...
Page 307: ... 292 ...
Page 308: ... 293 ...
Page 309: ... 294 ...
Page 310: ... 295 ...
Page 311: ... 296 ...


