-279-
ENGINE MANAGEMENT SYSTEM
- 279 -
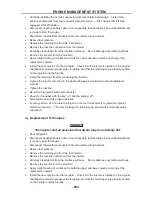
After making sure that engine is cold, relieve fuel pressure as follows.
Place vehicle gear in ‘Neutral’.
Disconnect fuel module electrical coupler from vehicle harness.
Start engine and run till it stops due to lack of fuel. Repeat ignition key ON and OFF for 2 ~ 3
times of about 3 seconds each time to relieve fuel pressure in lines. Fuel Connections are
now safe for servicing.
Upon the completion of servicing, Connect Fuel Module Connector to Vehicle Harness.
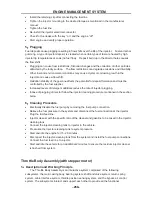
7. Fuel Leakage Check Procedure:
After performing any service on fuel system, check to make sure that there are no fuel leakages
as below.
Fill about 3 ~ 5 liters of fuel in tank.
Turn Ignition key to ON position for 3 seconds (to operate fuel pump) and then turn to OFF
position. Repeat this for 3 ~ 4 times to apply fuel pressure in fuel lines.
In this state, check to see that there are no fuel leakage from any part of fuel system (Fuel
Tank, Hoses, Hose Joints, etc)
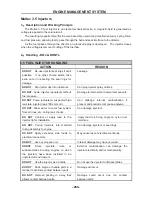
8. Handling – DOs and DONTs:
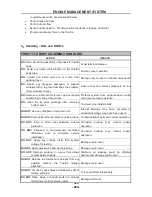
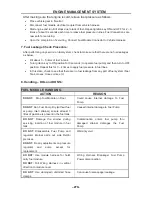
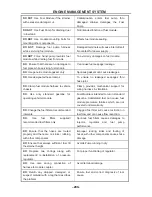
FUEL MODULE HANDLING
ACTION REASON
DO NOT:
Drop Fuel Module on Floor
Could cause internal damage to Fuel
Pump.
DO NOT
:
Run Fuel Pump Dry (without fuel
at pump inlet/ strainer) ensure atleast 3
litres of gasoline is present in the fuel tank
Caused internal damage to Fuel Pump
DO NOT
:
Damage the strainer during
servicing, insertion of fuel module in fuel
tank
Contamination enters fuel pump thru
damaged strainer damages the Fuel
Pump
DO NOT
:
Disassemble Fuel Pump and
regulator internal parts out side Delphi
premises.
DO NOT:
Do any adjustments on pressure
regulator and pump except for
replacement.
Warranty void.
DO NOT
:
Use module harness for hold/
carry fuel module.
DO NOT:
Pull Wiring Harness in vertical
direction to module cover
Wiring Harness Breakage/ Fuel Pump
Power disconnection
DO NOT
:
Use damaged/ distorted hose
clamps.
Can cause fuel seepage/ leakage.
Summary of Contents for HS200UTV
Page 3: ......
Page 15: ......
Page 94: ... 79 SPECIFICATIONS 79 HYDROGRAPHIC CHART Hydrographic chart Pressure ...
Page 95: ... 80 SPECIFICATIONS 80 LUBRICATION OIL WAY LUBRICATION OIL WAY Pressure splashing oil ...
Page 248: ... 233 CHASSIS 233 Fuel tank cap Remove the fuel tank cap by turning it counterclockwise ...
Page 263: ... 248 ...
Page 304: ... 289 ...
Page 305: ... 290 ...
Page 306: ... 291 ...
Page 307: ... 292 ...
Page 308: ... 293 ...
Page 309: ... 294 ...
Page 310: ... 295 ...
Page 311: ... 296 ...

