Replacing Consumable Products
319
9
9
9
9
9
9
9
9
9
9
9
9
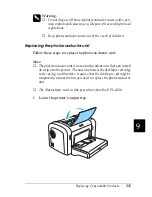
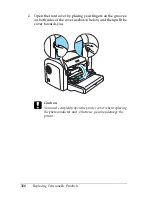
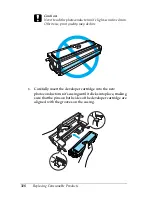
7. Hold the photoconductor unit’s casing by its handle and
insert it into the printer. Slide it gently into the opening until
it locks into place.
8. Close the front cover until it clicks shut.
You should reset the counter after replacing the photoconductor
unit. The photoconductor counter for the EPL-6200 can be reset
by using the buttons on the control panel or the printer driver,
while that for the EPL-6200L can be reset only through the printer
driver.
Summary of Contents for 6200L - EPL B/W Laser Printer
Page 29: ...12 Product Information ...
Page 39: ...22 Paper Handling 1 Pull the paper tray out from the cassette unit ...
Page 49: ...32 Paper Handling ...
Page 133: ...116 Using the Printer Driver For Windows ...
Page 207: ...190 Using the Printer Driver For Macintosh ...
Page 259: ...242 Setting Up Your Printer on a Network EPL 6200L ...
Page 321: ...304 Installing and Removing Options EPL 6200 only ...
Page 349: ...332 Cleaning and Transporting the Printer ...
Page 397: ...380 Troubleshooting 1 Remove the MP tray cover 2 Remove paper stacked in the tray ...
Page 457: ...440 Symbol Sets EPL 6200 only ...
Page 489: ...472 Working with Fonts ...
Page 500: ...Samples 483 E E E E E E E E E E E E Appendix E Samples Postscript Font Samples 484 ...
Page 501: ...484 Samples Postscript Font Samples ...
Page 502: ...Samples 485 E E E E E E E E E E E E ...
Page 503: ...486 Samples ...


