background image

7 - 5 4

Modulon DPH Series

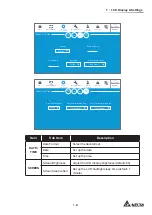
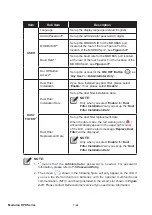
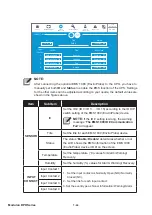
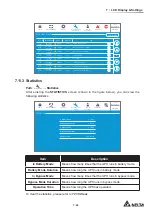
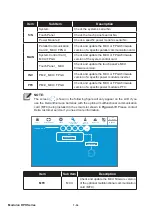
Item

Sub Item

Description

S/N

System

Check the system’s serial No. 

Touch Panel 

Check the touch panel’s serial No.

Power Module #

&KHFNDVSHFL¿FSRZHUPRGXOH¶VVHULDO1R

MAIN

Parallel Communication 
Card #_ MCU/ FPGA

&KHFNDQGXSGDWHWKH0&8RU)3*$¿UPZDUH
YHUVLRQRIDVSHFL¿FSDUDOOHOFRPPXQLFDWLRQFDUG

System Control Card_ 
MCU/ FPGA

&KHFNDQGXSGDWHWKH0&8RU)3*$¿UPZDUH

version of the system control card.

Touch Panel _ MCU

Check and update the touch panel’s MCU 

¿UPZDUHYHUVLRQ

INV

PM #_ MCU/ FPGA

&KHFNDQGXSGDWHWKH0&8RU)3*$¿UPZDUH
YHUVLRQRIDVSHFL¿FSRZHUPRGXOH¶VLQYHUWHU

PFC

PM #_ MCU/ FPGA

&KHFNDQGXSGDWHWKH0&8RU)3*$¿UPZDUH
YHUVLRQRIDVSHFL¿FSRZHUPRGXOH¶V3)&

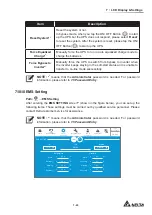
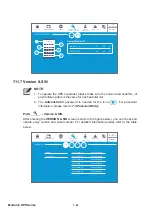
NOTE:

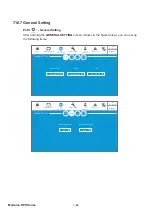
The screen ( 

MFC

VKRZQLQWKHIROORZLQJ¿JXUHZLOORQO\DSSHDURQWKH/&'LI\RX

use the Delta lithium-ion batteries with the optional multifunctional communication 
card (MFC) being installed in the smart slot shown in 

)LJXUH

. Please contact 

Delta customer service if you need more information.

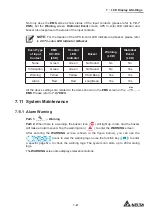
Bypass

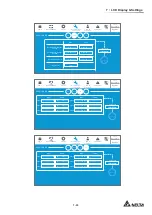
10:15

May 25,2018

0H0026ANFP.13.21

MCU

INV

PFC

VERSION & S/N

MAIN

S/N

UPS-1.1

SETUP

MAINTENANCE

LOG IN

Administrator

MEASUREMENT

EVENT LOG

Version & S/N

UPGRADE

Choose File

MFC

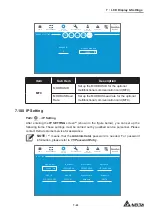
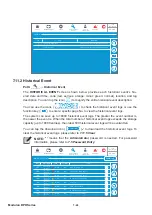
Item

Sub Item

Description

MFC

MCU

&KHFNDQGXSGDWHWKH0&8¿UPZDUHYHUVLRQ

of the optional multifunctional communication 
card (MFC).

Summary of Contents for DPH-300K

Page 1: ...Delta UPS Modulon Family The power behind competitiveness www deltapowersolutions com DPH Series Three Phase 100 300 kVA User Manual ...

Page 2: ...f this product Any disposition duplication dissemination reproduction modification translation extraction or usage of this Manual in whole or in part is prohibited without the prior written permission of Delta Given that Delta will continuously improve and develop the product changes may be made to the information in this Manual at any time without obligation to notify DQ SHUVRQ RI VXFK UHYLVLRQ R...

Page 3: ...zer 2 13 3 Operation Modes 3 1 3 1 Single Input 3 2 3 1 1 On Line Mode_ Single Input_ Single Unit 3 2 3 1 2 Battery Mode_ Single Input_ Single Unit 3 3 3 1 3 Bypass Mode_ Single Input_ Single Unit 3 3 3 1 4 Manual Bypass Mode_ Single Input_ Single Unit 3 4 3 1 5 ECO Mode_ Single Input_ Single Unit 3 5 3 1 6 Frequency Conversion Mode_ Single Input_ Single Unit 3 6 3 1 7 Green Mode_ Single Input_ Si...

Page 4: ...2 9 Battery Mode_ Dual Input_ Parallel Units 3 23 3 2 10 Bypass Mode_ Dual Input_ Parallel Units 3 24 3 2 11 Manual Bypass Mode_ Dual Input_ Parallel Units 3 25 3 2 12 ECO Mode_ Dual Input_ Parallel Units 3 27 3 2 13 Green Mode_ Dual Input_ Parallel Units 3 28 3 3 Hot Standby Redundancy Only For Dual Input At Least Two UPSs 3 29 3 4 Common Battery Only for Parallel UPSs connecting to the Same Exte...

Page 5: ...QSXW WR XDO QSXW 0RGL FDWLRQ 5 10 5 5 3 Single Unit Wiring 5 13 5 5 4 Parallel Unit Wiring 5 24 5 6 External Battery Cabinet Connection Warnings 5 29 5 7 STS Module 5 36 5 7 1 STS Module Installation 5 37 5 7 2 STS Module Removal 5 39 5 7 3 STS Module s LED Indicator 5 41 5 8 Power Module Optional 5 42 5 8 1 Power Module Installation 5 43 5 8 2 Power Module Removal 5 45 5 8 3 Power Module s LED In...

Page 6: ...0RGH 7XUQ Rႇ 3URFHGXUHV 6 37 2 0RGH 7XUQ Rႇ 3URFHGXUHV 6 37 UHTXHQF RQYHUVLRQ 0RGH 7XUQ Rႇ 3URFHGXUHV 6 40 UHHQ 0RGH 7XUQ Rႇ 3URFHGXUHV 6 43 QHUJ 5HF FOH 0RGH 7XUQ Rႇ 3URFHGXUHV 6 46 7 LCD Display Settings 7 1 7 1 LCD Display Hierarchy 7 2 7 2 How to Turn on the LCD 7 3 7 3 ON OFF Button 7 5 7 4 Introduction of Touch Panel and Function Keys 7 7 7 5 Password Entry 7 13 7 6 Main Screen 7 13 7 7 Main...

Page 7: ... 7 10 5 Parallel Setting 7 37 7 10 6 Dry Contact Setting 7 38 7 10 7 General Setting 7 40 7 10 8 IP Setting 7 43 7 10 9 Control 7 44 7 10 10 EMS Setting 7 45 7 11 System Maintenance 7 47 7 11 1 Alarm Warning 7 47 7 11 2 Historical Event 7 48 7 11 3 Statistics 7 49 7 11 4 Test 7 50 7 11 5 Clear 7 50 7 11 6 Advanced Diagnosis 7 51 7 11 7 Version S N 7 52 8 Optional Accessories 8 1 9 Maintenance 9 1 ...

Page 8: ......

Page 9: ...1 1 1 Important Safety Instructions 1 Important Safety Instructions 1 1 Installation Warnings 1 2 Connection Warnings 1 3 Usage Warnings 1 4 Storage Warnings 1 5 Standard Compliance ...

Page 10: ...he UPS 1 2 Connection Warnings y Before applying electrical power to the UPS make sure the UPS is grounded to avoid a possible risk of current leakage y You can parallel a maximum of eight UPS units y The UPS must be connected with an external battery cabinet user supplied handled DQG FRQ JXUHG E HOWD VHUYLFH SHUVRQQHO 3OHDVH UHIHU WR WHUQDO DWWHU DEL QHW RQQHFWLRQ DUQLQJV for relevant information...

Page 11: ...fault current may reach 20kA At the time the UPS s internal semi conductor fuses will take 8 10 ms to open Thus the reaction time of the upstream 1 protective devices must be more than 10 ms so that the fuses ZRXOG KDYH VXႈFLHQW WLPH WR LQWHUUXSW WKH IDXOW FXUUHQW DQG WKH 836 V E SDVV ZLOO EH able to keep supplying power to the loads NOTE 1 For dual input application this refers to the bypass upst...

Page 12: ...rized Delta engineers or service personnel can do so for installation or maintenance If you want to open or remove the covers or panels do it only under the supervision of authorized Delta engineers or service personnel y It is not recommended to connect the UPS to any regenerative loads For the load suit ability please contact Delta customer service before purchasing y The risk of dangerous high ...

Page 13: ...mer service if any of the following events occurs 1 Any liquid is poured or splashed on the UPS 2 The UPS is deformed 3 Any conductive powders or metals enter into the UPS 4 The UPS does not run normally after carefully following the instructions in this 8VHU 0DQXDO 1 4 Storage Warnings y Use the original packing material to pack the UPS to prevent any possible damage from rodents y If the UPS nee...

Page 14: ......

Page 15: ...2 Introduction 2 Introduction 2 1 General Overview 2 2 Package Inspection 2 3 Functions Features 2 4 Exterior and Dimensions 2 5 Front View 2 6 Internal View 2 7 Rear View 2 8 Tri color LED Indicator Buzzer ...

Page 16: ... DSP digital control technology and highest quality components 2 2 Package Inspection y External During UPS transportation some unpredictable situations might occur It is recom mended that you inspect the UPS exterior packaging If you notice any damage please immediately contact the dealer from whom you purchased the unit y Internal 1 Check the rating label attached to the UPS and make sure the de...

Page 17: ... 4 Pin Dry Contact Terminal Block used for REPO dry contacts please refer to LJXUH 1 PC 13 6 Pin Dry Contact Terminal Block used for MODBUS and BMS ports located at the rear of the touch panel please refer to LJXUH 1 PC 14 8 Pin Dry Contact Terminal Block used for 1 external battery temperature detection and 2 external switch breaker status dry contacts please refer to LJXUH 2 PCS 15 10 Pin Dry Co...

Page 18: ...n normal mode automatically right after the AC line resumes following a low battery shutdown 2 The UPS returns automatically to normal mode from bypass mode after an overload condition is cleared y Automatically detects whether bypass voltage is out of rating voltage default voltage 15 frequency 3Hz If yes the UPS will stop supplying power to the critical loads to protect your electronic equipment...

Page 19: ...g options such as battery test schedulable and battery replacement alarm y Battery temperature monitoring and compensation y Optional battery management system BMS allows measurement of every battery s voltage y Smart battery charger design allows auto charging or manual charging to shorten charging time y Provides communication interfaces and a smart slot Please refer to RPPXQLFDWLRQ QWHUIDFHV y ...

Page 20: ...2 6 Modulon DPH Series 2 4 Exterior and Dimensions 2000 mm 78 74 1100 mm 43 31 600 mm 23 62 LJXUH WHULRU LPHQVLRQV ...

Page 21: ... Feet LJXUH 836 URQW 9LHZ 1 For information about the 10 color touch panel please refer to LVSOD 6HWWLQJV 2 For information about the tri color LED indicator please refer to 7UL FRORU QGLFDWRU X HU 3 The casters at the bottom of the UPS can be used to move over short distances and the leveling feet fix and stabilize the UPS on the ground Please refer to 836 7UDQVSRUWDWLRQ for relevant information ...

Page 22: ...on If you want to execute any action mentioned above by yourself the action must be under the supervision of authorized Delta engineers or service personnel After you open the UPS s front door you will see the internal mechanisms including communication interfaces six power module slots among which only the bottom three slots have covers an STS module and four breakers Input Bypass Manual Bypass O...

Page 23: ...Q1 Bypass Breaker Q2 Manual Bypass Breaker Q3 Output Breaker Q4 Communication Interfaces 1 2 3 4 LJXUH 836 QWHUQDO 9LHZ URQW 9LHZ ZLWK RRU 2SHQ No Description 1 The communication interfaces are located at two areas 1 on the front of the UPS with front door open and 2 at the rear of the touch panel For relevant information please refer to RPPXQLFDWLRQ QWHUIDFHV 2 There are six power module slots On...

Page 24: ... MODBUS BMS INPUT BREAKER OUTPUT BREAKER BYPASS BREAKER MANUAL BYPASS BREAKER ON OFF ON OFF ON OFF ON OFF INPUT BREAKER OUTPUT BREAKER BYPASS BREAKER MANUAL BYPASS BREAKER ON OFF ON OFF ON OFF ON OFF Internal View Front View with Door Open Bypass Breaker Q2 Input Breaker Q1 Manual Bypass Breaker Q3 Output Breaker Q4 LJXUH RFDWLRQ RI WKH RXU UHDNHUV 2 7 Rear View WARNING Only authorized Delta engin...

Page 25: ... shown in LJXUH Rear Rear Rear Panel M5 Screw 8 LJXUH 836 5HDU 9LHZ LJXUH RFDWLRQ RI WKH 5HDU 3DQHO 6FUHZV L1 AC INPUT BYPASS INPUT L1 AC INPUT BYPASS INPUT BATTERY INPUT L1 AC INPUT BYPASS INPUT L1 L2 L3 N L1 L2 L3 N Rear View after Rear Panel Removal AC Input or Bypass Input AC Input AC Input or Bypass Input LJXUH LULQJ 7HUPLQDOVB QSXW SDVV QSXW ...

Page 26: ...ear Panel Removal UPS Output Battery Input BATTERY INPUT UPS OUTPUT N L1 L2 L3 N LJXUH LULQJ 7HUPLQDOVB DWWHU QSXW 836 2XWSXW L1 AC INPUT BYPASS INPUT Rear View after Rear Panel Removal PE GND Terminals for Top Wiring PE GND Terminals for Bottom Wiring LJXUH LULQJ 7HUPLQDOVB URXQGLQJ ...

Page 27: ...EMS System Status 10 15 May 25 2018 Tri color LED Indicator LJXUH 7UL FRORU QGLFDWRU RFDWLRQ 2SHQ WKH 836 V IURQW GRRU DQG QG WKH EX HU DW WKH UHDU RI WKH WRXFK SDQHO 3OHDVH VHH LJXUH DISPLAY CONSOLE EMS RESET INPUT BREAKER ON OFF ON OFF ON OFF ON OFF OUTPU T BREAKER BYPASS BREAKER MANUA L BYPASS BREAKER GND B A GND B A MODBUS BMS Front View with Door Open DISPLAY REPO NC NO EXT BATT TEMP BT1 BT2 ...

Page 28: ... Conversion Mode Frequency Conversion Green Mode Green Yellow ON y Indicates the UPS s current operation mode for its corresponding text shown in the upper right corner of the LCD screen please refer to the following table UPS Operation Mode Text on the LCD Screen upper right corner Bypass Mode Bypass Battery Mode Battery Standby Mode Standby Softstart Mode Softstart Energy Recycle Mode Energy Rec...

Page 29: ...ion Modes Operation Modes 3 1 Single Input 3 2 Dual Input 3 3 Hot Standby Redundancy Only For Dual Input At Least Two UPSs 3 4 Common Battery Only for Parallel UPSs connecting to the Same External Battery Cabinet s ...

Page 30: ...ternal Battery Cabinet s Breaker 3 1 Single Input 3 1 1 On Line Mode_ Single Input_ Single Unit In On Line mode the main AC source supplies AC power via the Input Breaker Q1 to the UHFWL HU DQG WKH UHFWL HU FRQYHUWV WKH SRZHU WR SRZHU DQG VXSSOLHV WKH SRZHU to the inverter In the meantime the rectifier provides charging power to the batteries After receiving the DC power the inverter converts it i...

Page 31: ...ectifier Inverter Static Switch Q5 LJXUH DWWHU 0RGH LDJUDPB 6LQJOH QSXW 6LQJOH 8QLW 3 1 3 Bypass Mode_ Single Input_ Single Unit When the inverter encounters abnormal situations such as over temperature overload short circuit abnormal output voltage or low battery it will automatically shut itself down If the UPS detects the bypass AC source is normal it will automatically switch to Bypass mode to...

Page 32: ...s Breaker Q3 as they may carry high voltage XULQJ 0DQXDO SDVV PRGH WKH 836 V LQSXW SRZHU LV FRPSOHWHO FXW Rႇ DQG the connected critical loads are not protected When the UPS needs maintenance you can manually switch the UPS to Manual Bypass mode To let the UPS run in Manual Bypass mode please follow the procedures below 1 RQ UP WKDW WKH E SDVV VRXUFH DQG WKH 676 PRGXOH DUH QRUPDO 2 Tap the LCD s ON...

Page 33: ...WLQJ In ECO mode when bypass AC source s input voltage and frequency are within the range of rating voltage 10 and rating frequency 3Hz the UPS works in Bypass mode otherwise the UPS runs in On Line mode For ECO mode diagram please see LJXUH During ECO mode the UPS s tri color LED illuminates green and the text ECO appears in the upper right corner of the screen MAIN LOAD Q1 Q2 Q4 Q3 Batteries Rec...

Page 34: ...e UPS is manually set in Frequency Conversion mode the inverter will automatically VHOHFW RU DV WKH HG RXWSXW IUHTXHQF IWHU WKH RXWSXW IUHTXHQF LV GHWHUPLQHG the system will automatically disable the bypass function Please note that once the inverter shuts down there is no bypass output For the diagram of Frequency Conversion mode please see LJXUH During Frequency Conversion mode the UPS s tri col...

Page 35: ...DOO GHWHFW WKH RXWSXW VWDWXV L H WRWDO ORDG FDSDFLW WR GHFLGH ZKLFK VSHFL F SRZHU PRGXOHV VKRXOG EH IXOO SRZHUHG RQ RU LGOH LQ RUGHU WR DFKLHYH KLJKHU HႈFLHQF RI the UPS For the Green mode diagram please see LJXUH During Green mode the UPS s tri color LED illuminates green and the text Green appears in the upper right corner of the screen MAIN LOAD Q1 Q2 Q4 Q3 Batteries Rectifier Inverter Static S...

Page 36: ...st under full load condition Before you activate Energy Recycle mode please make sure that the Manual Bypass Breaker Q3 Output Breaker Q4 and each external battery cabinet s battery breaker Q5 are in the OFF status To activate Energy Recycle mode please refer to QHUJ 5HF FOH 0RGH 6WDUW XS 3URFHGXUHV 0DLQ 6FUHHQ and 0RGH 6HWWLQJ For the diagram of Energy Recycle mode please see LJXUH During Energy ...

Page 37: ...ing UPS s load is larger than the total capacity of the UHPDLQLQJ SDUDOOHO XQLWV DOO 836V LQYHUWHUV ZLOO WXUQ Rႇ DQG WKH WRWDO ORDGV ZLOO EH VXSSOLHG by bypass power During On Line mode parallel each UPS s tri color LED illuminates green and each UPS s LCD shows the text On Line in the upper right corner Please refer to LJXUH for the path of electrical power through the parallel UPSs in On Line mo...

Page 38: ... process output voltage remains the same and during Battery mode parallel each UPS s tri color LED illuminates yellow and each UPS s LCD shows the text Battery in the upper right corner Please refer to LJXUH for the path of electrical power through the parallel UPSs in Battery mode MAIN LOAD MAIN 1 2 Q1 Q2 Q4 Q3 Batteries Rectifier Inverter Static Switch Q1 Q2 Q4 Q3 Batteries Rectifier Inverter St...

Page 39: ...wer interruption The critical loads will be equally shared by all parallel units After the abnormalities mentioned above are eliminated the parallel UPSs will switch back to On Line mode from Bypass mode During Bypass mode parallel each UPS s tri color LED illuminates yellow and each UPS s LCD shows the text Bypass in the upper right corner Please refer to LJXUH for the path of electrical power th...

Page 40: ... UPSs if you want to turn off one of the parallel UPSs for maintenance please make sure the total connected critical loads will not exceed the remaining parallel units total capacity In Manual Bypass mode parallel if one of the parallel UPSs needs maintenance please UVW FRQ UP WKDW WKH E SDVV VRXUFH DQG HDFK SDUDOOHO 836 V 676 PRGXOH DUH QRUPDO After confirmation please follow the procedures below...

Page 41: ...Operation Modes MAIN LOAD MAIN 1 2 Q1 Q2 Q4 Q3 Batteries Rectifier Inverter Static Switch Q1 Q2 Q4 Q3 Batteries Rectifier Inverter Static Switch Q5 Q5 LJXUH 0DQXDO SDVV 0RGH LDJUDPB 6LQJOH QSXW 3DUDOOHO 8QLWV ...

Page 42: ...quency 3Hz each parallel UPS works in Bypass mode otherwise each parallel UPS runs in On Line mode During ECO mode parallel each UPS s tri color LED illuminates green and each UPS s LCD shows the text ECO in the upper right corner Please see LJXUH for the path of electrical power through the parallel UPSs in ECO mode MAIN LOAD MAIN 1 2 Q1 Q2 Q4 Q3 Q5 Batteries Rectifier Inverter Static Switch Q1 Q...

Page 43: ... load FDSDFLW WR GHFLGH ZKLFK VSHFL F SRZHU PRGXOHV VKRXOG EH IXOO SRZHUHG RQ RU LGOH LQ RUGHU WR DFKLHYH KLJKHU HႈFLHQF RI WKH 836 XULQJ UHHQ PRGH SDUDOOHO HDFK 836 V WUL color LED illuminates green and each UPS s LCD shows the text Green in the upper right corner Please see LJXUH for the path of electrical power through the parallel UPSs in Green mode MAIN LOAD MAIN 1 2 Q1 Q2 Q4 Q3 Batteries Rec...

Page 44: ...ifier provides charging power to the batteries After receiving the DC power the inverter converts it into clean and stable AC power to the connected critical loads via the Output Breaker Q4 Please see LJXUH for the On Line mode diagram During On Line mode the UPS s tri color LED illuminates green and the text On Line appears in the upper right corner of the screen MAIN LOAD BYPA Q1 Q2 Q4 Q3 Batter...

Page 45: ...es Rectifier Inverter Static Switch Q5 LJXUH DWWHU 0RGH LDJUDPB XDO QSXW 6LQJOH 8QLW 3 2 3 Bypass Mode_ Dual Input_ Single Unit When the inverter encounters abnormal situations such as over temperature overload short circuit abnormal output voltage or low battery it will automatically shut itself down If the UPS detects the bypass AC source is normal it will automatically switch to Bypass mode to ...

Page 46: ... Breaker Q3 as they may carry high voltage XULQJ 0DQXDO SDVV PRGH WKH 836 V LQSXW SRZHU LV FRPSOHWHO FXW Rႇ DQG the connected critical loads are not protected When the UPS needs maintenance you can manually switch the UPS to Manual Bypass mode To let the UPS run in Manual Bypass mode please follow the procedures below 1 RQ UP WKDW WKH E SDVV VRXUFH DQG WKH 676 PRGXOH DUH QRUPDO 2 Tap the LCD s ON ...

Page 47: ...J In ECO mode when the bypass AC source s input voltage and frequency are within the range of rating voltage 10 and rating frequency 3Hz the UPS works in Bypass mode otherwise the UPS runs in On Line mode For ECO mode diagram please see LJXUH During ECO mode the UPS s tri color LED illuminates green and the text ECO appears in the upper right corner of the screen MAIN LOAD BYPA Q1 Q2 Q4 Q3 Batteri...

Page 48: ...UPS is manually set in Frequency Conversion mode the inverter will automatically VHOHFW RU DV WKH HG RXWSXW IUHTXHQF IWHU WKH RXWSXW IUHTXHQF LV GHWHUPLQHG the system will automatically disable the bypass function Please note that once the inverter shuts down there is no bypass output For the diagram of Frequency Conversion mode please see LJXUH During Frequency Conversion mode the UPS s tri color...

Page 49: ...OO GHWHFW WKH RXWSXW VWDWXV L H WRWDO ORDG FDSDFLW WR GHFLGH ZKLFK VSHFL F SRZHU PRGXOHV VKRXOG EH IXOO SRZHUHG RQ RU LGOH LQ RUGHU WR DFKLHYH KLJKHU HႈFLHQF RI the UPS For the Green mode diagram please see LJXUH During Green mode the UPS s tri color LED illuminates green and the text Green appears in the upper right corner of the screen MAIN LOAD BYPA Q1 Q2 Q4 Q3 Batteries Rectifier Inverter Stat...

Page 50: ...ng UPS s load is larger than the total capacity of the UHPDLQLQJ SDUDOOHO XQLWV DOO 836V LQYHUWHUV ZLOO WXUQ Rႇ DQG WKH WRWDO ORDGV ZLOO EH VXSSOLHG by bypass power During On Line mode parallel each UPS s tri color LED illuminates green and each UPS s LCD shows the text On Line in the upper right corner Please refer to LJXUH for the path of electrical power through the parallel UPSs in On Line mod...

Page 51: ...ocess output voltage remains the same During Battery mode parallel each UPS s tri color LED illuminates yellow and each UPS s LCD shows the text Battery in the upper right corner Please refer to LJXUH for the path of electrical power through the parallel UPSs in Battery mode MAIN LOAD MAIN 1 2 BYPA BYPA Q1 Q2 Q4 Q3 Batteries Rectifier Inverter Static Switch Q1 Q2 Q4 Q3 Batteries Rectifier Inverter...

Page 52: ...r interruption The critical loads will be equally shared by all parallel units After the abnormalities mentioned above are eliminated the parallel UPSs will switch back to On Line mode from Bypass mode During Bypass mode parallel each UPS s tri color LED illuminates yellow and each UPS s LCD shows the text Bypass in the upper right corner Please see LJXUH for the path of electrical power through t...

Page 53: ... 836V LI RX ZDQW WR WXUQ Rႇ RQH RI WKH SDUDOOHO 836V IRU PDLQWHQ ance please make sure the total connected critical loads will not exceed the remaining parallel units total capacity In Manual Bypass mode parallel if one of the parallel UPSs needs maintenance please UVW FRQ UP WKDW WKH E SDVV VRXUFH DQG HDFK SDUDOOHO 836 V 676 PRGXOH DUH QRUPDO After confirmation please follow the procedures below ...

Page 54: ...n DPH Series MAIN LOAD MAIN 1 2 BYPA BYPA Q1 Q2 Q4 Q3 Batteries Rectifier Inverter Static Switch Q1 Q2 Q4 Q3 Batteries Rectifier Inverter Static Switch Q5 Q5 LJXUH 0DQXDO SDVV 0RGH LDJUDPB XDO QSXW 3DUDOOHO 8QLWV ...

Page 55: ...y 3Hz each parallel UPS works in Bypass mode otherwise each parallel UPS runs in On Line mode During ECO mode parallel each UPS s tri color LED illuminates green and each UPS s LCD shows the text ECO in the upper right corner Please see LJXUH for the path of electrical power through the parallel UPSs in ECO mode MAIN LOAD MAIN 1 2 BYPA BYPA Q1 Q2 Q4 Q3 Q5 Batteries Rectifier Inverter Static Switch...

Page 56: ...d FDSDFLW WR GHFLGH ZKLFK VSHFL F SRZHU PRGXOHV VKRXOG EH IXOO SRZHUHG RQ RU LGOH LQ RUGHU WR DFKLHYH KLJKHU HႈFLHQF RI WKH 836 XULQJ UHHQ PRGH SDUDOOHO HDFK 836 V WUL color LED illuminates green and each UPS s LCD shows the text Green in the upper right corner Please see LJXUH for the path of electrical power through the parallel UPSs in Green mode MAIN LOAD MAIN 1 2 BYPA BYPA Q1 Q2 Q4 Q3 Batteri...

Page 57: ...ervice personnel In normal condition it is the UPS 2 inverter that supplies power to the critical loads Both UPS 1 UPS 2 tri color LEDs illuminate green When the UPS 2 inverter becomes abnormal the UPS 2 will automatically transfer to bypass mode and the UPS 1 inverter will supply power to the critical loads Under such circumstances the UPS 1 tri color LED illuminates green and the UPS 2 tri color...

Page 58: ... Voltage 1 Charge Current Max etc For more information please refer to DWWHU KDUJLQJ 6HWWLQJ NOTE 1 For common battery application please use the LCD to set each UPS s float charge voltage default 272V the same each UPS s equalized charge voltage 1 if applicable default 280V the same and each UPS s battery strings and charge current Max even For example A When 1 two UPSs are paralleled and share o...

Page 59: ...AIN LOAD MAIN 1 2 BYPA BYPA Q1 Q2 Q4 Q3 Q5 Rectifier Inverter Static Switch Q1 Q2 Q4 Q3 Q5 Batteries Rectifier Inverter Static Switch LJXUH RPPRQ DWWHU LDJUDPB RQO IRU 3DUDOOHO 836V RQQHFWLQJ WR WKH 6DPH WHUQDO DWWHU DELQHW V ...

Page 60: ......

Page 61: ...4 1 4 Communication Interfaces Communication Interfaces 4 1 Communication Interfaces I on the Front of the UPS with Front Door Open 4 2 Communication Interfaces II at the Rear of the Touch Panel ...

Page 62: ...ER BYPASS BREAKER MANUAL BYPASS BREAKER ON OFF ON OFF ON OFF ON OFF Communication Interfaces II Communication Interfaces I Internal View Front View with Door Open LJXUH RFDWLRQ RI WKH RPPXQLFDWLRQ QWHUIDFHV 4 1 Communication Interfaces I on the Front of the UPS with Front Door Open The following communication interfaces are located on the front of the UPS with front door open Please refer to LJXUH...

Page 63: ...ntact Delta customer service 4 System Control Card 1 PC Includes a USB port and an RS 232 port 5 Auxiliary Power Card 2 PCS Each card includes a LED indicator and a battery start button DISPLAY REPO NC NO EXT BATT TEMP BT1 BT2 EXT SWITCH STATUS S1 S2 S3 S4 BT3 BT4 O P DRY CONTACT USB RS 232 P1 P2 P3 P4 P5 P6 I P DRY CONTACT P1 P2 BATT START BATT START P3 P4 PARALLEL PARALLEL Display Port REPO Dry ...

Page 64: ...sed NC these two options for use REPO NC NO UPS 5V 1 2 3 4 Buffer Buffer NO NC 5V LJXUH 5 32 U RQWDFWV 6FKHPDWLF NOTE If you want to enable the normally closed NC function please take out the dry contact card see LJXUH and remove its Jump CNR3 see LJXUH before you turn on the UPS DISPLAY REPO NC NO EXT BATT TEMP BT1 BT2 EXT SWITCH STATUS S1 S2 S3 S4 BT3 BT4 O P DRY CONTACT USB RS 232 P1 P2 P3 P4 P...

Page 65: ...perature Detection You can use the external battery temperature detection BT1 BT2 BT3 and BT4 to detect a maximum of four external battery cabinets temperature You need to purchase the battery cabinet temperature sensor cable optional EXT BATT TEMP BT1 BT2 BT3 BT4 LJXUH WHUQDO DWWHU 7HPSHUDWXUH HWHFWLRQ 6FKHPDWLF ...

Page 66: ...ches or breakers You can only connect the dry contacts to normally open NO devices Type Connection Dry Contact_ S1 Normally closed NC device Dry Contact_ S2 Normally closed NC device Dry Contact_ S3 Normally closed NC device Dry Contact_ S4 Normally closed NO device 5V Buffer 5V Buffer 5V Buffer 5V Buffer UPS EXT SWITCH STATUS S1 S2 S3 S4 2mA Max Auxiliary Switch 2mA Max 2mA Max 2mA Max S1 S2 S3 S...

Page 67: ...reaker s status default S4 4 1 5 Output Dry Contacts There are six sets of programmable output dry contacts see LJXUH Please use the touch panel to set each dry contact as normally open NO or normally closed NC Each dry contact can be assigned with a specific event Six out of twenty one events can be assigned according to your applications For the twenty one events please refer to the table below ...

Page 68: ... DRY E_NO DRY D_NO DRY C_NO DRY B_NO DRY A_NO COMM_F COMM_E COMM_D COMM_C COMM_B COMM_A 10 112 6 8 2 4 9 11 5 7 1 3 12VS DRY 6 12VS DRY 5 12VS DRY 4 12VS DRY 3 12VS DRY 2 12VS DRY 1 P6 Max 0 5A 12V P5 Max 0 5A 12V P4 Max 0 5A 12V P3 Max 0 5A 12V P2 Max 0 5A 12V P1 Max 0 5A 12V UPS LJXUH 2XWSXW U RQWDFWV 6FKHPDWLF ...

Page 69: ... critical loads 11 EPO Activated 7KH 32 EXWWRQ LV SUHVVHG WR XUJHQWO SRZHU Rႇ WKH UPS 12 Load On Manual Bypass The Manual Bypass Breaker Q3 is turned on and the UPS transfers to manual bypass mode 13 Battery Over Temperature The external battery cabinet s temperature is too high 14 Output Voltage Abnormal The output voltage is too high or too low 15 Battery Need Replacement The battery replacement...

Page 70: ... as normally open 12 RU QRUPDOO FORVHG 1 DFK LQSXW GU FRQWDFW FDQ EH DVVLJQHG ZLWK D VSHFL F HYHQW There are six events can be assigned according to your applications For information about the six events please refer to the table below To learn how to set up please contact your local dealer and refer to U RQWDFW 6HWWLQJ I P DRY CONTACT P1 P2 P3 P4 5V Dry 4 Buffer 5V Dry 3 Buffer 5V Dry 2 Buffer 5V...

Page 71: ...allel communication card Each card has one LED indicator and two parallel ports Please see LJXUH and LJXUH for relevant location If both cards work normally the master parallel communication card s LED indicator will illuminate green and the backup parallel communication card s LED indicator will illuminate yellow If one card works normally and the other works abnormally the normal card s LED indi...

Page 72: ... USB RS 232 P1 P2 P3 P4 P5 P6 I P DRY CONTACT P1 P2 BATT START BATT START P3 P4 PARALLEL PARALLEL Parallel Ports Parallel Ports LJXUH RFDWLRQ RI WKH 3DUDOOHO 3RUWV 4 1 9 SMART Slot 1 You can install the optional Relay I O card for dry contact expansion into the SMART slot shown in LJXUH For relevant installation and application information please contact Delta customer service 2 If you use the Del...

Page 73: ... PARALLEL SMART Slot LJXUH RFDWLRQ RI WKH 60 57 6ORW 4 1 10 USB Port RS 232 Port Only service personnel can use an RS 232 cable provided or a USB cable provided to FRQQHFW D FRPSXWHU WR WKH 836 V 56 SRUW RU 86 SRUW WR XSJUDGH WKH UPZDUH RI the UPS power modules system control card parallel communication cards and optional multifunctional communication card MFC and 2 download event logs NOTE Do not...

Page 74: ...ry Power Card s LED Indicator Auxiliary Power Card Auxiliary Power Card s LED Indicator Auxiliary Power Card LJXUH RFDWLRQ RI WKH X LOLDU 3RZHU DUGV 4 1 12 Battery Start Buttons Please refer to LJXUH for the location of battery start buttons For the battery start buttons relevant operation information please refer to DWWHU 0RGH 6WDUW XS 3URFHGXUHV DISPLAY REPO NC NO EXT BATT TEMP BT1 BT2 EXT SWITC...

Page 75: ...RESET Press the RESET button once to restart the LCD 2 MODBUS RS 485 Port 1 Provides MODBUS RTU communication service 2 Connects to a user supplied monitoring system 3 BMS Connects to the Delta battery management system optional The BMS function is only applicable to lead acid batteries 4 DISPLAY Before shipment the DISPLAY port has been connected 5 EMS CONSOLE Connects to a user supplied environm...

Page 76: ......

Page 77: ... Installation and Wiring 5 1 Before Installation and Wiring 5 2 Installation Environment 5 3 UPS Transportation 5 4 UPS Installation 5 5 Wiring 5 6 External Battery Cabinet Connection Warnings 5 7 STS Module 5 8 Power Module Optional ...

Page 78: ...stallation Environment y Install the UPS indoors Do not place it outdoors y Make sure that transportation routes e g corridors door gates elevators etc and installation area can accommodate and bear the weight of the UPS external battery cabinet s and handling equipment Please refer to 7DEOH IRU ÀRRU ZHLJKW ORDGLQJ information Table 5 1 UPS Floor Weight Loading Table DPH Series UPS UPS Capacity 10...

Page 79: ...ommend the use of wiring ducts y Keep the installation area s temperature around 25 C 77 F and humidity within 95 The highest operating altitude is 1000 meters 3280 ft above sea level y For safety concerns we suggest that you 1 Equip surroundings of the installation area with CO2 RU GU SRZGHU UH H WLQJXLVKHUV QVWDOO WKH 836 LQ DQ HQYLURQPHQW ZKHUH UHSURRI PDWHULDOV DUH XVHG WR FRQVWUXFW WKH ZDOOV ...

Page 80: ...ovement of the casters to avoid accidents 2 Please refer to the 8QSDFNLQJ XLGH attached to the UPS external wooden box for the location of the balance brackets y The casters are designed to move on level ground Do not move the UPS on an uneven surface This might cause damage to the casters or tip the UPS which could damage the unit y After the UPS has been removed from the pallet to the ground we ...

Page 81: ... 836 PXVW VWDQG RQ WKH ÀRRU VWDEO DQG OHYHOO ZLWKRXW DQ WLSSLQJ 3 Use six M10 screws three for the front three for the rear 1 and six expansion screws and nuts three for the front three for the rear 2 WR WKH 836 RQ WKH JURXQG ZLWK WZR balance brackets Please refer to LJXUH LJXUH The six M10 screws and the two balance brackets are those been taken apart from the UPS earlier while moving the UPS fro...

Page 82: ...ed with the UPS 4 Follow LULQJ to perform wiring procedures 5 Follow WHUQDO DWWHU DELQHW RQQHFWLRQ DUQLQJV to connect the external battery cabinet s 6 Follow 3RZHU 0RGXOH 2SWLRQDO to install the power modules 7 After routing the cables and verifying cable connections seal or cover the gaps between the cables and the cabinet to avoid foreign materials falling into the UPS After that reinstall the r...

Page 83: ... top or at the bottom of the UPS to allow cable entry y Check that the size diameter phase polarity are correct for each cable that needs con necting to the UPS and external battery cabinet s Please refer to 7DEOH for the VSHFL FDWLRQV RI LQSXW RXWSXW EDWWHU FDEOHV DQG EUHDNHUV 7DEOH 6SHFL FDWLRQV RI QSXW 2XWSXW DWWHU DEOHV DQG UHDNHUV NOTE 1 7DEOH is based on a default input output voltage 220V b...

Page 84: ...CS 4 0 AWG 2 PCS 120 mm2 2 PCS 250 kcmil 2 PCS Maximum cable size L1 L2 L3 N 240 mm2 2 PCS 500 kcmil 2 PCS Maximum cable lug width 48 mm 1 89 Screw size Cable lug inner diameter M10 14 mm 0 55 Terminal type 1 TLAPH250 2A12 Battery Nominal discharge current condition 12V 40 PCS 220A 330A 440A 550A 660A Maximum discharge current condition 9 6V 40 PCS 275A 413A 550A 688A 825A Recommended cable size N...

Page 85: ...F are suggested 4 1 The suggested manufacturer is K S TERMINALS INC You may use equivalent terminals provided by other manufacturers y I WKHUH LV D ÀRDWLQJ YROWDJH EHWZHHQ WKH LQSXW SRZHU V QHXWUDO 1 DQG WKH 3 SURWHFWLYH earth and you require that the VNG of the UPS should be zero we suggest that you install an isolation transformer in front of the input side of the UPS and connect the isola tion ...

Page 86: ...pass Input neutral N terminal respectively For the AC Input and Bypass Input s neutral N terminals please refer to LJXUH 3 If the UPS is not grounded the power boards and components might be damaged after the UPS is powered on 6LQJOH QSXW WR XDO QSXW 0RGL FDWLRQ WARNING Only authorized Delta engineers or service personnel can modify the single input dual input setup The UPS default setting is sing...

Page 87: ... AC Input AC Input or Bypass Input LJXUH LULQJ 7HUPLQDOVB QSXW SDVV QSXW 2 Unscrew the 8 nuts and remove the four cooper bars shown in LJXUH L1 AC INPUT BYPASS INPUT L1 AC INPUT BYPASS INPUT BATTERY INPUT BYPASS INPUT AC INPUT L1 Rear View after Rear Panel Removal L1 L2 L3 N L1 L2 L3 N Different Angle Four Copper Bars Four Copper Bars Eight Nuts Eight Nuts LJXUH 5HPRYH WKH LJKW 1XWV DQG RXU RRSHU ...

Page 88: ...removed four copper bars on which the small copper bars have been mounted according to 3 in the designated areas Please secure the eight nuts tightly BYPASS INPUT AC INPUT L1 L2 L3 N L1 L2 L3 N Different Angle 4 Install the Four Copper Bars Here Secure the Eight Nuts Tightly Install the Four Copper Bars Here Secure the Eight Nuts Tightly Cooper Bar on Which the Small Copper Bar Has Been Mounted Ac...

Page 89: ...ng WARNING 1 Only authorized Delta engineers or service personnel can perform installation wiring panel cover removal maintenance and operation If you want to execute any action mentioned above by yourself the action must be under the supervision of authorized Delta engineers or service personnel 2 Before wiring please read LULQJ thoroughly and make sure relevant conditions have been met 3 Note th...

Page 90: ...PASS INPUT BATTERY INPUT L1 AC INPUT BYPASS INPUT L1 L2 L3 N L1 L2 L3 N Rear View after Rear Panel Removal AC Input or Bypass Input AC Input AC Input or Bypass Input LJXUH LULQJ 7HUPLQDOVB QSXW SDVV QSXW BATTERY INPUT UPS OUTP UT BYP INPU AC INP Rear View after Rear Panel Removal UPS Output Battery Input BATTERY INPUT UPS OUTPUT N L1 L2 L3 N LJXUH LULQJ 7HUPLQDOVB DWWHU QSXW 836 2XWSXW ...

Page 91: ...QGLQJ 2 For top wiring remove the three top covers 2 screws for each cover for bottom wiring remove the three bottom covers 2 nuts for each cover See LJXUH for the location of the top and bottom covers BATTERY INPUT UPS OUTP UT BYP INPU AC INP Rear View after Rear Panel Removal Bottom Cover 3 Each with Two Nuts Top Cover 3 Each with Two Screws LJXUH RFDWLRQ RI WKH 7RS DQG RWWRP RYHUV ...

Page 92: ...case of fault 1 The terminal must be connected to the main earth 6 GND ground Terminals The terminals are used to ground the devices which are associated with UPS operation NOTE 1 The PE protective earth connection ensures that all exposed conductive surfaces are at the same electric potential as the Earth to avoid the risk of electrical shock due to leakage current or an insulation fault 4 Make s...

Page 93: ... LULQJ LDJUDPB 6WHS LJXUH 6LQJOH 8QLW 6LQJOH QSXW RWWRP LULQJ LDJUDPB 6WHS WHUQDO DWWHU DELQHW RQQHFWLRQ DUQLQJ L1 AC INPUT BYPASS INPUT L1 AC INPUT BYPASS INPUT BATTERY INPUT BYPASS INPUT AC INPUT L1 Rear View after Rear Panel Removal Connect to the Main AC Source N L1 L2 L3 Single Input_ Top Wiring_ Step 1 PE protective earth Terminal GND ground Terminals LJXUH 6LQJOH 8QLW 6LQJOH QSXW 7RS LULQJ ...

Page 94: ...nect to the External Battery Cabinet LJXUH 6LQJOH 8QLW 6LQJOH QSXW 7RS LULQJ LDJUDPB 6WHS L1 AC INPUT BYPASS INPUT L1 AC INPUT BYPASS INPUT BATTERY INPUT BYPASS INPUT AC INPUT L1 N L1 L2 L3 Rear View after Rear Panel Removal Single Input_ Bottom Wiring_ Step 1 Connect to the Main AC Source N L1 L2 L3 PE protective earth Terminal GND ground Terminals LJXUH 6LQJOH 8QLW 6LQJOH QSXW RWWRP LULQJ LDJUDP...

Page 95: ...V QSXW QHXWUDO 1 terminal 8 Follow the table below to select proper Protective Earth PE cables to ground the UPS external battery cabinet s and connected critical loads The table is in accordance with IEC 60364 5 54 UWLFOH and 7DEOH The grounding diagram below is for reference DPH Series 100 300kVA Capacity 100kVA 100kW 150kVA 150kW 200kVA 200kW 250kVA 250kW 300kVA 300kW Suggested PE Cable Size In...

Page 96: ...48 mm 1 89 48 mm 1 89 48 mm 1 89 Screw Size Cable Lug Inner Diameter M10 14 mm 0 55 Tightening Torque M10 250 10 kgf cm 217 8 7 lb in Terminal Type 1 TLAPH250 2A12 TLAPH250 2A12 TLAPH250 2A12 TLAPH250 2A12 TLAPH250 2A12 NOTE 1 The suggested manufacturer is K S TERMINALS INC You may use equivalent terminals provided by other manufacturers Protective Earthing UPS Grounding External Battery Cabinet L...

Page 97: ...wiring and bottom wiring Please refer to the following to perform wiring 7DEOH LULQJ 7HUPLQDOV LULQJ QIRUPDWLRQ LJXUH 6LQJOH 8QLW XDO QSXW 7RS LULQJ LDJUDPB 6WHS LJXUH 6LQJOH 8QLW XDO QSXW 7RS LULQJ LDJUDPB 6WHS LJXUH 6LQJOH 8QLW XDO QSXW RWWRP LULQJ LDJUDPB 6WHS LJXUH 6LQJOH 8QLW XDO QSXW RWWRP LULQJ LDJUDPB 6WHS WHUQDO DWWHU DELQHW RQQHFWLRQ DUQLQJV L1 AC INPUT BYPASS INPUT L1 AC INPUT BYPASS IN...

Page 98: ...the External Battery Cabinet LJXUH 6LQJOH 8QLW XDO QSXW 7RS LULQJ LDJUDPB 6WHS L1 AC INPUT BYPASS INPUT L1 AC INPUT BYPASS INPUT L2 3 Rear View after Rear Panel Removal Dual Input_ Bottom Wiring_ Step 1 PE protective earth Terminal GND ground Terminals BYPASS INPUT AC INPUT Connect to the Main AC Source Connect to the Bypass Source N L1 L2 L3 N L1 L2 L3 L2 L1 LJXUH 6LQJOH 8QLW XDO QSXW RWWRP LULQJ...

Page 99: ...o the External Battery Cabinet N LJXUH 6LQJOH 8QLW XDO QSXW RWWRP LULQJ LDJUDPB 6WHS NOTE For dual input the UPS will not work normally if the main AC power s QHXWUDO 1 DQG WKH E SDVV SRZHU V QHXWUDO 1 DUH QRW UPO FRQQHFWHG or not connected to the UPS s AC Input neutral N terminal and Bypass Input neutral N terminal respectively 4 Follow LJXUH to ground the UPS external battery cabinet s and conne...

Page 100: ...e paralleled the length of each unit s bypass input cables plus output cables must be the same This ensures that the parallel UPSs can equally share the critical loads in bypass mode UPS1 L1 L2 L3 L4 UPS2 1 L1 L4 Length of Wiring Cable 2 L1 L3 L2 L4 Input Distribution Panel Output Distribution Panel 4 The UPS s rating voltage is 220 380Vac 230 400Vac or 240 415Vac the external battery cabinet s ra...

Page 101: ...ls Daisy Chain Method UPS Output Terminals UPS Output Terminals Parallel Port Parallel Port Parallel Port Parallel Port Parallel Port Parallel Port 3Ø4W 3Ø4W Parallel Cable Parallel Cable Parallel Cable Parallel Cable LJXUH 3DUDOOHO 8QLWV 6LQJOH QSXW LULQJ LDJUDP NOTE For single input the UPS will not work normally if the main AC power s QHXWUDO 1 LV QRW UPO FRQQHFWHG RU QRW FRQQHFWHG WR WKH 836 V...

Page 102: ... 16 mm2 1 PC 4 AWG 1 PC 25 mm2 1 PC 2 AWG 1 PC 25 mm2 1 PC 2 AWG 1 PC 35 mm2 1 PC 1 AWG 1 PC 50 mm2 1 PC 1 0 AWG 1 PC Bypass 16 mm2 1 PC 4 AWG 1 PC 25 mm2 1 PC 2 AWG 1 PC 25 mm2 1 PC 2 AWG 1 PC 35 mm2 1 PC 1 AWG 1 PC 50 mm2 1 PC 1 0 AWG 1 PC Suggested PE Cable Size Output 16 mm2 1 PC 4 AWG 1 PC 25 mm2 1 PC 2 AWG 1 PC 35 mm2 1 PC 2 AWG 1 PC 50 mm2 1 PC 1 0 AWG 1 PC 67 mm2 1 PC 2 0 AWG 1 PC Battery ...

Page 103: ...r to 3DUDOOHO 6HWWLQJ y Dual Input Parallel Units When there are two AC power sources parallel units wiring procedures are as follows 1 Follow 6LQJOH QSXW WR XDO QSXW 0RGLILFDWLRQ to modify the UPS from single input to dual input 2 Refer to the procedures 1 6 stated in the section of 6LQJOH QSXW 6LQJOH 8QLW 3 Connect the cables of the main AC source bypass source output and external battery cabine...

Page 104: ...QHXWUDO 1 DQG WKH E SDVV SRZHU V QHXWUDO 1 DUH QRW UPO FRQQHFWHG RU not connected to the UPS s AC Input neutral N terminal and Bypass Input neutral N terminal respectively 4 Use the provided parallel cables 1 to connect the parallel ports of the parallel units Please adopt the Daisy Chain method shown in LJXUH For the parallel port location refer to LJXUH NOTE 1 One parallel cable is provided in e...

Page 105: ... fully charged please charge the batteries at least 8 KRXUV EHIRUH UVW XVH RI WKH 836 7KH FKDUJLQJ SURFHGXUHV DUH DV IROORZV 1 Connect the UPS to the main AC source and the external battery cabinet s Please see QVWDOODWLRQ DQG LULQJ 2 Follow 836 2SHUDWLRQ to turn on the UPS and the external battery cabinet s After the UPS is turned on the UPS will automatically charge the batteries WARNING You can...

Page 106: ... charged not fully charged or even seriously damaged y Only use the same type of batteries from the same supplier Never use old new and dif ferent Ah batteries at the same time y The number of batteries must meet UPS requirements y Do not connect the batteries in reverse y Use a voltage meter to measure whether the total voltage after the external battery cabinet connection is around 12 5Vdc the t...

Page 107: ... ty Protective Device s Current Protective Device s Voltage 100kVA 100kW 2 250A 1 4 pole DC circuit breaker or 4 pole DC isolated switch per SROH YROWDJH 9GF 2 3 pole DC circuit breaker or 3 pole DC isolated switch per SROH YROWDJH 9GF IXVH YROWDJH 9GF 150kVA 150kW 3 400A 200kVA 200kW 4 500A 250kVA 250kW 5 700A 300kVA 300kW 6 800A NOTE 1 7DEOH LV IRU 9GF î 3 6 EDWWHULHV GHIDXOW I RX LQVWDOO D GLႇH...

Page 108: ... 3DUDOOHO 8QLWV y When choosing the external battery cabinet s protective device please take the follow ing factors into consideration 1 over current between the UPS and battery circuit 2 short circuit current of the batteries 3 wire cable materials and 4 local electrical regulations If you have any questions about the external battery cabinet s protective de vice please contact Delta service pers...

Page 109: ... s protective device installation methods are as follows Option 1 Installation of a 4 pole DC circuit breaker or DC isolated switch per pole voltage 9GF FRQQHFWHG LQ VHULHV ZLWK D IXVH YROWDJH 9GF External Battery Cabinet N UPS 4 Pole DC Circuit Breaker or DC Isolated Switch DC Fuse N LJXUH QVWDOODWLRQ RI D 3ROH LUFXLW UHDNHU RU VRODWHG 6ZLWFK RQQHFWHG LQ 6HULHV ZLWK D XVH Option 2 Installation of...

Page 110: ...ODWLRQ RI D SROH FLUFXLW EUHDNHU SHU SROH YROWDJH 9GF N UPS External Battery Cabinet 3 Pole DC Circuit Breaker N LJXUH QVWDOODWLRQ RI D 3ROH LUFXLW UHDNHU y To save on your costs and installation space the parallel UPSs up to 8 units can share their connected external battery cabinet s For relevant information please refer to RPPRQ DWWHU 2QO IRU 3DUDOOHO 836V RQQHFWLQJ WR WKH 6DPH WHUQDO DWWHU DEL...

Page 111: ...y external battery cabinet connected to the UPS has the following problems the UPS system will sound an alarm Please see the table below No External Battery Cabinet Status Alarm 1 Battery Abnormal Reversed Sounds for 0 5 second every second 2 Battery Ground Fault Sounds for 0 5 second every second 3 Battery Over Temperature Sounds for 0 5 second every second 4 Battery Under Temperature Sounds for ...

Page 112: ...ESET INPUT BREAKER ON OFF ON OFF ON OFF ON OFF OUTPU T BREAKER BYPASS BREAKER MANUAL BYPASS BREAKER GND B A GND B A MODBUS BMS DISPLAY REPO NC NO EXT BATT TEMP BT1 BT2 EXT SWITCH STATUS S1 S2 S3 S4 BT3 BT4 O P DRY CONTACT USB RS 232 P1 P2 P3 P4 P5 P6 I P DRY CONTACT P1 P2 BATT START BATT START P3 P4 PARALLEL PARALLEL PARALLEL STS Module 1 UPS Front View with Door Open LJXUH 676 0RGXOH RFDWLRQ ...

Page 113: ...a factory before shipment If the STS module is removed for some reasons and you want to re install it please follow the steps below NOTE 1 Only qualified service personnel can perform the following STS module installation procedures 2 The STS module is heavy 25 kg 55 12 lb At least two people are required for handling 1 RQ UP WKDW WKH 676 PRGXOH V VZLWFK LV LQ WKH ORZHU SRVLWLRQ LJXUH RQ UP WKH 67...

Page 114: ...A GND B A MODBUS BMS UPS Front View with Door Open ON ON OFF DISPLAY REPO NC NO EXT BATT TEMP BT1 BT2 EXT SWITCH STATUS S1 S2 S3 S4 BT3 BT4 O P DRY CONTACT USB RS 232 P1 P2 P3 P4 P5 P6 I P DRY CONTACT P1 P2 BATT START BATT START P3 P4 PARALLEL PARALLEL PARALLEL STS Module LJXUH QVHUW WKH 676 0RGXOH LQWR WKH 836 3 Re install the four screws removed during the STS module removal process to UPO WKH 6...

Page 115: ... SHUVRQQHO FDQ SHUIRUP WKH IROORZLQJ 676 PRGXOH UHPRYDO procedures 2 The STS module is heavy 25 kg 55 12 lb At least two people are required for handling 1 Turn the STS module s switch to the lower position and wait until the STS PRGXOH V LQGLFDWRU EHFRPHV Rႇ LJXUH 7XUQ WKH 676 0RGXOH V 6ZLWFK WR WKH RZHU 3RVLWLRQ 2 Unscrew the four screws shown in LJXUH OFF OFF LJXUH 5HPRYH WKH RXU 6FUHZV ...

Page 116: ...SPLAY CONSOLE EMS RESET INPUT BREAKER ON OFF ON OFF ON OFF ON OFF OUTPU T BREAKER BYPASS BREAKER MANUAL BYPASS BREAKER GND B A GND B A MODBUS BMS UPS Front View with Door Open ON ON OFF DISPLAY REPO NC NO EXT BATT TEMP BT1 BT2 EXT SWITCH STATUS S1 S2 S3 S4 BT3 BT4 O P DRY CONTACT USB RS 232 P1 P2 P3 P4 P5 P6 I P DRY CONTACT P1 P2 BATT START BATT START P3 P4 PARALLEL PARALLEL PARALLEL STS Module LJ...

Page 117: ... following table LED Indicator Description OFF The STS module is OFF ON yellow The STS module is working in bypass mode ECO mode or energy recycle mode Flashing yellow _ on for 0 3 VHFRQG DQG Rႇ IRU VHFRQGV The STS module is abnormal NOTE In bypass mode if you turn the STS module s switch to the lower position the 676 PRGXOH ZLOO VKXW GRZQ DQG LWV RXWSXW DQG LWV LQGLFDWRU ZLOO EH Rႇ ...

Page 118: ...umber of power modules Please refer to the table below UPS Capacity 100kVA 100kW 150kVA 150kW 200kVA 200kW 250kVA 250kW 300kVA 300kW Power Module Q ty 2 3 4 5 6 Handle Handle Switch LED Indicator Fans LJXUH 3RZHU 0RGXOH 2SWLRQDO Please see the table below for the power module s packing list 1 2 3 4 2 4 8 Table 5 5 Power Module Package List No Item Q ty 1 Power Module 1 PC 2 Bracket Ear 2 PCS 3 M6 ...

Page 119: ...PS capacity to install the correct number of power modules Please refer to the table below UPS Capacity 100kVA 100kW 150kVA 150kW 200kVA 200kW 250kVA 250kW 300kVA 300kW Power Module Q ty 2 3 4 5 6 4 Please install the power modules from the top layer of the power module slot to the bottom layer of the power module slot in sequence 1 RQ UP WKDW WKH SRZHU PRGXOH V VZLWFK LV LQ WKH ORZHU SRVLWLRQ LJX...

Page 120: ...r of the power module slot in sequence DISPLAY CONSOLE EMS RESET INPUT BREAKER ON OFF ON OFF ON OFF ON OFF OUTPU T BREAKER BYPASS BREAKER MANUAL BYPASS BREAKER GND B A GND B A MODBUS BMS DISPLAY REPO NC NO EXT BATT TEMP BT1 BT2 EXT SWITCH STATUS S1 S2 S3 S4 BT3 BT4 O P DRY CONTACT USB RS 232 P1 P2 P3 P4 P5 P6 I P DRY CONTACT P1 P2 BATT START BATT START P3 P4 PARALLEL PARALLEL PARALLEL UPS Front Vi...

Page 121: ...UH L WKH 3RZHU 0RGXOH RQ WKH 836 6 Turn the power module s switch to the upper position LJXUH 7XUQ WKH 3RZHU 0RGXOH V 6ZLWFK WR WKH 8SSHU 3RVLWLRQ 5 8 2 Power Module Removal WARNING 1 Before removing any power module make sure the remaining power module s can support the connected critical loads 2 Only qualified service personnel can perform the following power module removal procedures 3 The powe...

Page 122: ...le shown in LJXUH PLAY PLAY REPO NC NO EXT BATT TEMP BT1 BT2 EXT SWIT CH STATUS S1 S2 S3 S4 BT3 BT4 O P DRY CONTACT USB RS 232 P1 P2 P3 P4 P5 P6 I P DRY CONTACT P1 P2 BATT START BATT START P3 P4 PARALLEL PARALLEL PARALLEL LJXUH 5HPRYH WKH RXU 6FUHZV 3 Pull out the power module from the slot two people are required see LJXUH 5 51 When the power module cannot be pulled out any more press the lock se...

Page 123: ...ND B A GND B A MODBUS BMS DISPLAY REPO NC NO EXT BATT TEMP BT1 BT2 EXT SWITCH STATUS S1 S2 S3 S4 BT3 BT4 O P DRY CONTACT USB RS 232 P1 P2 P3 P4 P5 P6 I P DRY CONTACT P1 P2 BATT START BATT START P3 P4 PARALLEL PARALLEL PARALLEL UPS Front View with Door Open Power Module LJXUH 5HPRYH WKH 3RZHU 0RGXOH Press the Lock LJXUH 3UHVV WKH RFN RI WKH 3RZHU 0RGXOH ...

Page 124: ...y mode 2 The power module s inverter starts up 3 The power module s PFC starts up Flashing green _ on for 2 VHFRQGV DQG Rႇ IRU VHFRQG The power module is under discharging process Flashing green _ on for 0 3 VHFRQG DQG Rႇ IRU VHFRQGV The power module is abnormal NOTE In online mode if you turn the power module s switch to the lower position the power module will shut down its output and discharge ...

Page 125: ...6 1 6 UPS Operation 6 UPS Operation 6 1 Pre Start up Pre Turn Rႇ DUQLQJV IRU 6LQJOH 8QLW and Parallel Units 6 2 Start up Procedures 7XUQ Rႇ 3URFHGXUHV ...

Page 126: ...sure that installation and wiring have been completely done according to QVWDOODWLRQ DQG LULQJ and relevant instructions have been followed 4 Before operation please refer to 7UL FRORU QGLFDWRU X HU and LVSOD 6HWWLQJV 5 1 The setting of the 2Q 2ႇ XWWRQ FFHVV is set as Any User for all the ON OFF Button presented in this user manual 2 If you want to change the access setting for the ON OFF Button p...

Page 127: ...difference between the Neutral N and Ground is 3V 5 Check if the wiring is correct Ensure that the AC power s voltage frequency phase sequence and battery type meet the UPS s requirements 6 Check if all power modules are properly installed and every power module s switch is in the upper position Please refer to 3RZHU 0RGXOH 2SWLRQDO for more information 7 For parallel units ensure that every opera...

Page 128: ...d Output Breaker Q4 4 After you switch on the Input Breaker Q1 and Bypass Breaker Q2 each auxiliary power card s LED indicator will illuminate green and the following status will occur simultaneously 1 The system and each power module will start initialization After each power PRGXOH QLVKHV LQLWLDOL DWLRQ HDFK SRZHU PRGXOH V IDQV ZLOO VWDUW UXQQLQJ HDFK power module will start establishing DC BUS ...

Page 129: ... P5 P6 I P DRY CONTACT P1 P2 BATT START BATT START P3 P4 PARALLEL PARALLEL Auxiliary Power Card s LED Indicator Auxiliary Power Card s LED Indicator UPS Internal View with Front Door Open Auxiliary Power Card Auxiliary Power Card Power Module Power Module s LED Indicator Backup Parallel Communication Card s LED Indicator Master Parallel Communication Card s LED Indicator Master Parallel Communicat...

Page 130: ...voltage the charger will start to charge the batteries If the bypass AC source is within the normal range the UPS will transfer to run in Bypass mode the LCD screen will show as LJXUH and the tri color LED indicator will illuminate yellow Bypass POWER FLOW Maintenance Bypass Bypass Mains 90 5 mins Load 30 MEASUREMENT Power Flow UPS 1 1 SETUP MAINTENANCE EVENT LOG LOG IN User Power Flow Summary EMS...

Page 131: ...rter each power module will start up and perform self inspection At the same time the system begins synchronization with the bypass AC source After the self inspection is completed the UPS will automatically transfer to run in On Line mode the tri color LED indicator will illuminate green and the following screen will appear On Line POWER FLOW Maintenance Bypass Bypass Mains 90 5 mins Load 30 MEAS...

Page 132: ...e LJXUH for one second and release it After that each auxiliary power card s LED indicator will illuminate green and the following status will occur simultaneously 1 The system and each power module will start initialization After each power PRGXOH QLVKHV LQLWLDOL DWLRQ HDFK SRZHU PRGXOH V IDQV ZLOO VWDUW UXQQLQJ 2 Each parallel communication card s LED indicator will illuminate red first and then...

Page 133: ...7 Tap the ON OFF Button and the following screen will pop up to ask if you want to power on the UPS Please select YES Standby MEASUREMENT Power Flow UPS 1 1 SETUP MAINTENANCE EVENT LOG POWER ON No Yes LOG IN User 10 15 May 25 2018 LJXUH 3RZHU RQ 5HPLQGHU 6FUHHQ 8 After selection of YES to start up the UPS s inverter each power module will start up and perform self inspection and the LED indicator ...

Page 134: ...s Breaker Q2 4 After you switch on the Input Breaker Q1 and Bypass Breaker Q2 each auxiliary power card s LED indicator will illuminate green and the following status will occur simultaneously 1 The system and each power module will start initialization After each power PRGXOH QLVKHV LQLWLDOL DWLRQ HDFK SRZHU PRGXOH V IDQV ZLOO VWDUW UXQQLQJ HDFK power module will start establishing DC BUS voltage...

Page 135: ...ains green After each power module finishes establishing DC BUS voltage the charger will start to charge the batteries If the bypass AC source is within the normal range the UPS will transfer to run in Bypass mode the LCD screen will show as LJXUH and the tri color LED indicator will illuminate yellow Bypass POWER FLOW Maintenance Bypass Bypass Mains 90 5 mins Load 0 MEASUREMENT Power Flow UPS 1 1...

Page 136: ...ns Power Flow Summary EMS System Status 10 15 May 25 2018 Load 0 UPS 1 1 Local UPS 1 2 Read Only UPS 1 3 Read Only UPS 1 1 Power Flow UPS 1 1 Parallel Group ID No Parallel ID No LJXUH 3DUDOOHO URXS 1R 3DUDOOHO 1R QTXLU 6FUHHQ 9 For single unit turn ON the Output Breaker Q4 For parallel units ensure that the output voltage difference between each parallel UPS is below 3V If larger than 3V it is abn...

Page 137: ...s except the Manual Bypass Breaker Q3 are in the OFF position and use a voltmeter to check if there is any high voltage LQVLGH WKH 836 2QO DIWHU RX KDYH FRQ UPHG WKDW WKHUH LV QR KLJK YROWDJH LQ the UPS can service personnel perform UPS maintenance 6 During the UPS maintenance process do not touch the following parts AC Input terminal block Bypass Input terminal block UPS Output terminal block Bat...

Page 138: ...I 5HPLQGHU 6FUHHQ 4 If normal please select YES After that the UPS will shut down the inverter and transfer to run in Bypass mode 5 QVXUH WKDW WKH 836 UXQV LQ SDVV PRGH IWHU FRQ UPDWLRQ WXUQ ON the Manual Bypass Breaker Q3 6 Switch OFF the Input Breaker Q1 Bypass Breaker Q2 and Output Breaker Q4 After that the screen shows as follows Standby POWER FLOW Maintenance Bypass Bypass Mains 90 5 mins Loa...

Page 139: ... Input Breaker Q1 Bypass Breaker Q2 and Output Breaker Q4 3 After you switch on the Input Breaker Q1 and Bypass Breaker Q2 each auxiliary power card s LED indicator will illuminate green and the following status will occur simultaneously 1 The system and each power module will start initialization After each power module finishes initialization each power module s fans will start running each powe...

Page 140: ...ltage the charger will start to charge the batteries If the bypass AC source is within the normal range the UPS will transfer to run in Bypass mode the LCD screen will show as LJXUH and the tri color LED indicator will illuminate yellow Bypass POWER FLOW Maintenance Bypass Bypass Mains 90 5 mins Load 30 MEASUREMENT Power Flow UPS 1 1 SETUP MAINTENANCE LOG IN User 2 WARNING Power Flow Summary EMS S...

Page 141: ...art up the UPS s inverter each power module will start up and perform self inspection At the same time the system begins synchronization with the bypass AC source After the self inspection is completed the UPS will automatically transfer to run in On Line mode the tri color LED indicator will illuminate green and the following screen will appear On Line POWER FLOW Maintenance Bypass Bypass Mains 9...

Page 142: ...aker Q2 each auxiliary power card s LED indicator will illuminate green and the following status will occur simultaneously 1 The system and each power module will start initialization After each power PRGXOH QLVKHV LQLWLDOL DWLRQ HDFK SRZHU PRGXOH V IDQV ZLOO VWDUW UXQQLQJ HDFK power module will start establishing DC BUS voltage and each power module s LED indicator will illuminate green 2 Each pa...

Page 143: ...blishing DC BUS voltage the charger will start to charge the batteries If the bypass AC source is within the normal range the UPS will transfer to run in Bypass mode the LCD screen will show as LJXUH and the tri color LED indicator will illuminate yellow Bypass POWER FLOW Maintenance Bypass Bypass Mains 90 5 mins Load 30 MEASUREMENT Power Flow UPS 1 1 SETUP MAINTENANCE EVENT LOG LOG IN User Power ...

Page 144: ... Power Flow Summary EMS System Status 10 15 May 25 2018 Administrator Login ON OFF Button LJXUH 0DLQ 6FUHHQB GPLQLVWUDWRU RJLQ 21 2 XWWRQ RFDWLRQ 8 Go to SETUP ĺ Mode Setting ĺ ECO Bypass UPS 1 1 MODE SETTING MEASUREMENT Mode Setting SETUP MAINTENANCE EVENT LOG LOG IN Administrator On Line Green ECO Energy Recycle Frequency Conversion Select to change system mode 10 15 May 25 2018 LJXUH 6HOHFW 2 0...

Page 145: ...e time the system begins synchronization with the bypass AC source After the self inspection is completed the UPS will automatically transfer to run in On Line mode After the system confirms that the bypass voltage is normal the UPS will automatically switch to run in ECO mode to let the bypass AC source supply power see LJXUH Now the tri color LED indicator illuminates green and the following scr...

Page 146: ...imultaneously 1 The system and each power module will start initialization After each power PRGXOH QLVKHV LQLWLDOL DWLRQ HDFK SRZHU PRGXOH V IDQV ZLOO VWDUW UXQQLQJ HDFK power module will start establishing DC BUS voltage and each power module s LED indicator will illuminate green 2 Each parallel communication card s LED indicator will illuminate red first and then each card will start initializat...

Page 147: ...te yellow Bypass POWER FLOW Maintenance Bypass Bypass Mains 90 5 mins Load 30 MEASUREMENT Power Flow UPS 1 1 SETUP MAINTENANCE EVENT LOG LOG IN User Power Flow Summary EMS System Status 10 15 May 25 2018 User Login LJXUH 0DLQ 6FUHHQB 8VHU RJLQ 7 Please log in as an Administrator For the Administrator password please contact service personnel After login ensure that you are in the Administrator log...

Page 148: ... left corner of the screen to go back to the Main Screen 10 Tap the ON OFF Button and the following screen will pop up to ask if you want to power on the UPS s inverter Please select YES Standby MEASUREMENT Power Flow UPS 1 1 SETUP MAINTENANCE EVENT LOG POWER ON No Yes LOG IN Administrator 10 15 May 25 2018 LJXUH 3RZHU RQ 5HPLQGHU 6FUHHQ 11 After selection of YES to start up the UPS s inverter eac...

Page 149: ...ion 2 Switch ON every external battery cabinet s breaker Q5 3 Switch ON the Input Breaker Q1 Bypass Breaker Q2 and Output Breaker Q4 4 After you switch on the Input Breaker Q1 and Bypass Breaker Q2 each auxiliary power card s LED indicator will illuminate green and the following status will occur simultaneously 1 The system and each power module will start initialization After each power PRGXOH QL...

Page 150: ...LED indicator remains green After each power module finishes establishing DC BUS voltage the charger will start to charge the batteries If the bypass AC source is within the normal range the UPS will transfer to run in Bypass mode the LCD screen will show as LJXUH and the tri color LED indicator will illuminate yellow Bypass POWER FLOW Maintenance Bypass Bypass Mains 90 5 mins Load 30 MEASUREMENT ...

Page 151: ...r Flow Summary EMS System Status 10 15 May 25 2018 Administrator Login ON OFF Button LJXUH 0DLQ 6FUHHQB GPLQLVWUDWRU RJLQ 21 2 XWWRQ RFDWLRQ 8 Go to SETUP ĺ Mode Setting ĺ Green Bypass UPS 1 1 MODE SETTING MEASUREMENT Mode Setting SETUP MAINTENANCE EVENT LOG LOG IN Administrator On Line Green ECO Energy Recycle Frequency Conversion Select to change system mode 10 15 May 25 2018 LJXUH 6HOHFW UHHQ 0...

Page 152: ...begins synchronization with the bypass AC source After the self inspection is completed the UPS will automatically transfer to run in Green mode and the system will automatically detect WKH RXWSXW VWDWXV L H WRWDO ORDG FDSDFLW WR GHFLGH ZKLFK VSHFL F SRZHU PRGXOHV VKRXOG EH IXOO SRZHUHG RQ RU LGOH LQ RUGHU WR DFKLHYH KLJKHU HႈFLHQF RI WKH 836 Now the tri color LED indicator illuminates green and t...

Page 153: ...ach power PRGXOH QLVKHV LQLWLDOL DWLRQ HDFK SRZHU PRGXOH V IDQV ZLOO VWDUW UXQQLQJ 2 Each parallel communication card s LED indicator will illuminate red first and then each card will start initialization After initialization the master parallel communication card s LED indicator will illuminate green and the backup communication card s LED indicator will illuminate yellow For the locations of the...

Page 154: ...mary EMS System Status 10 15 May 25 2018 User Login Bypass LJXUH 0DLQ 6FUHHQB 8VHU RJLQ 6 Please log in as an Administrator For the Administrator password please contact service personnel After login ensure that you are in the Administrator login status see LJXUH Bypass 2 WARNING POWER FLOW Maintenance Bypass Bypass Mains MEASUREMENT Power Flow UPS 1 1 SETUP MAINTENANCE LOG IN Administrator Load 0...

Page 155: ... Button and the following screen will pop up to ask if you want to power on the UPS s inverter Please select YES Bypass MEASUREMENT Power Flow UPS 1 1 SETUP MAINTENANCE POWER ON No Yes LOG IN Administrator 2 WARNING 10 15 May 25 2018 LJXUH 3RZHU RQ 5HPLQGHU 6FUHHQ 10 After selection of YES to start up the UPS s inverter each power module will start up and perform self inspection At the same time t...

Page 156: ...y operation procedure mentioned below is synchronized to all parallel UPSs RU SDUDOOHO DSSOLFDWLRQ LI RX MXVW ZDQW WR RSHUDWH D VSHFL F 836 EXW QRW DOO parallel ones please contact service personnel 1 In On Line mode the LCD shows the following screen LJXUH and the tri color LED indicator illuminates green On Line POWER FLOW Maintenance Bypass Bypass Mains 90 5 mins Load 30 MEASUREMENT Power Flow ...

Page 157: ...the inverter terminate each power module s output and let the bypass AC source supply power If the bypass AC source is abnormal there is a risk of output interruption and the connected critical loads won t be protected At this moment each power module keeps charging the batteries the tri color LED indicator illuminates yellow and the following screen LJXUH appears Bypass POWER FLOW Maintenance Byp...

Page 158: ...RQ LI RX MXVW ZDQW WR RSHUDWH D VSHFL F 836 EXW QRW DOO parallel ones please contact service personnel 1 In Battery mode the LCD shows the following screen LJXUH and the tri color LED indicator illuminates yellow Battery POWER FLOW Maintenance Bypass Bypass Mains 90 5 mins Load 30 MEASUREMENT Power Flow UPS 1 1 SETUP MAINTENANCE LOG IN User 2 WARNING Power Flow Summary EMS System Status 10 15 May ...

Page 159: ...owing screen LJXUH appears Standby POWER FLOW Maintenance Bypass Bypass Mains 90 5 mins Load 0 MEASUREMENT Power Flow UPS 1 1 SETUP MAINTENANCE LOG IN User 2 WARNING Power Flow Summary EMS System Status 10 15 May 25 2018 LJXUH 6WDQGE 0RGH 6FUHHQ 4 Switch OFF the Input Breaker Q1 Bypass Breaker Q2 and Output Breaker Q4 5 1RZ HDFK SRZHU PRGXOH SHUIRUPV 86 GLVFKDUJLQJ DQG LWV LQGLFDWRU ÀDVKHV JUHHQ I...

Page 160: ...R FLOW Maintenance Bypass Bypass Mains 90 5 mins Load 30 MEASUREMENT Power Flow UPS 1 1 SETUP MAINTENANCE EVENT LOG LOG IN User Power Flow Summary EMS System Status 10 15 May 25 2018 LJXUH SDVV 0RGH 6FUHHQ 2 Switch OFF the Input Breaker Q1 Bypass Breaker Q2 and Output Breaker Q4 After that the UPS will run in Standby mode 3 1RZ HDFK SRZHU PRGXOH SHUIRUPV 86 GLVFKDUJLQJ DQG LWV LQGLFDWRU ÀDVKHV JUH...

Page 161: ...dicators and fans are OFF 2 Check that all breakers and power are OFF 2 0RGH 7XUQ Rႇ 3URFHGXUHV WARNING 1 For parallel units ensure that every operation procedure mentioned below is synchronized to all parallel UPSs RU SDUDOOHO DSSOLFDWLRQ LI RX MXVW ZDQW WR RSHUDWH D VSHFL F 836 EXW QRW DOO parallel ones please contact service personnel 1 In ECO mode the LCD shows the following screen LJXUH and t...

Page 162: ...the inverter terminate each power module s output and let the bypass AC source supply power If the bypass AC source is abnormal there is a risk of output interruption and the connected critical loads won t be protected At this moment each power module keeps charging the batteries the tri color LED indicator illuminates yellow and the following screen appears LJXUH Bypass POWER FLOW Maintenance Byp...

Page 163: ... 25 2018 Administrator Login LJXUH SDVV 0RGH 6FUHHQB GPLQLVWUDWRU RJLQ 5 Go to SETUP ĺ Mode Setting ĺ On Line Bypass UPS 1 1 MODE SETTING MEASUREMENT Mode Setting SETUP MAINTENANCE EVENT LOG LOG IN Administrator On Line Green ECO Energy Recycle Frequency Conversion Select to change system mode 10 15 May 25 2018 LJXUH 6HOHFW 2QOLQH 0RGH 6 Switch OFF the Input Breaker Q1 Bypass Breaker Q2 and Output...

Page 164: ...following screen LJXUH and the tri color LED indicator illuminates green Frequency Conversion POWER FLOW Maintenance Bypass Bypass Mains 90 5 mins Load 30 MEASUREMENT Power Flow UPS 1 1 SETUP MAINTENANCE EVENT LOG LOG IN User Power Flow Summary EMS System Status 10 15 May 25 2018 ON OFF Button LJXUH UHTXHQF RQYHUVLRQ 0RGH 6FUHHQ 21 2 XWWRQ RFDWLRQ 2 Tap the ON OFF Button and the following screen w...

Page 165: ...ght after the inverter is shut down Now each power module keeps charging the batteries the tri color LED indicator illuminates yellow and the following screen appears LJXUH Standby POWER FLOW Maintenance Bypass Bypass Mains 90 5 mins MEASUREMENT Power Flow UPS 1 1 SETUP MAINTENANCE EVENT LOG LOG IN User Load 0 Power Flow Summary EMS System Status 10 15 May 25 2018 LJXUH 6WDQGE 0RGH 6FUHHQ 4 Switch...

Page 166: ...pass AC source supply power to the output Bypass UPS 1 1 MODE SETTING MEASUREMENT Mode Setting SETUP MAINTENANCE EVENT LOG LOG IN Administrator On Line Green ECO Energy Recycle Frequency Conversion Select to change system mode 10 15 May 25 2018 LJXUH 6HOHFW 2QOLQH 0RGH 6 Switch OFF the Input Breaker Q1 and Bypass Breaker Q2 7 1RZ HDFK SRZHU PRGXOH SHUIRUPV 86 GLVFKDUJLQJ DQG LWV LQGLFDWRU ÀDVKHV J...

Page 167: ...tor illuminates green Green POWER FLOW Maintenance Bypass Bypass Mains 90 5 mins Load 30 MEASUREMENT Power Flow UPS 1 1 SETUP MAINTENANCE EVENT LOG LOG IN User Power Flow Summary EMS System Status 10 15 May 25 2018 ON OFF Button LJXUH UHHQ 0RGH 6FUHHQ 21 2 XWWRQ RFDWLRQ 2 Tap the ON OFF Button and the following screen will pop up to ask if you want WR SRZHU Rႇ WKH 836 V LQYHUWHU 3OHDVH VHOHFW YES ...

Page 168: ...intenance Bypass Bypass Mains 90 5 mins Load 30 MEASUREMENT Power Flow UPS 1 1 SETUP MAINTENANCE EVENT LOG LOG IN User Power Flow Summary EMS System Status 10 15 May 25 2018 LJXUH SDVV 0RGH 6FUHHQ 4 Please log in as an Administrator For the Administrator password please contact service personnel After login ensure that you are in the Administrator login status see LJXUH Bypass POWER FLOW Maintenan...

Page 169: ... May 25 2018 LJXUH 6HOHFW 2Q LQH 0RGH 6 Switch OFF the Input Breaker Q1 Bypass Breaker Q2 and Output Breaker Q4 After that the UPS will run in Standby mode 7 1RZ HDFK SRZHU PRGXOH SHUIRUPV 86 GLVFKDUJLQJ DQG LWV LQGLFDWRU ÀDVKHV JUHHQ IWHU GLVFKDUJLQJ HDFK SRZHU PRGXOH V LQGLFDWRU ZLOO EH Rႇ 8 About 3 minutes later the UPS will shut down and the LCD and the tri color LED LQGLFDWRU ZLOO EH Rႇ 9 Swi...

Page 170: ...s MEASUREMENT Power Flow UPS 1 1 SETUP MAINTENANCE 2 WARNING LOG IN User Load 0 0 0 mins Power Flow Summary EMS System Status 10 15 May 25 2018 ON OFF Button LJXUH QHUJ 5HF FOH 0RGH 6FUHHQ 21 2 XWWRQ RFDWLRQ 2 Tap the ON OFF Button and the following screen will pop up to ask if you want WR SRZHU Rႇ WKH 836 V LQYHUWHU 3OHDVH VHOHFW YES MEASUREMENT Power Flow UPS 1 1 SETUP MAINTENANCE No Yes LOG IN ...

Page 171: ...2 WARNING 0 0 mins Power Flow Summary EMS System Status 10 15 May 25 2018 LJXUH SDVV 0RGH 6FUHHQ 4 Please log in as an Administrator For the Administrator password please contact service personnel After login ensure that you are in the Administrator login status see LJXUH Bypass POWER FLOW Maintenance Bypass Bypass Mains Load 0 MEASUREMENT Power Flow UPS 1 1 SETUP MAINTENANCE 2 WARNING 0 0 mins LO...

Page 172: ...ting SETUP MAINTENANCE EVENT LOG LOG IN Administrator On Line Green ECO Energy Recycle Frequency Conversion Select to change system mode 10 15 May 25 2018 LJXUH 6HOHFW 2QOLQH 0RGH 6 Switch OFF the Input Breaker Q1 and Bypass Breaker Q2 7 7KH 836 ZLOO VKXW GRZQ DQG WKHQ WKH DQG WKH WUL FRORU LQGLFDWRU ZLOO EH Rႇ ...

Page 173: ...lay Hierarchy 7 2 How to Turn on the LCD 7 3 ON OFF Button 7 4 Introduction of Touch Panel and Function Keys 7 5 Password Entry 7 6 Main Screen 7 7 Main Menu 7 8 Power Flow Summary System Status 7 9 Check System Readings 7 10 UPS Settings 7 11 System Maintenance ...

Page 174: ... Historical Event Clear Battery Test Result Clear Kilowatt Hour kWh On Line Green ECO Energy Recycle Frequency Conversion Voltage V Voltage Compensation V Frequency Hz Slew Rate Hz s PM Redundancy V Async Transfer Time ms Module Sequential Start s System Sequential Start s Battery Type Battery Rating Voltage Battery Strings Battery Low Warning Battery Cut Off Voltage Capacity Float Charge Voltage ...

Page 175: ...n the operation situation 4 To turn on the touch panel please refer to RZ WR 7XUQ RQ WKH and 21 2 XWWRQ 5 1 The setting of the 2Q 2ႇ XWWRQ FFHVV is set as Any User for all the ON OFF Button presented in this user manual 2 If you want to change the access setting for the ON OFF Button please go to SETUP ĺ General Setting ĺ User ĺ On Off Button Access For relevant information please refer to HQHUDO ...

Page 176: ... START BATT START P3 P4 PARALLEL PARALLEL BATT START BATT START UPS Front View with Door Open Battery Start Button x 2 LJXUH 7KH 3RVLWLRQ RI DWWHU 6WDUW XWWRQV LJXUH QLWLDO 6FUHHQ 2 About 20 seconds after the LCD initial screen see LJXUH is on the Main Screen will appear see LJXUH After you see the Main Screen you can operate the LCD Please note that the Main Screen appears in the User login statu...

Page 177: ...e setting of the 2Q 2ႇ XWWRQ FFHVV is set as Any User for all the ON OFF Button presented in this user manual 2 If you want to change the access setting for the ON OFF Button please go to SETUP ĺ General Setting ĺ User ĺ On 2ႇ Button Access For relevant information please refer to HQHUDO 6HWWLQJ After the touch panel is turned on in accordance with the steps stated in RZ WR 7XUQ RQ WKH the Main Sc...

Page 178: ... 2 XWWRQ RFDWLRQ y Power On When the ON OFF Button is gray it indicates that the UPS s inverter is in the OFF status Tap the button once and a reminder window shown below will pop up to DVN IRU FRQ UPDWLRQ RI POWER ON After selection of Yes the ON OFF Button will turn green indicating that the power on process is completed Bypass MEASUREMENT Power Flow UPS 1 1 SETUP MAINTENANCE EVENT LOG POWER ON ...

Page 179: ...Line MEASUREMENT Power Flow UPS 1 1 SETUP MAINTENANCE EVENT LOG No Yes POWER OFF Transfer to Bypass without Protection 10 15 May 25 2018 LOG IN Administrator LJXUH 3RZHU 2 5HPLQGHU LQGRZ 7 4 Introduction of Touch Panel and Function Keys On Line POWER FLOW Maintenance Bypass Bypass Mains 90 5 mins Load 30 MEASUREMENT Power Flow UPS 1 1 SETUP MAINTENANCE EVENT LOG LOG IN Administrator Power Flow Sum...

Page 180: ... you can only check its own status and readings 2 MEASUREMENT Shortcut icon for the measurement menu For more information please refer to KHFN 6 VWHP 5HDGLQJV 3 SETUP Shortcut icon for the setup menu For more information please refer to 836 6HWWLQJV 4 MAINTENANCE Shortcut icon for the maintenance menu For more information please refer to 6 VWHP 0DLQWHQDQFH 5 LOG IN User Indicates login by User Tap...

Page 181: ...ue at the upper right of the red warning icon indicates the total number of warning events By tapping the buzzer icon the buzzer will be muted At this time the buzzer disabled icon will appear If there is any warning event afterwards the buzzer will sound and the buzzer icon will appear and light up again 7 09 30 May 10 2018 Indicates the time and date 8 On Line ECO Frequency Conversion Green Ener...

Page 182: ...ease refer to 3RZHU ORZ 6XPPDU 6 VWHP 6WDWXV 06 12 EMS Shortcut icon for EMS information On the EMS screen you can check the integrated status of each optional EMS 1000 EnviroProbe device connected to the UPS Green Normal Yellow DUQLQJ 5HG ODUP UD 2ႇ WKH integrated status is determined by the most severe status among the device s temperature C status humidity status and the status of input contact...

Page 183: ...me minutes 4 Battery status screen shortcut icon 17 Bypass static switch status Green ON Gray Abnormal or OFF 18 5HFWL HU VWDWXV UHHQ 1RUPDO UD Waiting or OFF 19 1 Inverter status Green Normal Gray Waiting or OFF 2 Inverter output screen shortcut icon 20 Load 30 1 Output status Green Normal Gray No Output 2 Load capacity 3 UPS output screen shortcut icon Other icons on the touch panel are shown in...

Page 184: ...ck light can be adjusted Please refer to HQHUDO 6HWWLQJ 3 If you are logged in as an Administrator the Administrator password is required please refer to 3DVVZRUG QWU you will be logged out when WKH EDFNOLJKW LV Rႇ 7DS WR ZDNH XS WKH VFUHHQ DQG LW ZLOO JR EDFN WR WKH Main Screen in the User login status Even if you set up the backlight in Never Sleep mode you will still be logged out after the scr...

Page 185: ... V GPLQLVWUDWRU 8VHU KDYH GLႇHUHQW DFFHVV WR GLႇHUHQW VFUHHQV inspection items and setup items Please refer to LVSOD LHUDUFK 7 6 Main Screen 1 Please refer to RZ WR 7XUQ RQ WKH and 21 2 XWWRQ to enter the Main Screen 2 The system shows different power flow screens depending on the status of the UPS Each power flow screen is a Main Screen See the examples below Standby POWER FLOW Maintenance Bypass...

Page 186: ...indicates that the UPS is in Bypass PRGH DQG WKH LQYHUWHU LV Rႇ 3 On Line POWER FLOW Maintenance Bypass Bypass Mains 90 5 mins Load 30 MEASUREMENT Power Flow UPS 1 1 SETUP MAINTENANCE EVENT LOG LOG IN Administrator Power Flow Summary EMS System Status 10 15 May 25 2018 The screen above indicates that the UPS is in On Line mode and power supply of the loads comes from the inverter Please refer to 0...

Page 187: ...o rest depending on the total load situation For Green mode settings please refer to 0RGH 6HWWLQJ and UHHQ 0RGH 6WDUW XS 3URFHGXUHV 5 ECO MEASUREMENT Power Flow UPS 1 1 SETUP MAINTENANCE EVENT LOG LOG IN Administrator POWER FLOW Maintenance Bypass Bypass Mains 90 5 mins Load 30 Power Flow Summary EMS System Status 10 15 May 25 2018 The screen above indicates that the UPS is in ECO mode The inverte...

Page 188: ...s and the aging test could be conducted For Energy Recycle mode settings please refer to 0RGH 6HWWLQJ and QHUJ 5HF FOH 0RGH 6WDUW XS 3URFHGXUHV 7 Frequency Conversion MEASUREMENT MAINTENANCE EVENT LOG LOG IN Administrator Power Flow UPS 1 1 SETUP POWER FLOW Maintenance Bypass Bypass Mains 90 5 mins Load 30 Power Flow Summary EMS System Status 10 15 May 25 2018 The screen above indicates that the U...

Page 189: ...it must be ensured that all input power bypass power and battery SRZHU DUH GLVFRQQHFWHG IWHU SRZHU GLVFRQQHFWLRQ WKH ZLOO EH Rႇ DQG WKH ORDGV ZLOO not be protected If there is any sudden malfunction in the bypass the loads will lose power Please refer to 0DQXDO SDVV 0RGH 6WDUW XS 3URFHGXUHV 7 7 Main Menu There are three main menu icons MEASUREMENT SETUP and MAINTENANCE and their positions are show...

Page 190: ... 4 Battery Charging Setting 5 Parallel Setting 6 Dry Contact Setting 7 General Setting 8 IP Setting 9 Control 10 EMS Setting For more information please refer to 836 6HWWLQJV MAINTENANCE Tap the icon to go to the Maintenance Menu In the menu you can 1 check the warning events historical events statistics relevant temperature readings firmware versions 2 execute the manual battery test 3 clear the ...

Page 191: ...H VHH WKH JXUH EHORZ On Line POWER FLOW MEASUREMENT Power Flow UPS 1 1 SETUP MAINTENANCE EVENT LOG LOG IN Administrator Power Flow Summary EMS System Status 10 15 May 25 2018 Maintenance Bypass Bypass Mains 90 5 mins Load 30 1 Tap the Power Flow LFRQ WR FKHFN WKH 836 V SRZHU ÀRZ GLDJUDP 3OHDVH UHIHU WR WKH JXUH below On Line POWER FLOW MEASUREMENT Power Flow UPS 1 1 SETUP MAINTENANCE EVENT LOG LOG...

Page 192: ...ning Voltage Charge Current Current Load Main Voltage Bypass Voltage Input Output Battery Power Flow Summary EMS System Status 10 15 May 25 2018 3 Tap the System Status icon to check the status of the STS module power modules parallel communication cards system control card and auxiliary power cards Please refer to WKH JXUH EHORZ On Line MEASUREMENT System Status UPS 1 1 SETUP MAINTENANCE EVENT LO...

Page 193: ...TENANCE EVENT LOG LOG IN Administrator EMS 10 15 May 25 2018 EMS Summary System Status Power Flow Temperature Title Humidity DI1 DI2 DI4 DI3 Normal Warning Alarm Off 7 9 Check System Readings 7 9 1 Main Input Path MEASUREMENT ĺ 0DLQ QSXW After entering the MAIN INPUT screen shown in the figure below you can view the readings of Phase Voltage Line Voltage Current Frequency and Kilowatt Hour For mor...

Page 194: ...Main Input MAIN INPUT Phase Voltage V Line Voltage V Current A Frequency Hz Kilowatt Hour kWH 10 15 May 25 2018 UPS 1 1 220 0 380 0 220 0 380 0 220 0 380 0 50 0 0 On Line SETUP MAINTENANCE EVENT LOG LOG IN Administrator MEASUREMENT Main Input MAIN INPUT Phase Voltage V Line Voltage V Current A Frequency Hz Kilowatt Hour kWH 10 15 May 25 2018 Last Reset Date 2018 07 06 CONSUMPTION Day Week Month Ye...

Page 195: ...Sum kWH d 5HJDUGOHVV RI GLႇHUHQW N K VWDWLVWLFV VKHHWV WKHVH IRXU items only indicate today s statistics the present value the highest value so far the lowest value so far the sum so far 6 Last Reset Date The last date when Clear Kilowatt Hour was executed 7 9 2 Bypass Input Path MEASUREMENT ĺ SDVV QSXW After entering the BYPASS INPUT VFUHHQ VKRZQ LQ WKH JXUH EHORZ RX FDQ YLHZ WKH readings of Phas...

Page 196: ...y After entering the POWER MODULE SUMMARY screen 1 VKRZQ LQ WKH JXUH EHORZ RX can view each power module s Phase Voltage Current DC BUS Voltage PM A D and PM D D readings NOTE 1 means that the Administrator password is needed For password information please refer to 3DVVZRUG QWU Power Module Phase Voltage V Current A PM A D PM D D DC BUS Voltage V 1 On Off 25 0 25 0 25 0 360 0 360 0 220 0 220 0 22...

Page 197: ...25 2018 7 9 6 Battery Status Path MEASUREMENT ĺ DWWHU 6WDWXV After entering the BATTERY STATUS VFUHHQ VKRZQ LQ WKH JXUH EHORZ RX FDQ YLHZ WKH readings of Status Voltage Current Remaining Capacity Remaining Time Estimated Recharging Time Test Result Battery Temperature 1 4 and each power module s Charge Voltage 1 and Charge Current 1 NOTE 1 means that the Administrator password is needed For passwo...

Page 198: ...1 Batt Module 1 2 String Voltage String Current 280 0V 10 0A On Line 1 4 00 26 2 4 00 26 3 4 00 26 4 4 00 26 5 4 00 26 6 4 00 26 7 4 00 26 8 4 00 26 9 4 00 26 10 4 00 26 11 4 00 26 12 4 00 26 13 4 00 26 14 4 00 26 1 4 00 26 2 4 00 26 3 4 00 26 4 4 00 26 5 4 00 26 6 4 00 26 7 4 00 26 8 4 00 26 9 4 00 26 10 4 00 26 11 4 00 26 12 4 00 26 13 4 00 26 14 4 00 26 UPS 1 1 SETUP MAINTENANCE EVENT LOG LOG I...

Page 199: ...Probe please refer to RQQHFWLQJ WKH RSWLRQDO 06 QYLUR3UREH and the QYLUR3UREH 4XLFN XLGH attached in the package of the optional EMS 1000 EnviroProbe On Line 0 EMS0 25 4 C 52 ID 1 3 6 Security 1 2 qqqqq3 qqpo4 EMS1 25 8 C 51 Security 1 2 qqqqq3 qqpo4 EMS3 25 9 C 51 Security 1 2 qqqqq3 qqpo4 EMS6 C S1 L2 F3 S4 EMS UPS 1 1 SETUP MAINTENANCE LOG IN Administrator MEASUREMENT EMS 10 15 May 25 2018 2 WA...

Page 200: ...cted value is lower than the Recovery value 3 Humidity Green Normal Yellow Warning Red Alarm 4 DI1 Green None Information Yellow Warning Red Alarm 1 Shows the statuses of the input contacts 2 The Title NO NC and Event Type can be adjusted according to your needs DI2 DI3 DI4 1 If the status of the EMS 1000 EnviroProbe device ID is OFF gray as shown in WKH JXUH EHORZ LW PHDQV WKH FRPPXQLFDWLRQ RI WK...

Page 201: ...ouch Panel Comm Loss PFC 1 Fan Fault Please contact service personnel for more information Please contact service personnel for more information 2 After connection of the EMS 1000 EnviroProbe to the UPS if you don t set the status of the EMS 1000 EnviroProbe device ID as Enable please refer to 06 6HWWLQJ the information of the EMS 1000 EnviroProbe device ID will not show on the EMS screen If none ...

Page 202: ...EMS 1000 EnviroProbe please set the ID by the four ID DIP switches on the left of the device following 3 6ZLWFK 6HWWLQJV of the QYLUR3UREH 4XLFN XLGH NOTE 1 You must set the ID on the LCD according to the ID DIP switch setting on the EMS 1000 EnviroProbe device Please refer to 06 6HWWLQJ 2 The ID of each EMS 1000 EnviroProbe device connected to the UPS PXVW EH GLႇHUHQW 3 When connecting more than ...

Page 203: ...ge Min Set up the bypass output s minimum voltage ECO Voltage Range Set up the bypass output s voltage range in ECO mode 7 10 2 Mode Setting Path SETUP ĺ 0RGH 6HWWLQJ After entering the MODE SETTING screen 1 VKRZQ LQ WKH JXUH EHORZ RX FDQ VHW XS WKH UPS system mode of which there are 5 options On Line Mode Green Mode ECO Mode Energy Recycle Mode and Frequency Conversion Mode These settings must be...

Page 204: ...PS in ECO mode only when there is stable main AC power Otherwise power supply quality will be compromised Energy Recycle Mode Set up the UPS in Energy Recycle mode In Energy Recycle mode the full load output can be simulated for the aging test without real output to the loads Frequency Conversation Mode Set up the UPS in Frequency Conversation mode In Frequency Conversation mode it is the inverter...

Page 205: ...accordance with the bypass power Slew Rate Set up the maximum permissible speed for the system output frequency to catch up with the bypass frequency variation Power Module Redundancy Set up how many power modules that need to be preserved for redundancy Asynchronous Transfer Time When 1 the inverter is not synchronized with the bypass and 2 the loads need to be transferred to the bypass source th...

Page 206: ...attery Charging Setting BATTERY CHARGING SETTING 1 PAGE 3 PAGE 2 PAGE 4 PAGE Battery Type PbAc Battery Rating Voltage Submit Battery Low Warning Battery Cut Off Voltage Float Charge Voltage Equalized Charge Voltage Charge Current Max 450 A Capacity Battery Strings 1 10 15 May 25 2018 Whether it is Equalized Charge Voltage or Restored Voltage shown in this column it is determined by Battery Type Pl...

Page 207: ... MEASUREMENT Battery Charging Setting BATTERY CHARGING SETTING 1 PAGE 3 PAGE 2 PAGE 4 PAGE Low Temperature Alarm Enable Enable High Temperature Alarm Installation Date Next Replacement Date 10 15 May 25 2018 Item Description Battery Type Set up the battery type as VRLA LiB Dry Contact 1 LiB Integration 2 NOTE 1 1 If you use non Delta lithium ion batteries please set up the battery type as LiB Dry ...

Page 208: ...d to bypass if the bypass is available otherwise the UPS will shut down Capacity Set up the battery capacity Float Charge Voltage 6HW XS WKH ÀRDW FKDUJH YROWDJH Equalized Charge Voltage Set up the equalized charge voltage NOTE The item will only show up if the Battery Type is set as VRLA Restored Voltage Set up the restored voltage NOTE 1 The item will only show up if the Battery Type is set as Li...

Page 209: ... Please contact Delta customer service for assistance NOTE 1 means that the Administrator password is needed For password information please refer to 3DVVZRUG QWU Bypass 1 1 UPS 1 1 SETUP MAINTENANCE EVENT LOG LOG IN Administrator MEASUREMENT Parallel Setting PARALLEL SETTING Enable Parallel Group ID Parallel ID Common Battery 10 15 May 25 2018 Item Description Parallel Group ID The UPSs in parall...

Page 210: ...XVW EH FDUULHG RXW E TXDOL HG VHUYLFH SHUVRQQHO 3OHDVH FRQWDFW Delta customer service for assistance NOTE 1 means that the Administrator password is needed For password information please refer to 3DVVZRUG QWU Bypass 1 2 3 4 UPS 1 1 SETUP MAINTENANCE EVENT LOG LOG IN Administrator MEASUREMENT Dry Contact Setting DRY CONTACT SETTING INPUT OUTPUT Event Type Normally Open None None None None Normally...

Page 211: ... Contact 6 Select one of the following events as the setting for each output dry contact 1 None 2 Load on inverter 3 Load on bypass 4 Load on battery 5 Battery low 6 Battery input abnormal 7 Battery test fail 8 Internal comm fail 9 External parallel comm fail only applicable to parallel application 10 Output overload 11 EPO activated 12 Load on manual bypass 13 Battery over temperature 14 Output v...

Page 212: ...8 May 10 09 30 26 UPS 1 1 SETUP MAINTENANCE EVENT LOG LOG IN Administrator MEASUREMENT General Setting GENERAL SETTING DATE TIME SCREEN USER DUST FILTER Date Format Date Time 10 15 May 25 2018 Bypass 80 UPS 1 1 SETUP MAINTENANCE EVENT LOG LOG IN Administrator MEASUREMENT General Setting GENERAL SETTING DATE TIME SCREEN USER DUST FILTER Screen Brightness Screen Sleep after 1 min 10 15 May 25 2018 ...

Page 213: ...ay 23 UPS 1 1 SETUP MAINTENANCE EVENT LOG LOG IN Administrator MEASUREMENT General Setting GENERAL SETTING DATE TIME SCREEN USER DUST FILTER Dust Filter Installation Dust Filter Installation Date Dust Filter Replacement Date Enable 10 15 May 25 2018 Item Sub Item Description DATE TIME Date Format Select the date format Date Set up the date Time Set up the time SCREEN Screen Brightness Adjust the L...

Page 214: ...te 6HW XS WKH GXVW OWHU LQVWDOODWLRQ GDWH NOTE Only when you select Enable for Dust Filter Installation can you set up the Dust Filter Installation Date Dust Filter Replacement Date 6HW XS WKH GXVW OWHU UHSODFHPHQW GDWH When the date is due the red warning icon will automatically appear in the upper right corner of the LCD and the alarm message Replace Dust Filter will be displayed NOTE Only when ...

Page 215: ...P Setting Path SETUP ĺ 3 6HWWLQJ After entering the IP SETTING screen 1 shown in the figure below you can set up the IROORZLQJ LWHPV 7KHVH VHWWLQJV PXVW EH FDUULHG RXW E TXDOL HG VHUYLFH SHUVRQQHO 3OHDVH contact Delta customer service for assistance NOTE 1 means that the Administrator password is needed For password information please refer to 3DVVZRUG QWU Bypass 172 16 176 200 172 16 190 64 172 1...

Page 216: ...QJ LWHPV 7KHVH VHWWLQJV PXVW EH FDUULHG RXW E TXDOL HG VHUYLFH SHUVRQQHO 3OHDVH contact Delta customer service for assistance On Line UPS 1 1 SETUP MAINTENANCE EVENT LOG LOG IN Administrator MEASUREMENT Control CONTROL Buzzer Enable Force Equalized Charge Execute Force Bypass to Inverter Execute Reset Module Reset Reset System Reset 10 15 May 25 2018 Item Description Buzzer Enable or disable the b...

Page 217: ...successfully NOTE 1 means that the Administrator password is needed For password information please refer to 3DVVZRUG QWU 7 10 10 EMS Setting Path SETUP ĺ 06 6HWWLQJ After entering the EMS SETTING screen 1 VKRZQ LQ WKH JXUH EHORZ RX FDQ VHW XS WKH IROORZLQJ LWHPV 7KHVH VHWWLQJV PXVW EH FDUULHG RXW E TXDOL HG VHUYLFH SHUVRQQHO 3OHDVH contact Delta customer service for assistance NOTE 1 means that t...

Page 218: ... JXUHV DERYH Item Sub Item Description SENSOR ID Set the ID ID 0 ID 1 ID 15 according to the ID DIP switch setting of the EMS 1000 EnviroProbe device NOTE If the ID setting is wrong the warning message The EMS 1000 ID Communication Fail will appear Title Set the title for each EMS 1000 EnviroProbe device Status The status Enable Disable determines whether or not the LCD shows the EMS information o...

Page 219: ...ound No Yes Warning Yellow Yellow Short Beep Yes Yes Alarm Red Red Long Beep Yes Yes All the above settings are related to the items shown on the EMS screen in the MEASUREMENT ĺ EMS Please refer to 06 7 11 System Maintenance 7 11 1 Alarm Warning Path 1 MAINTENANCE ĺ DUQLQJ Path 2 When there is a warning the buzzer icon will light up in red and the buzzer will make an alarm sound Tap the warning ic...

Page 220: ... the event is When the total number of historical event logs exceeds the storage capacity up to 10000 entries the oldest 500 historical event logs will be overwritten You can tap the download icon DOWNLOAD 1 to download the historical event logs To clear the historical event logs please refer to OHDU NOTE 1 means that the Administrator password is needed For password information please refer to 3D...

Page 221: ...15 07 15 02 10 15 May 25 2018 2 WARNING 7 11 3 Statistics Path MAINTENANCE ĺ 6WDWLVWLFV After entering the STATISTICS screen shown in the figure below you can view the following statistics 3 1 3 1 147 In Battery Mode Battery Mode Duration In Bypass Mode Bypass Mode Duration Operation Time times hours times hours hours On Line UPS 1 1 SETUP MAINTENANCE LOG IN Administrator MEASUREMENT Statistics EV...

Page 222: ...ery Test Start 10 15 May 25 2018 7 11 5 Clear Path MAINTENANCE ĺ OHDU After entering the CLEAR screen 1 VKRZQ LQ WKH JXUH EHORZ RX FDQ FOHDU WKH UHFRUGV RI 1 statistics 2 historical event 3 battery test result and 4 kilowatt hour kWh NOTE 1 means that the Administrator password is needed For password information please refer to 3DVVZRUG QWU On Line UPS 1 1 SETUP MAINTENANCE LOG IN Administrator ME...

Page 223: ...orical event 3 battery test result and 4 kilowatt hour kWh provide important information for system analysis and maintenance Do not clear any of them without the consent of qualified service personnel 7 11 6 Advanced Diagnosis Path MAINTENANCE ĺ GYDQFHG LDJQRVLV After entering the ADVANCED DIAGNOSIS screen 1 VKRZQ LQ WKH JXUH EHORZ RX FDQ check 1 STS temperature battery temperature and fan speed o...

Page 224: ...2 The Administrator password is needed for the icon UPGRADE For password information please refer to 3DVVZRUG QWU Path MAINTENANCE ĺ 9HUVLRQ 6 1 After entering the VERSION S N VFUHHQ VKRZQ LQ WKH JXUH EHORZ RX FDQ FKHFN DQG update every version and serial number For detailed information please refer to the table below Bypass INV PFC EA017700017W0 EA017700018W0 EA017700019W0 EA017700020W0 EA0177000...

Page 225: ...A001AR00 00 00 0H0014AR00 07 00 0H0014AR00 07 00 0H0014AR00 07 00 4A001AR00 00 00 4A001AR00 00 00 4A001AR00 00 00 INV PFC UPS 1 1 SETUP MAINTENANCE LOG IN Administrator MEASUREMENT EVENT LOG Version S N VERSION S N MAIN S N UPGRADE Choose File PM 01 PM 03 PM 05 PM 02 PM 04 PM 06 10 15 May 25 2018 Bypass INV PFC UPS 1 1 SETUP MAINTENANCE LOG IN Administrator MEASUREMENT EVENT LOG Version S N VERSIO...

Page 226: ... UPZDUH YHUVLRQ RI D VSHFL F SRZHU PRGXOH V LQYHUWHU PFC PM _ MCU FPGA KHFN DQG XSGDWH WKH 0 8 RU 3 UPZDUH YHUVLRQ RI D VSHFL F SRZHU PRGXOH V 3 NOTE The screen MFC VKRZQ LQ WKH IROORZLQJ JXUH ZLOO RQO DSSHDU RQ WKH LI RX use the Delta lithium ion batteries with the optional multifunctional communication card MFC being installed in the smart slot shown in LJXUH Please contact Delta customer servic...

Page 227: ...8 1 8 Optional Accessories 8 Optional Accessories ...

Page 228: ...ort For more information about the application of the EMS 1000 EnviroProbe please refer to 06 4 Battery Cabinet Temperature Sensor Cable Detects the temperature of an external battery cabinet connected to the UPS 5 Parallel Cable 5 meter long Connects the parallel UPSs 6 Parallel Cable 10 meter long Connects the parallel UPSs 7 Battery Management System BMS If you use the lead acid batteries it is...

Page 229: ...O 6HWWLQJ and 9HUVLRQ 6 1 Please contact Delta customer service if you need more information NOTE For parallel UPSs you must install one multifunctional com munication card MFC in each parallel UPS if you use the Delta lithium ion batteries NOTE 1 For details of installation and operation of the accessories mentioned above please refer to the 4XLFN XLGH 8VHU XLGH or QVWDOODWLRQ 2SHUDWLRQ XLGH incl...

Page 230: ......

Page 231: ...9 1 9 Maintenance Maintenance ...

Page 232: ...ng to battery life However the actual battery life depends on the environment temperature usage and charging discharging frequency High temperature environments and high charging discharging frequency will quickly shorten the battery life thus battery inspection and maintenance are required periodically Please follow the suggestions below to ensure normal battery life 1 Keep usage temperature betw...

Page 233: ...A1 1 Appendix 1 7HFKQLFDO 6SHFL FDWLRQV Technical 6SHFL FDWLRQV A1 A1 ...

Page 234: ...linear load Power Factor 1 Frequency 50 60 Hz Overload Capability PLQXWHV PLQXWH 150 1 second Display 10 Touch Panel Interface Standard External battery temperature detection 4 External switch breaker status dry contact 4 Output dry contact 6 Input dry contact 4 Parallel port 4 USB type A 2 USB type B 1 RS 232 port 1 MODBUS port 1 BMS RJ45 1 Ethernet 1 SMART slot 1 REPO 1 ႈFLHQF Online Mode up to ...

Page 235: ...allel Redundancy Yes up to 8 units PHUJHQF 3RZHU 2ႇ Yes remote default local optional Battery start Yes Physical Dimensions W D H 600 1100 2000 mm 23 62 43 31 78 74 Weight UPS 311 kg 685 6 lb without power modules Power module optional 36 kg 79 4 lb 383 kg 844 4 lb 419 kg 923 7 lb 455 kg 1003 1 lb 491 kg 1082 5 lb 527 kg 1161 8 lb NOTE 1 1 When input vTHD is 1 2 2 At a distance of 1 meter 3 28 ft ...

Page 236: ......

Page 237: ...A2 1 Appendix 2 Warranty Warranty A2 A2 ...

Page 238: ... force i e war fire natural disaster etc and this warranty also expressly excludes all incidental and consequential damages Maintenance service for a fee is provided for any damage out of the warranty period If any maintenance is required please directly contact the supplier or Seller WARNING The individual user should take care to determine prior to use whether the environment and the load charac...

Page 239: ...cha Gasan dong Geumcheon gu Seoul Korea 153 704 T 82 2 515 5303 E ups south korea deltaww com Delta Electronics Int l Singapore Pte Ltd 4 Kaki Bukit Ave 1 05 04 Singapore 417939 T 65 6747 5155 E ups singapore deltaww com Australia Thailand South Korea Singapore Delta Electronics Thailand Public Co Ltd 909 Soi 9 Moo 4 E P Z Bangpoo Industrial Estate Tambon Prakasa Amphur Muang samutprakarn Samutpra...

Page 240: ... ...
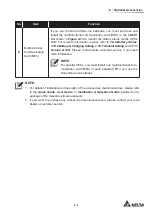
Reviews: