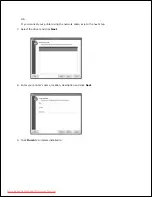
2.
3.
Double-click the
MAC_Installer
folder.
4.
Double-click the
MAC_Printer
folder.
5.
Double-click the
Dell Laser MFP Installer
icon.
6.
Enter the password and click
OK
.
7.
Click
Continue
.
8.
Select
Easy Install
and then click
Install
.
9.
After the installation is finished, click
Quit
.
10.
UnInstall the printer driver
Insert the
DRIVERS AND UTILITIES CD
which came with your printer into the CD-ROM drive.
1.
Double-click
CD-ROM icon
that appears
on your Macintosh desktop.
2.
Double-click the
MAC_Installer
folder.
3.
Double-click the
MAC_Printer
folder.
4.
Double-click the
Dell Laser MFP Installer
icon.
5.
Enter the password and click
OK
.
6.
Click
Continue
.
7.
Click
Uninstall
and then click
Uninstall
.
8.
After the uninstallation is finished, click
Quit
.
9.
Install the Scan driver
Ensure that you connect your printer to the computer. Turn on your computer and printer.
1.
Insert the
DRIVERS AND UTILITIES CD
which came with your printer into the CD-ROM drive.
2.
Double-click
CD-ROM icon
that appears
on your Macintosh desktop.
3.
Double-click the
MAC_Installer
folder.
4.
Double-click the
MAC_Twain
folder.
5.
Double-click the Installer icon.
6.
Enter the password and click
OK
.
7.
Click
Continue
.
8.
Click
Install
.
9.
10.
Downloaded from ManualsPrinter.com Manuals


