Eclipse
|
Upgrade Guide
Page 128
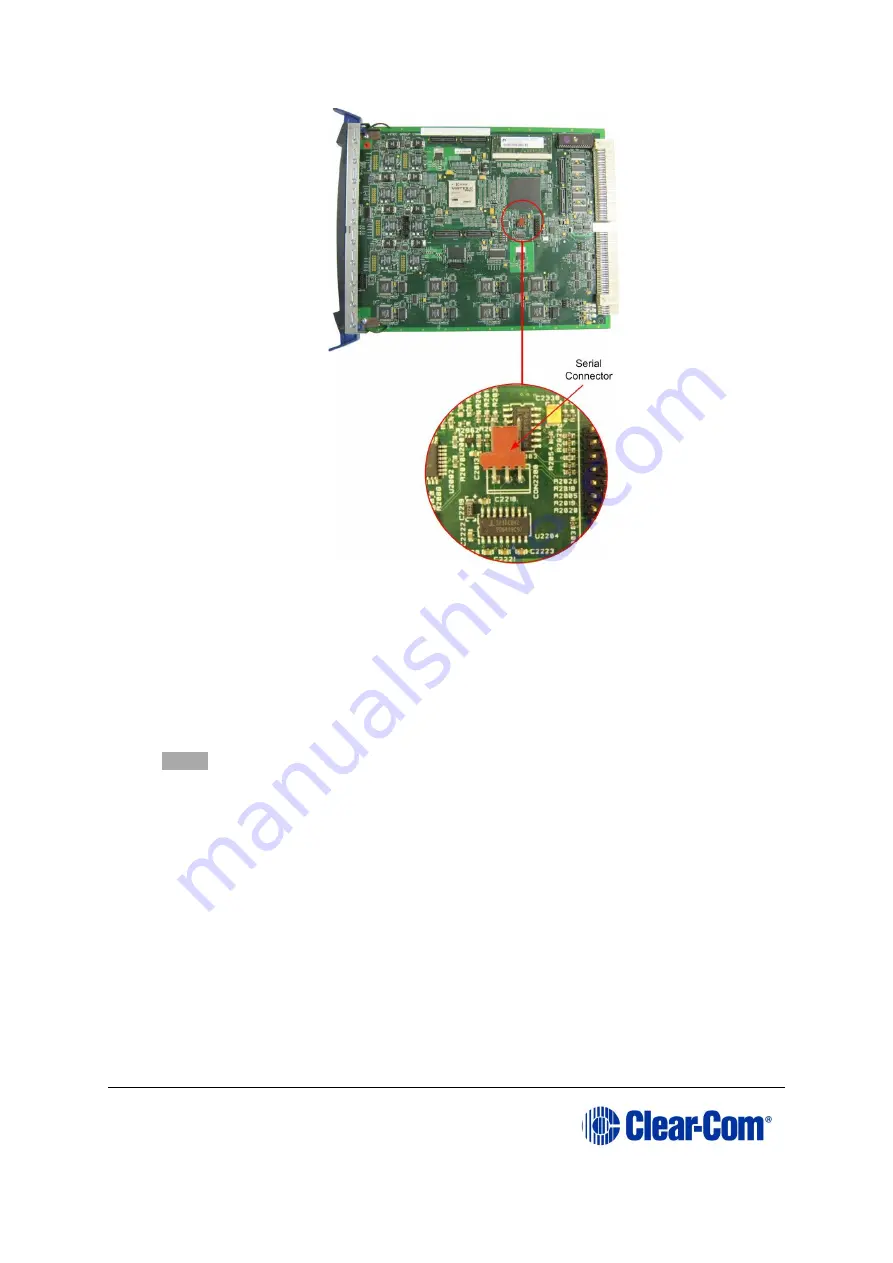
Figure 9-7: E-QUE MK1 card serial connector
12. If it is not already powered up, power up the Eclipse HX-Median / Eclipse HX-Omega /
Eclipse HX-Delta matrix.
13. Ensure that the E-QUE card and the PC are both connected to the Ethernet network in some
way, or are connected using a crossover Ethernet cable.
The LAN connector on the E-QUE card is the highest RJ-45 socket on the back panel. When
the E-QUE card is connected to the PC or to the network, check that the LAN LEDs (the
yellow
and
green
lights at the bottom of the card) are flashing occasionally, indicating a
network connection.
14. In Tera Term, select
Control > Macro
and then navigate to the
c:\tftp
directory
.
Open
combined_eque_upgrade.ttl
and follow the macro instructions.
Note:
The macro should reset and re-boot the E-QUE card automatically. However, if it does not,
you may have to reset the E-QUE card using the reset button on the front. The reboot should
be seen on the serial console. This reset is essential, as it permits Tera Term to interrupt the
boot process.
15. The Macro will detect the card as a MKI. You will be prompted to verify the card has a green
PCB by the macro. If the card is Blue, it is a MKII.
16. Enter the following information to enable the download:
a. Enter an IP address for the E-QUE card. This address must be in the same range
as your PC IP address (for example,
192.168.42.5
).
b. Enter your PC IP address (for example,
192.168.42.1)


