Step 4
Tilt the DIMM to approximately the same angle as the socket and insert the connector edge into the socket. Note the
two notches (keys) on the connector edge of the DIMM. These keys are intended to ensure correct orientation of the
DIMM in the socket.
When inserting DIMMs, use firm but not excessive pressure. If you damage a socket, you will have to return
the route processor to the factory for repair.
Caution
Step 5
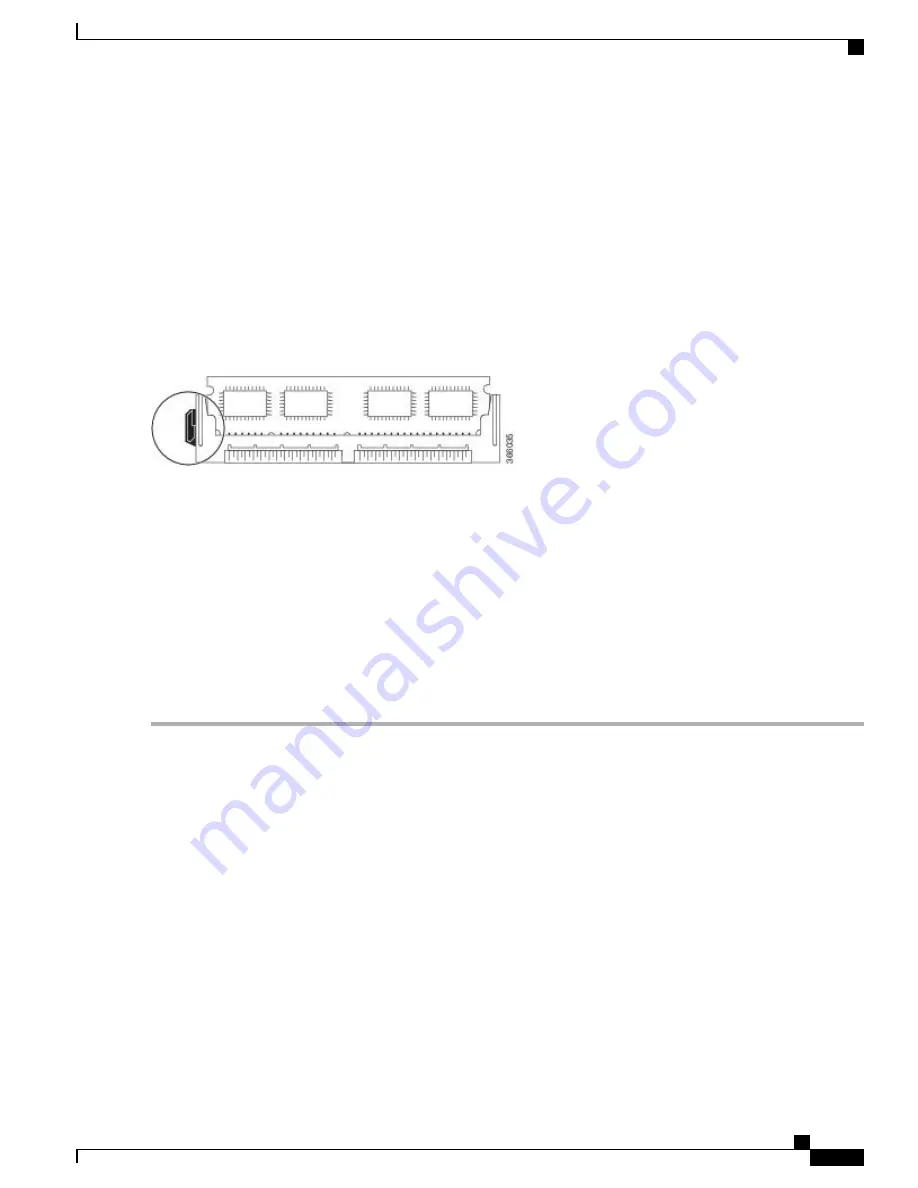
Note the orientation of the socket key on the DIMM and the DIMM socket, and gently push the DIMM into the socket
until the lever is flush against the side of the DIMM socket, and the DIMM edge connector is fully inserted. If necessary,
rock the DIMM gently back and forth to seat it properly. The following figure shows how to install the DIMM in the
socket for the Cisco ASR 1001 Router.
Figure 250: Installing the DIMM in the Socket for the Cisco ASR 1001 Router
Step 6
After the DIMM is installed, check whether the release lever is flush against the side of the DIMM socket. If it is not,
the DIMM might not be seated properly. If the DIMM appears misaligned, carefully remove it according to the removal
procedure and then reseat it in the socket. Push the DIMM firmly back into the socket until the release lever is flush
against the side of the DIMM socket.
Step 7
Repeat Step 4 through Step 6 for the remaining DIMMs.
Step 8
Replace the Cisco ASR 1001 Router top cover:
a) Slide the cover onto the chassis ensuring that the interlock hook feature fits on the chassis cover and base, as shown
in xref Figure 14-21, callout 4.
b) Tighten the top surface screws and then the three screws on the front faceplate.
Step 9
Install the power supplies into the chassis. See: xref Installing AC Input Power to Cisco ASR 1001 Router, xref Installing
DC Input Power on the Cisco ASR 1001 Router
What to Do Next
This completes the procedure for replacing the Cisco ASR 1001 Router DIMMs.
After you have correctly installed the Cisco ASR 1001 Router DIMMs, the system should reboot properly.
If the system fails to reboot properly or if the console terminal displays a checksum or memory error after
you have installed new DIMMs, check the following:
•
Ensure that all the DIMMs are installed correctly. If necessary, shut down the system and remove the
chassis cover. Check the DIMMs by looking straight down on them to inspect them at eye level. The
DIMMs should all be aligned at the same angle and the same height when properly installed. If a DIMM
appears to stick out or rest in the socket at a different angle from the others, remove the DIMM and
reinsert it. Replace the top chassis cover, and reboot the system for another installation check.
•
Ensure that all the DIMMs are from the same manufacturer and part number.
Cisco ASR 1000 Series Router Hardware Installation Guide
513
Removing and Replacing FRUs from the Cisco ASR 1000 Series Routers
Removing and Replacing the Cisco ASR 1001 Router DIMM Memory Modules
Summary of Contents for ASR 1001
Page 2: ... 2013 2017 Cisco Systems Inc All rights reserved ...
Page 20: ...Cisco ASR 1000 Series Router Hardware Installation Guide xx Contents ...
Page 30: ...Cisco ASR 1000 Series Router Hardware Installation Guide xxx Preface Warning Definition ...
Page 32: ...Cisco ASR 1000 Series Router Hardware Installation Guide xxxii Preface Warning Definition ...


