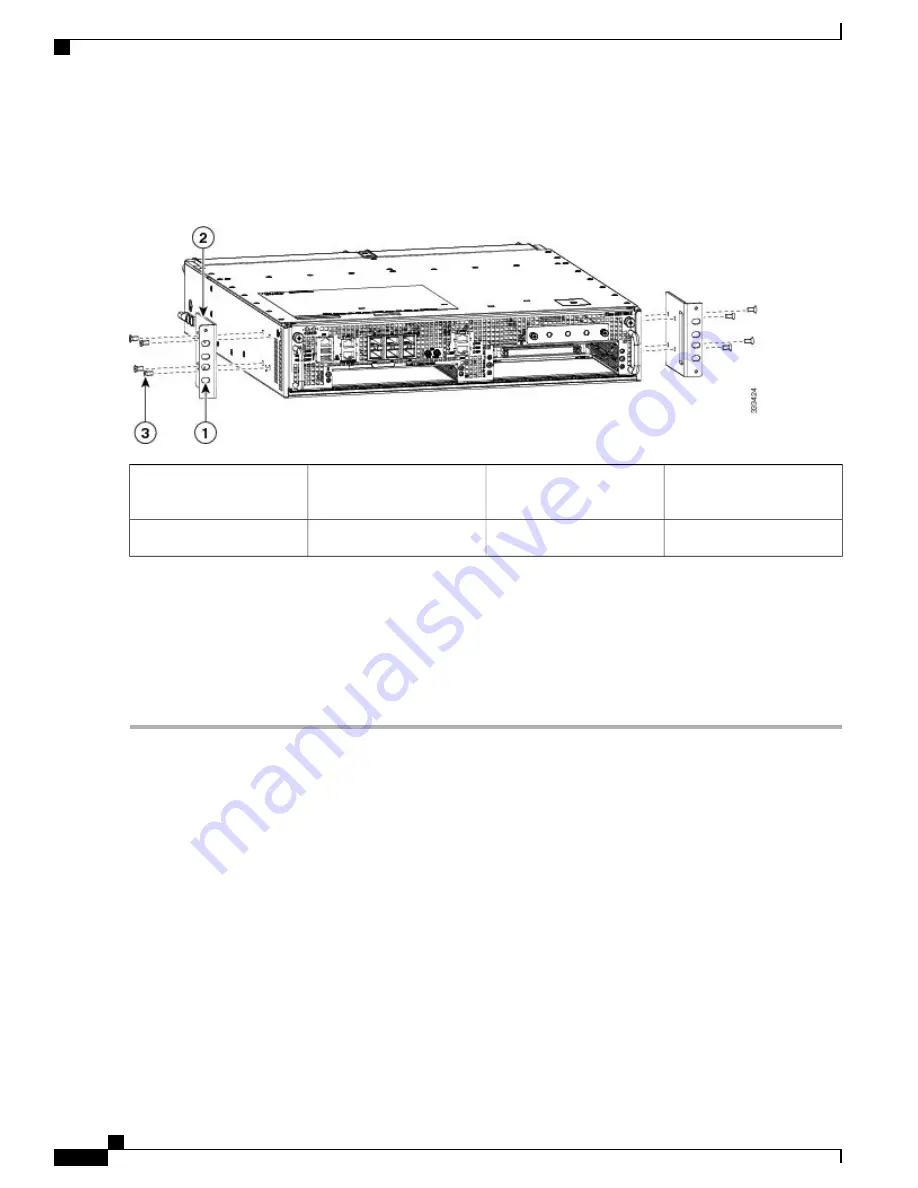
The following image shows where to attach the front rack mount brackets to the Cisco ASR 1002-X Router.
Figure 154: Attaching the Front Rack Mount Brackets to the Cisco ASR 1002-X Router
Front rack mount bracket
screws
3
Front rack mount bracket ear
and holes
1
—
Front rack mount bracket
2
Step 2
Position the front rack mount bracket
’
s top hole with the chassis, first top hole behind the side vent holes.
Step 3
Insert and tighten the black screws shipped with the router on one side.
Step 4
Repeat Step 1 through Step 3 on the other side of the chassis. Use the black screws to secure the rack mount brackets to
the chassis.
Step 5
Install the chassis in a rack. To install the Cisco ASR 1002-X Router in a rack, see the information provided in the
Installing the Cisco ASR 1002-X Router in a Rack, on page 340
.
What to Do Next
This completes the steps for attaching the front rack mount brackets to the Cisco ASR 1002-X Router.
Chassis Rear Rack Mount Brackets
If you are rack mounting the chassis using the rear rack mount brackets, the chassis gets recessed in the rack.
To install the rear rack mount brackets on the Cisco ASR 1002-X Router, perform the following steps:
Cisco ASR 1000 Series Router Hardware Installation Guide
338
Cisco ASR 1002-X Router Overview and Installation
Chassis Rear Rack Mount Brackets
Summary of Contents for ASR 1001
Page 2: ... 2013 2017 Cisco Systems Inc All rights reserved ...
Page 20: ...Cisco ASR 1000 Series Router Hardware Installation Guide xx Contents ...
Page 30: ...Cisco ASR 1000 Series Router Hardware Installation Guide xxx Preface Warning Definition ...
Page 32: ...Cisco ASR 1000 Series Router Hardware Installation Guide xxxii Preface Warning Definition ...


