


6-29
Routine Maintenance
6
Adjusting the Printing Position
4
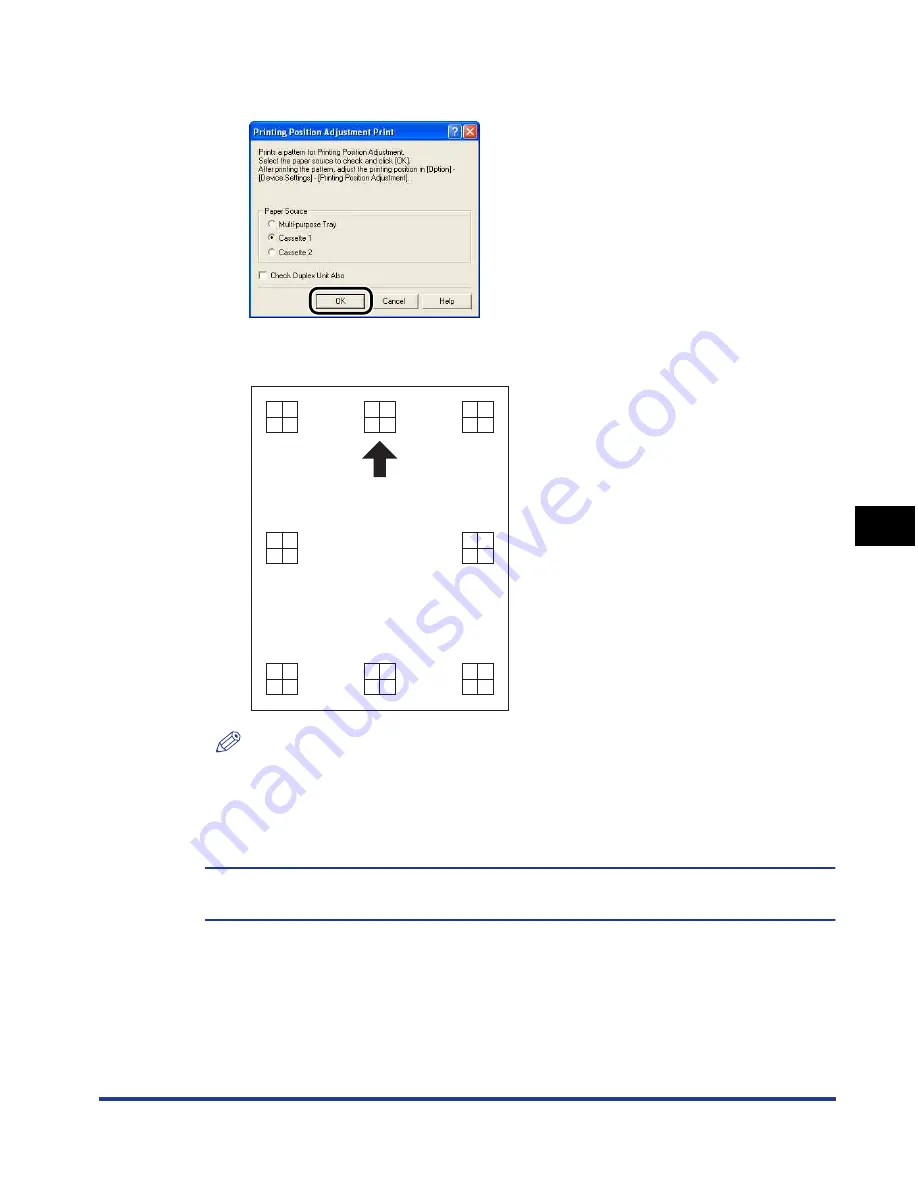
Click [OK].
The Printing Position Adjustment Print is printed as shown in the following. The
printed arrow is the top edge of the Printing Position Adjustment Print.
NOTE
When you print the Printing Position Adjustment Print with the [Check Duplex Unit
Also] check box selected in Step 3, the side on which a solid black arrow is printed
is to be the printout result of the front side, and the side on which an outlined arrow
is printed is to be that of the back side.
Next, check the printout results and specify the position to be adjusted in "Adjusting the
Printing Position" (See p. 6-30).
Summary of Contents for i-SENSYS LBP5300 Series
Page 2: ...LBP5300 Laser Printer User s Guide ...
Page 39: ...1 12 Before You Start 1 Optional Accessories ...
Page 140: ...3 65 2 sided Printing Loading and Outputting Paper 3 9 Click OK to start printing ...
Page 141: ...3 66 2 sided Printing Loading and Outputting Paper 3 ...
Page 335: ...5 102 Printing a Document 5 Printer Status Window ...
Page 381: ...6 46 Routine Maintenance 6 Handling the Printer ...
Page 403: ...7 22 Troubleshooting 7 Paper Jams 1 Turn the power of the printer OFF 2 Open the top cover ...
Page 470: ...9 7 Appendix 9 Dimensions of Each Part PAPER FEEDER PF 93 405 568 165 4 mm Front Surface ...


