


• All settings returned to their default values
• All logs deleted
If you remove a drive and then erase all data on the TeraStation, the LCD panel will show the E22 message and the
number of the removed drive. You can still use the TeraStation.
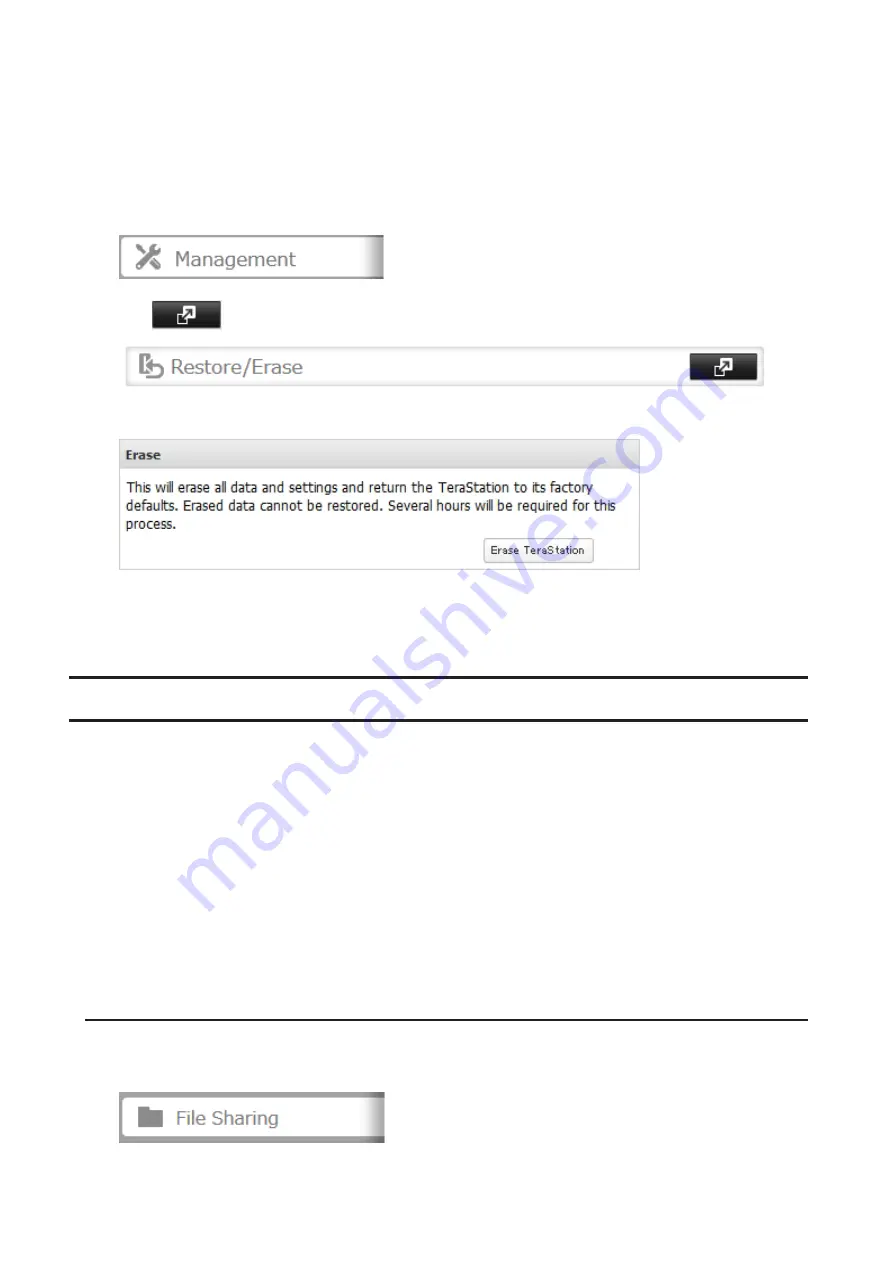
Follow the procedure below to completely and permanently erase all data from your TeraStation.
1
From Settings, click
Management
.
2
Click
to the right of “Restore/Erase”.
3
Click
Erase TeraStation
.
4
The “Confirm Operation” screen will open. Enter the confirmation number, then click
OK
.
5
All data on the TeraStation will be permanently erased.
Drive Quotas
You can set a drive quota to limit drive space for each user or group. You can also set a threshold. If the drive space
exceeds the configured threshold, an email notification will be sent. To configure email notifications for the drive
quota, refer to the “Email Notification” section in chapter 10.
Notes:
• When using quotas, disable the recycle bin or empty the trash folder often. The limited space includes the space
used for trash.
• Quotas apply per drive or per array. If a quota is set to 1 GB, each array or drive can use a maximum of 1 GB.
• Quotas cannot be set for external drives connected to the TeraStation and drives that are configured as media
cartridges.
• If both user and group quotas are configured for a user, the most restrictive quota will always apply.
• Make sure that SMB2 is disabled before using quotas on the TeraStation.
Quotas for Users
Follow this procedure to limit the shared folder drive space available for a user.
1
From Settings, click
File Sharing
.
55
Summary of Contents for terastation 3000
Page 23: ...4 Configure the desired settings then click OK 22...
Page 26: ...3 Click Create User 25...
Page 29: ...3 Click Add Group 28...
Page 109: ...6 Click Time Machine 108...
Page 110: ...7 Click Select Backup Disk 8 Select the shared folder and click Use Disk 109...
Page 134: ...4 Open the License tab then click Activate Free License To deactivate the license click 133...
Page 136: ...3 Click Next 4 Click Find Cameras 135...
Page 142: ...2 Select the search criteria on the left side of the search screen then click Search 141...
Page 143: ...3 The search results are displayed Click a thumbnail to start the media viewer 142...


