


2
From Settings, click
Network
.
3
Click
to the right of “Port Trunking”.
4
Choose a port trunking link.
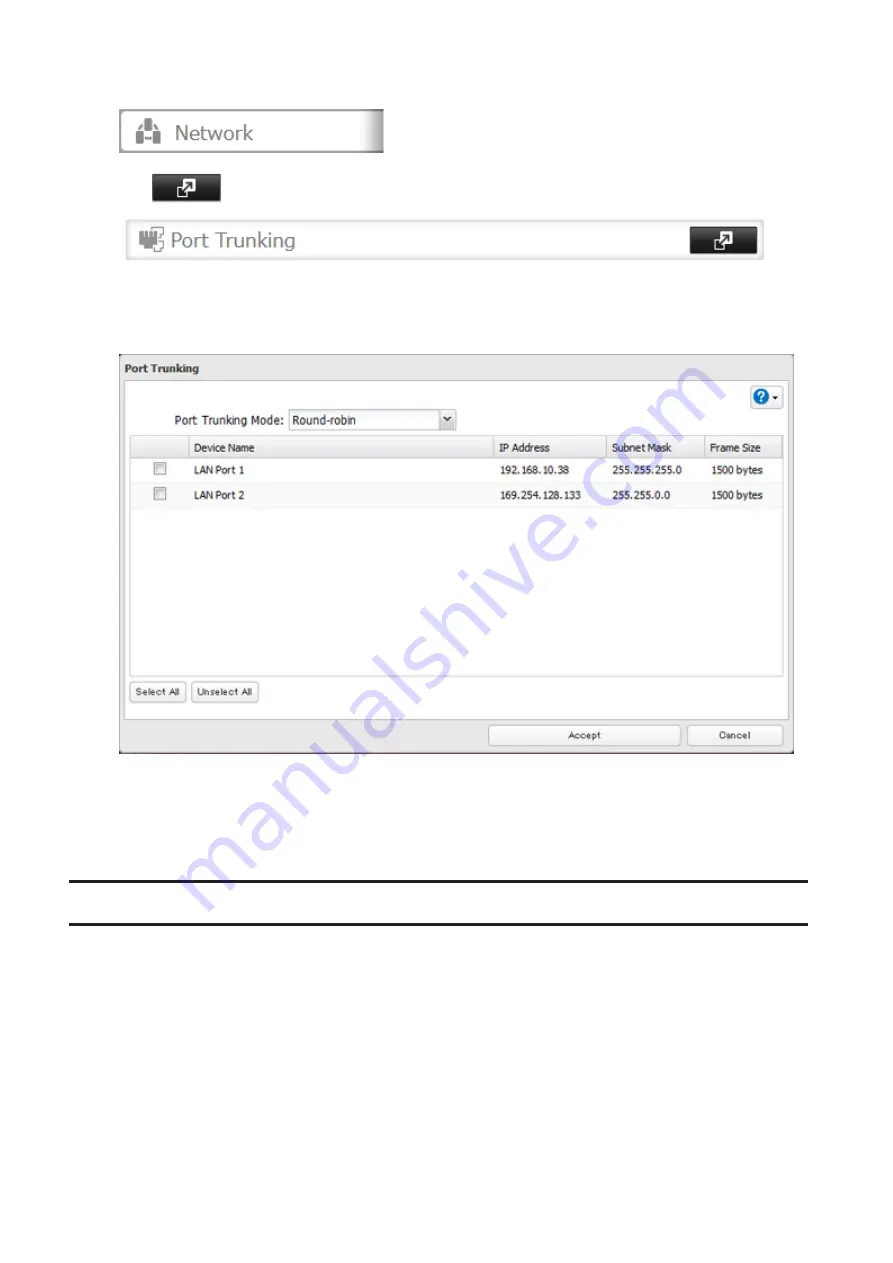
5
Select the LAN port that will be used, select the port trunking mode, and click
Accept
.
6
Connect the hub’s LAN port and TeraStation’s LAN port using the second LAN cable. If you are using an
intelligent switch, connect to the LAN port that was previously configured for port trunking.
7
Restart the TeraStation before use.
Connecting a Printer
You can connect a printer to the USB port on the TeraStation.
Notes:
• Only one USB printer can be connected to the TeraStation.
• Bidirectional communication is not supported i.e., remaining ink quantities and other printer status information
are not displayed.
• If a multifunctional printer is connected, only the printer function can be used. Other functions such as scanning
will not be available.
• The print server does not support macOS.
• Don’t disable the SMB protocol while the print server is enabled. If you do, you will need to enable SMB again and
reconfigure the print server from scratch.
178
Summary of Contents for terastation 3000
Page 23: ...4 Configure the desired settings then click OK 22...
Page 26: ...3 Click Create User 25...
Page 29: ...3 Click Add Group 28...
Page 109: ...6 Click Time Machine 108...
Page 110: ...7 Click Select Backup Disk 8 Select the shared folder and click Use Disk 109...
Page 134: ...4 Open the License tab then click Activate Free License To deactivate the license click 133...
Page 136: ...3 Click Next 4 Click Find Cameras 135...
Page 142: ...2 Select the search criteria on the left side of the search screen then click Search 141...
Page 143: ...3 The search results are displayed Click a thumbnail to start the media viewer 142...


