


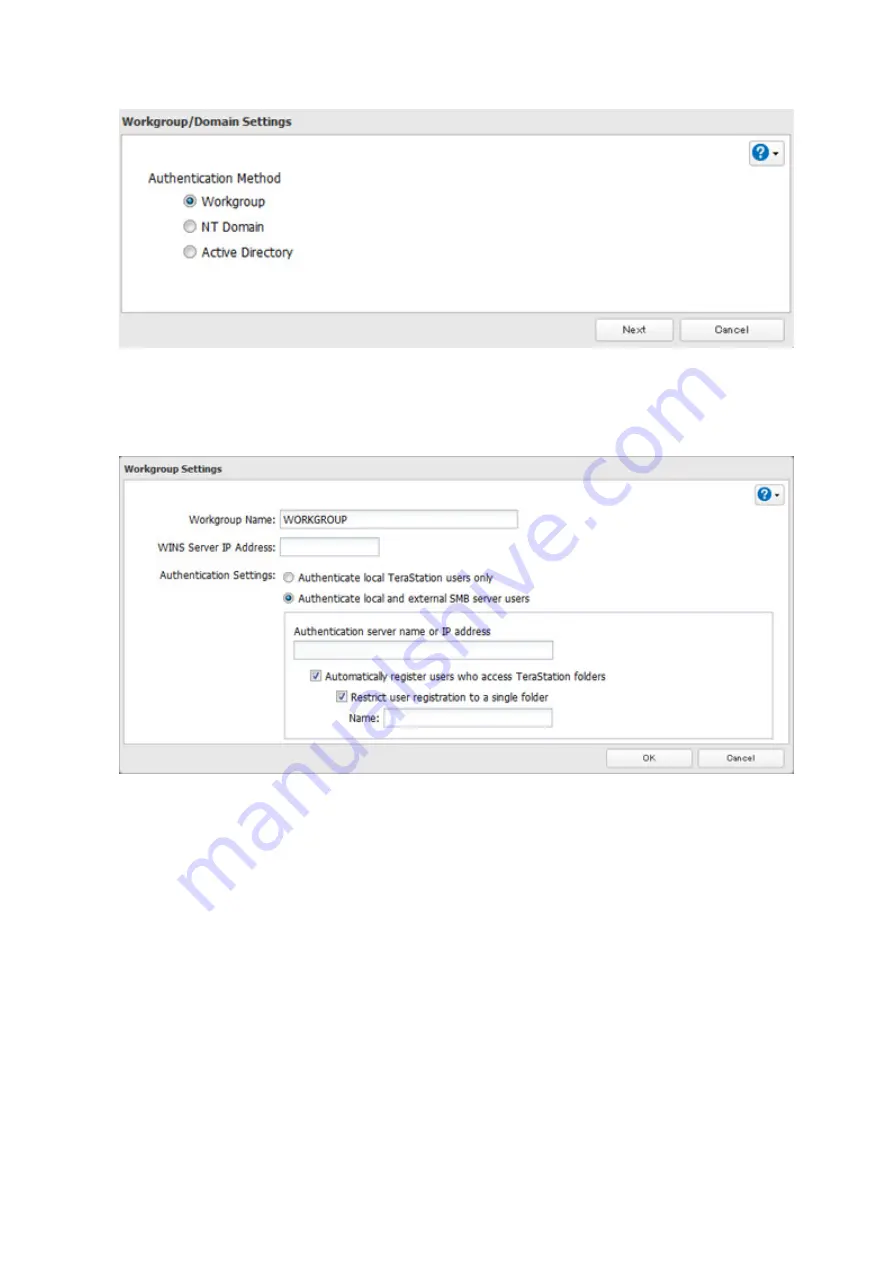
4
Select “Workgroup” and click
Next
.
5
If a prompt appears, click
Yes
.
6
Enter a workgroup name. Select “Authenticate local and external SMB server users” and enter the SMB server’s
IP address. You can also specify a server from another subnet.
7
If “Automatically register users who access TeraStation folders” is checked, users that access any of the
TeraStation’s folders will be automatically registered as external users. This process only applies to folders that
have access restrictions disabled. After new external users are added, disable this option to limit the number of
authenticated user accounts.
8
If “Restrict user registration to a single folder” is checked, the TeraStation will automatically create a read-
only shared folder. Enter the shared folder name. Users that access this specific folder will be automatically
registered as external users. If this setting is deselected at a later time, the TeraStation will automatically
remove the folder.
Note:
Connect to the authentication folder via SMB, not FTP or AFP. Automatic user registration may not
work with OS X 10.8 (or later) the first time. If this occurs, try rebooting the TeraStation then access the
authentication shared folder again.
9
Click
OK
to save any changes. When saving changes to the external authentication server settings, you may
not convert all current local users to external users. If a local user is converted to an external user, their user
information (including passwords) will be removed from the NAS. External users cannot be reverted to local
users.
37
Summary of Contents for terastation 3000
Page 23: ...4 Configure the desired settings then click OK 22...
Page 26: ...3 Click Create User 25...
Page 29: ...3 Click Add Group 28...
Page 109: ...6 Click Time Machine 108...
Page 110: ...7 Click Select Backup Disk 8 Select the shared folder and click Use Disk 109...
Page 134: ...4 Open the License tab then click Activate Free License To deactivate the license click 133...
Page 136: ...3 Click Next 4 Click Find Cameras 135...
Page 142: ...2 Select the search criteria on the left side of the search screen then click Search 141...
Page 143: ...3 The search results are displayed Click a thumbnail to start the media viewer 142...


