


Notes:
• If the target shared folder specified as the storage location for recorded video is deleted, the surveillance camera
is automatically disabled.
• Do not directly edit recorded video data in the shared storage folder. If a file is directly edited, the surveillance
camera may no longer operate properly.
• Do not duplicate or back up the recorded videos with the backup or replication functions in the TeraStation’s
Settings. A separate backup license must be purchased to back up this data to another TeraStation.
• The client tools can only be used with the LAN connected to the selected LAN port.
• Failover and surveillance cameras are not compatible. Therefore surveillance cameras cannot be used if failover is
configured. Conversely, failover cannot be used if surveillance camera functionality is enabled.
Use with Two or More Network Cameras
In the default settings, only one network camera can be used. To use two or more network cameras, additional
licenses (sold separately) must be purchased and registered. For more details to add licenses and registration, see
the “Activating Additional Licenses” section.
Enabling the Free License
Your TeraStation comes with a license for one surveillance camera. Follow the procedure below to enable the
included license.
Note:
If port trunking is enabled, the free license cannot be activated. To activate the license, disable port trunking,
then follow the procedure below.
1
Connect the TeraStation to the Internet.
2
Click
Start
>
BUFFALO
>
BUFFALO Surveillance Server
>
Vault Admin
.
For Windows 8.1 and Windows 8, click
Vault Admin
in the Start menu.
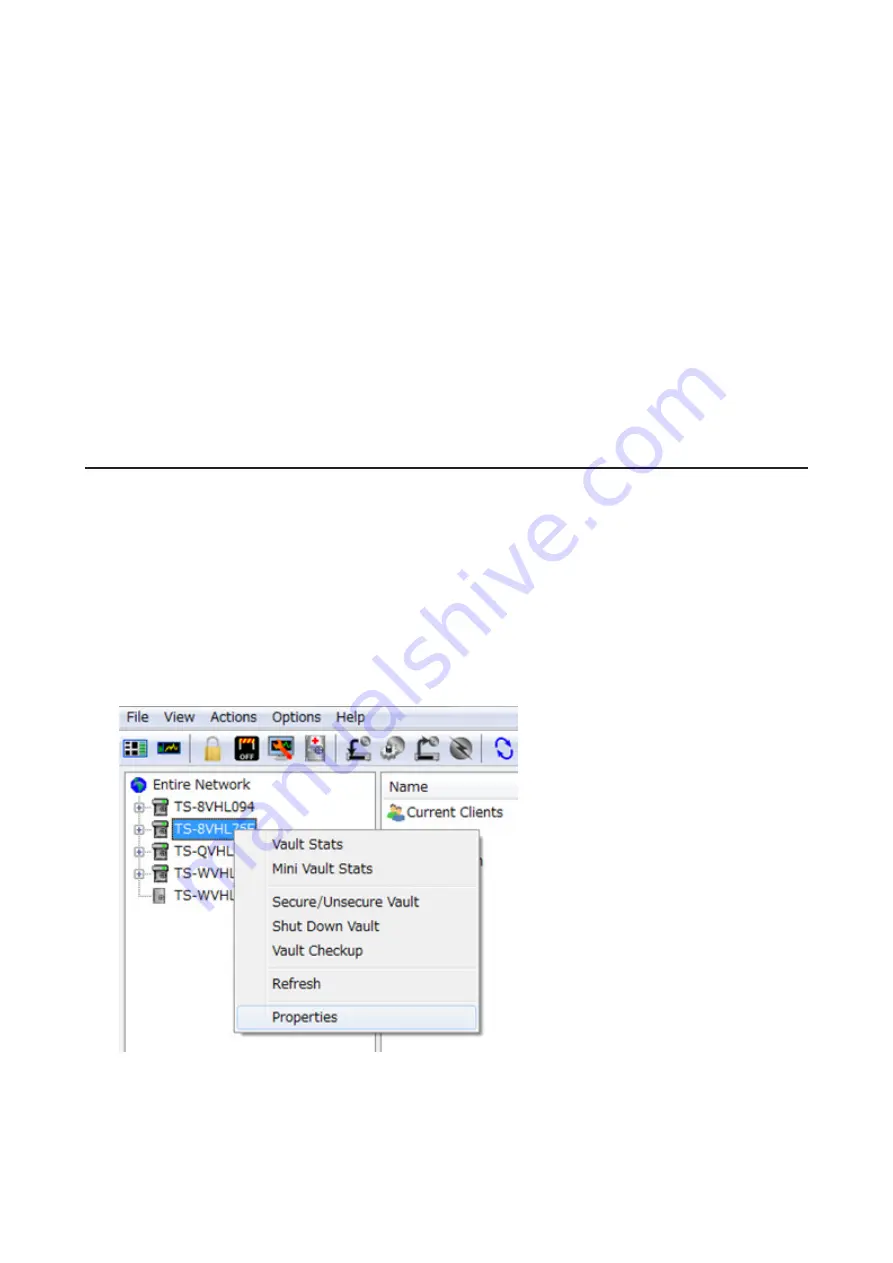
3
Select the TeraStation where you want to add the license, right-click it, and click
Properties
.
Note:
If your computer joins a Public network, the TeraStations may not be detected. In such case, let the
computer joins a Home or Work network.
132
Summary of Contents for terastation 3000
Page 23: ...4 Configure the desired settings then click OK 22...
Page 26: ...3 Click Create User 25...
Page 29: ...3 Click Add Group 28...
Page 109: ...6 Click Time Machine 108...
Page 110: ...7 Click Select Backup Disk 8 Select the shared folder and click Use Disk 109...
Page 134: ...4 Open the License tab then click Activate Free License To deactivate the license click 133...
Page 136: ...3 Click Next 4 Click Find Cameras 135...
Page 142: ...2 Select the search criteria on the left side of the search screen then click Search 141...
Page 143: ...3 The search results are displayed Click a thumbnail to start the media viewer 142...


