


Notes:
• Don’t disable the SMB protocol while DFS is enabled. If you do, you will need to enable SMB again and
reconfigure DFS from scratch.
• TeraStations, LinkStations, and SMB-compatible Windows computers can be specified as DFS link targets (macOS
and Linux are not supported).
Accessing from an NFS Client
Note:
(US customers only) Buffalo’s customer support will help configure the NFS settings on your TeraStation, and
will support VMware and Windows clients but will not provide support for configuring your Linux or other UNIX
clients. There are various types of UNIX and the procedures for configuring NFS with them will vary considerably.
For help configuring your NetWare, Linux, or other UNIX clients for NFS support, please consult each client’s own
documentation and support.
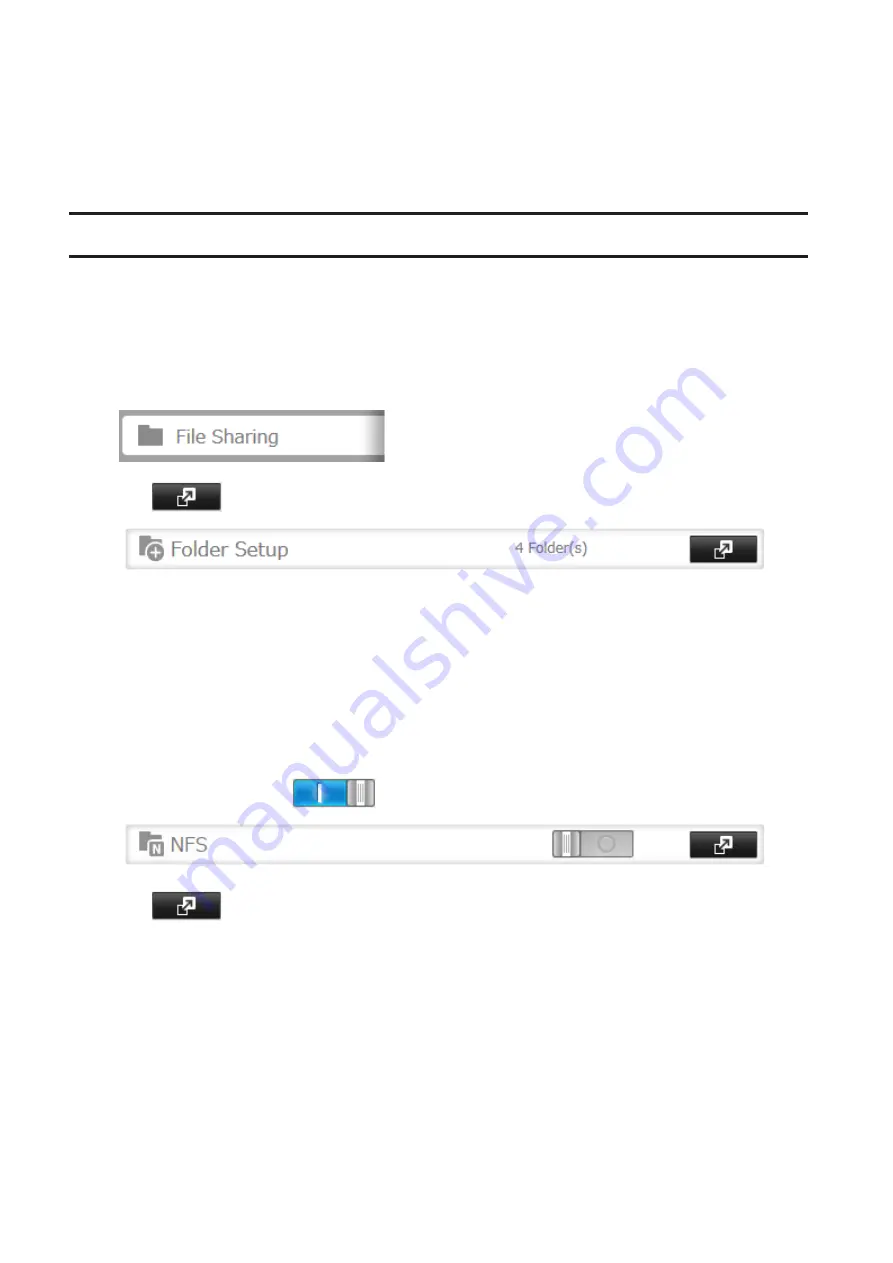
1
From Settings, click
File Sharing
.
2
Click
to the right of “Folder Setup”.
3
Choose the shared folder that will be accessible from the NFS client.
4
Click
Edit
.
5
Under “LAN Protocol Support”, select the “NFS” checkbox and click
OK
.
Note the NFS path. It will be used later for accessing data from an NFS client.
6
Click
Close
.
7
Move the NFS switch to the
position to enable NFS.
8
Click
to the right of “NFS”.
185
Summary of Contents for terastation 3000
Page 23: ...4 Configure the desired settings then click OK 22...
Page 26: ...3 Click Create User 25...
Page 29: ...3 Click Add Group 28...
Page 109: ...6 Click Time Machine 108...
Page 110: ...7 Click Select Backup Disk 8 Select the shared folder and click Use Disk 109...
Page 134: ...4 Open the License tab then click Activate Free License To deactivate the license click 133...
Page 136: ...3 Click Next 4 Click Find Cameras 135...
Page 142: ...2 Select the search criteria on the left side of the search screen then click Search 141...
Page 143: ...3 The search results are displayed Click a thumbnail to start the media viewer 142...


