


3
Click the
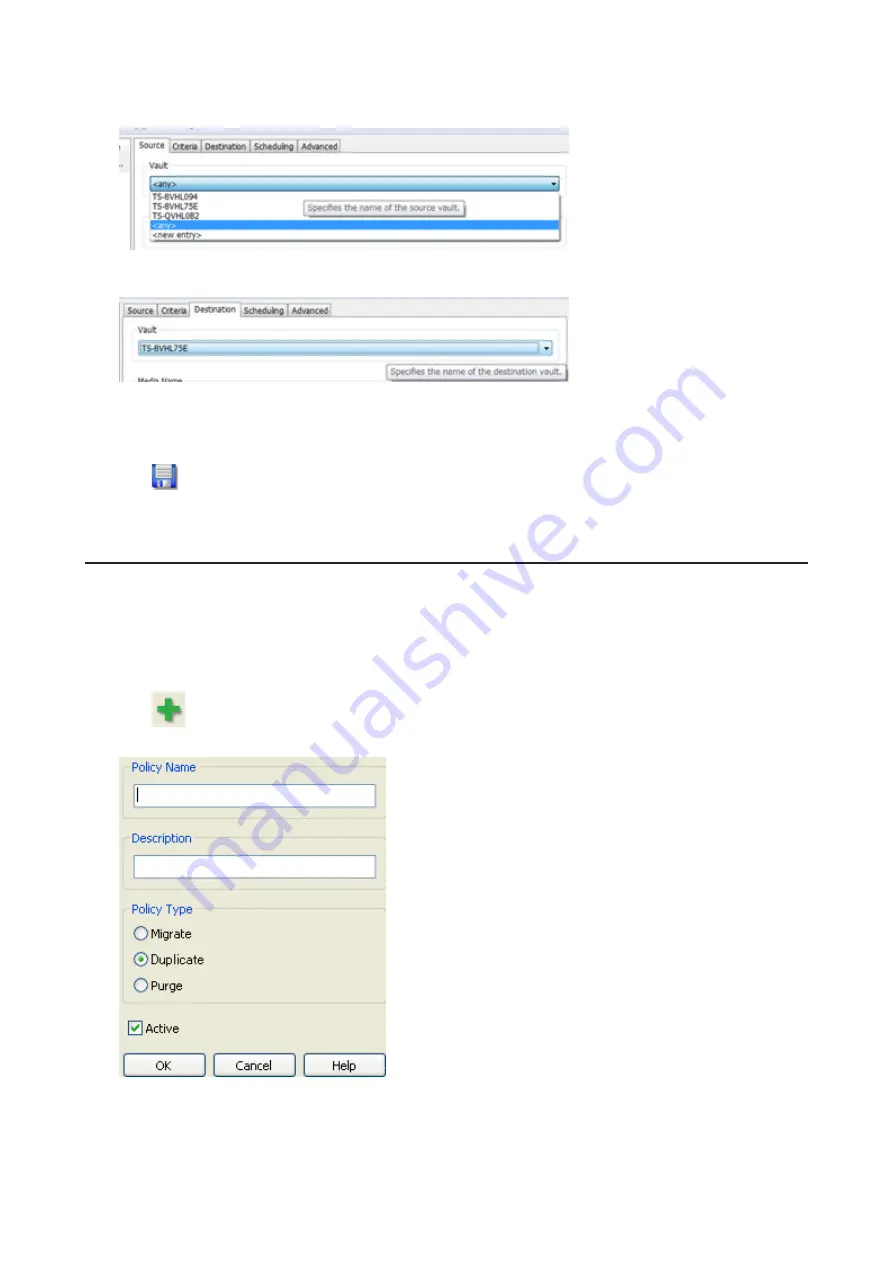
Source
tab. Under “Vault”, select the TeraStation where the recorded video data is saved. Select “Any”
to migrate recorded data on all network-connected TeraStations.
4
Click the
Destination
tab to select which TeraStation you want to move the data from “Vault” off of.
5
Set the migration date and time on the
Scheduling
tab. To execute migration every hour, select “Repeatedly at a
defined interval” and “Every 1 hour”.
6
Click
and register the policy.
This completes the settings for moving recorded video to another TeraStation.
Backing Up Recorded Video to Another TeraStation
Follow this procedure to back up recorded video data to another TeraStation.
Note:
A separate surveillance camera license pack must be purchased to do this.
1
Click
Start
>
BUFFALO
>
BUFFALO Surveillance Server
>
Data Service Policies
.
For Windows 8.1 and Windows 8, click
Data Service Policies
in the Start menu.
2
Click
and when the Create a Policy screen opens, enter “DuplicateTest” into the “Policy Name” field, select
“Duplicate”, and click
OK
.
145
Summary of Contents for terastation 3000
Page 23: ...4 Configure the desired settings then click OK 22...
Page 26: ...3 Click Create User 25...
Page 29: ...3 Click Add Group 28...
Page 109: ...6 Click Time Machine 108...
Page 110: ...7 Click Select Backup Disk 8 Select the shared folder and click Use Disk 109...
Page 134: ...4 Open the License tab then click Activate Free License To deactivate the license click 133...
Page 136: ...3 Click Next 4 Click Find Cameras 135...
Page 142: ...2 Select the search criteria on the left side of the search screen then click Search 141...
Page 143: ...3 The search results are displayed Click a thumbnail to start the media viewer 142...


