


Name
Description
Configure
Opens the properties page that lets you configure the
Buffalo NAS device’s IP address or open Settings.
Label Color
Selects the color of the name displayed below the icon.
View Options
Lets you choose icon size, position, and view mode.
Auto Power Mode
Auto power mode can turn supported Buffalo NAS devices
on the network on and off automatically.
To display these
options, hold down
the control key and
click your device’s
icon.
Open Folder
Opens the Buffalo NAS device’s shared folders.
Settings
Opens Settings for the Buffalo NAS device.
Configure
Opens the properties page that lets you configure the
Buffalo NAS device’s IP address or open Settings.
I’m here
Causes your Buffalo NAS device to beep.
Label Color
Selects the color of the name displayed below the icon.
The following menus may be accessed from the Buffalo NAS device’s properties page.
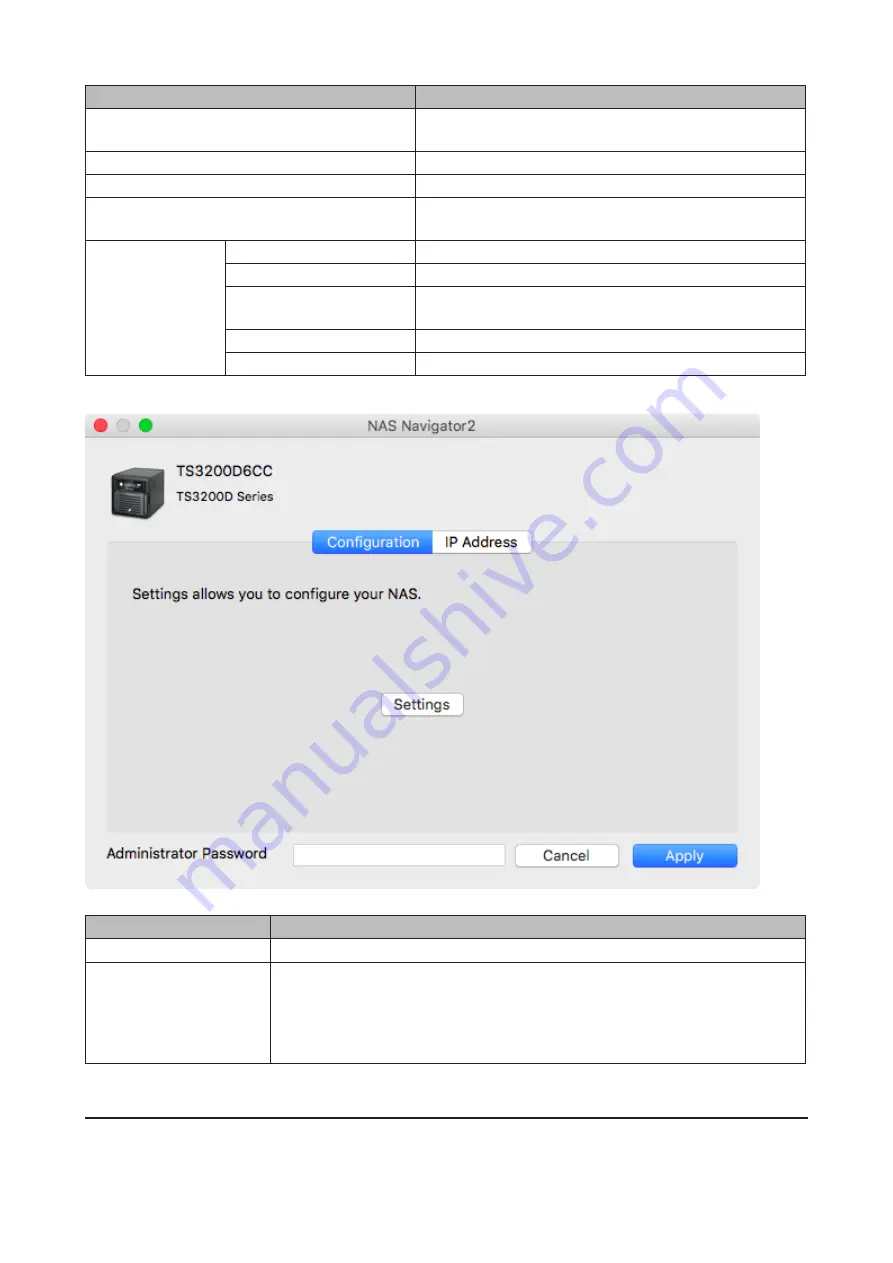
Name
Description
Configuration
Click
Settings
to open the configuration interface.
IP Address
Select the “Use DHCP” checkbox to assign an IP address from the DHCP server
automatically. If there is no DHCP server on the network, you cannot use this
function. Select the “Renew IP address” checkbox to obtain an IP address from the
DHCP server. You can manually enter a static IP address, subnet mask, and default
gateway.
Mounting as a Network Drive
You can map a shared folder as a network drive using NAS Navigator2 on macOS.
216
Summary of Contents for terastation 3000
Page 23: ...4 Configure the desired settings then click OK 22...
Page 26: ...3 Click Create User 25...
Page 29: ...3 Click Add Group 28...
Page 109: ...6 Click Time Machine 108...
Page 110: ...7 Click Select Backup Disk 8 Select the shared folder and click Use Disk 109...
Page 134: ...4 Open the License tab then click Activate Free License To deactivate the license click 133...
Page 136: ...3 Click Next 4 Click Find Cameras 135...
Page 142: ...2 Select the search criteria on the left side of the search screen then click Search 141...
Page 143: ...3 The search results are displayed Click a thumbnail to start the media viewer 142...


