


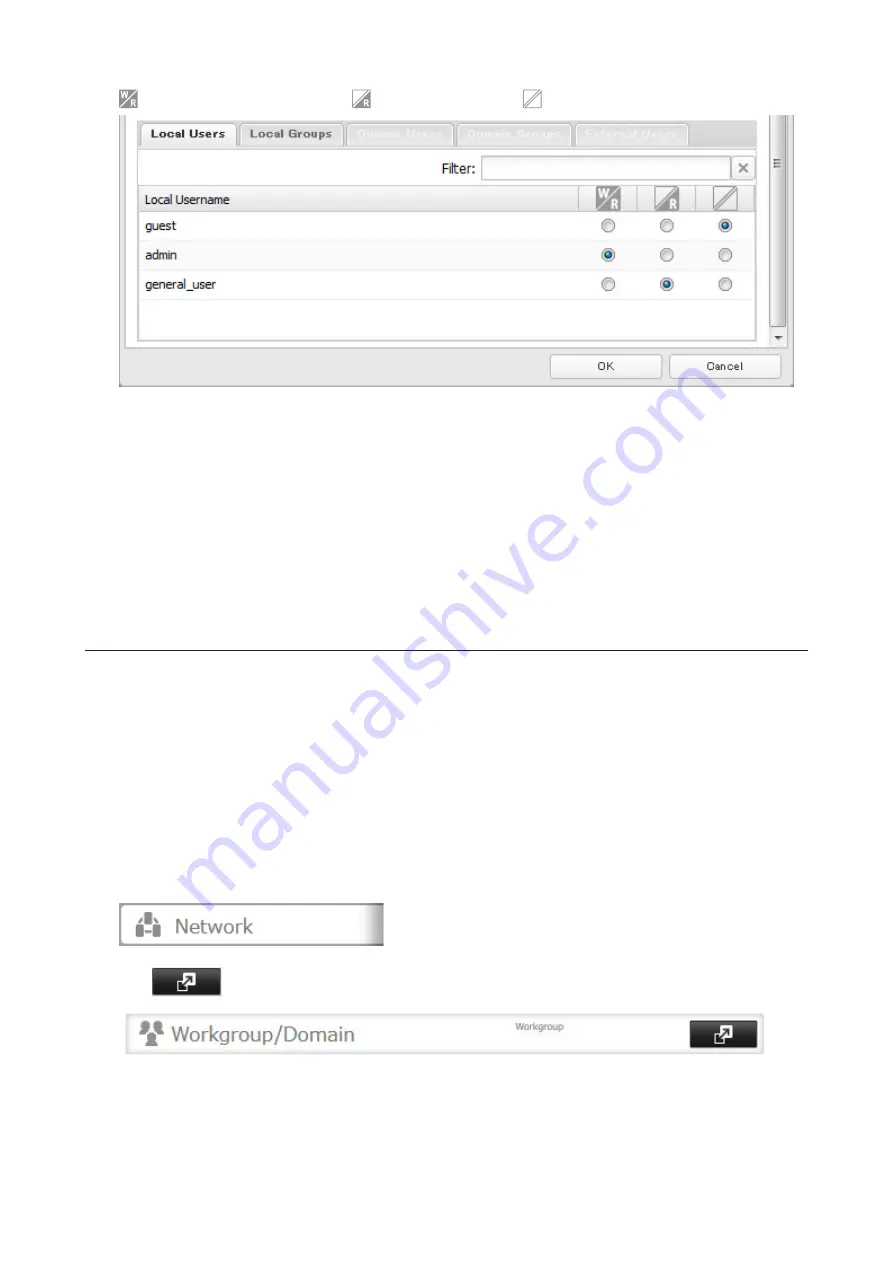
: Read and write access allowed
: Read access allowed
: Access prohibited
7
Click
OK
.
Notes:
• The example above shows access restriction by a user. To restrict access by group, click the
Local Groups
tab and
select group permissions.
• If both read-only and read and write permissions are given to a user, the user will have read-only access. The most
restrictive access always applies.
• For an access-restricted shared folder, if you change the access restrictions of all users and groups from read and
write or read-only to access prohibited from the user or group list page in Settings, that shared folder can only be
accessed by admin users and groups.
Active Directory
If there is an Active Directory environment, the TeraStation will use account information from the Active Directory
domain controller to set access restrictions for TeraStation’s shared folders. There is no need to perform individual
account management for the TeraStation. If multiple TeraStations are installed on the network, the account
information is centrally managed in Active Directory, greatly reducing the operations required for installation and
management.
Notes:
• If usernames or group names from Active Directory include multibyte characters, you will not be able to
configure access restrictions for them.
• The TeraStation supports a domain environment with a maximum of 1000 users and 1000 groups.
1
From Settings, click
Network
.
2
Click
to the right of “Workgroup/Domain”.
3
Click
Edit
.
31
Summary of Contents for terastation 3000
Page 23: ...4 Configure the desired settings then click OK 22...
Page 26: ...3 Click Create User 25...
Page 29: ...3 Click Add Group 28...
Page 109: ...6 Click Time Machine 108...
Page 110: ...7 Click Select Backup Disk 8 Select the shared folder and click Use Disk 109...
Page 134: ...4 Open the License tab then click Activate Free License To deactivate the license click 133...
Page 136: ...3 Click Next 4 Click Find Cameras 135...
Page 142: ...2 Select the search criteria on the left side of the search screen then click Search 141...
Page 143: ...3 The search results are displayed Click a thumbnail to start the media viewer 142...


