


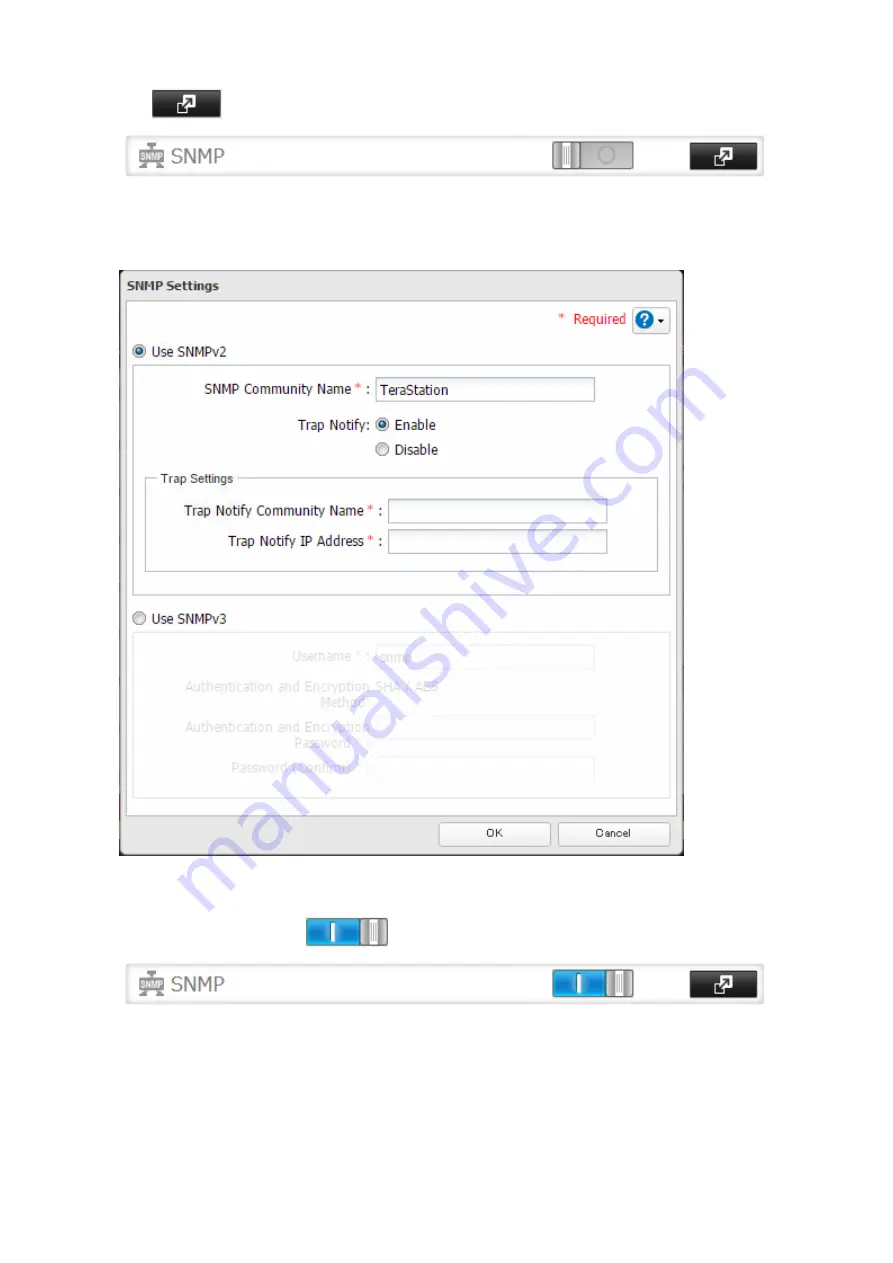
2
Click
to the right of “SNMP”.
3
Click
Edit
.
4
Select whether to use SNMP version 2 or version 3.
5
Configure the desired settings, then click
OK
.
6
Move the SNMP switch to the
position to enable SNMP.
7
SNMP has been configured for the TeraStation. For further use, configure your SNMP-compatible network
management software using the Buffalo-specific MIB (management information base) file. The MIB file is
available from the Buffalo website.
Depending on which SNMP client software you use, the procedure for configuring the software will differ. For
more detailed information on configuring the client software, refer to its help or included manual.
193
Summary of Contents for terastation 3000
Page 23: ...4 Configure the desired settings then click OK 22...
Page 26: ...3 Click Create User 25...
Page 29: ...3 Click Add Group 28...
Page 109: ...6 Click Time Machine 108...
Page 110: ...7 Click Select Backup Disk 8 Select the shared folder and click Use Disk 109...
Page 134: ...4 Open the License tab then click Activate Free License To deactivate the license click 133...
Page 136: ...3 Click Next 4 Click Find Cameras 135...
Page 142: ...2 Select the search criteria on the left side of the search screen then click Search 141...
Page 143: ...3 The search results are displayed Click a thumbnail to start the media viewer 142...


