Using your LinkStation
LinkStation User Manual
36
1
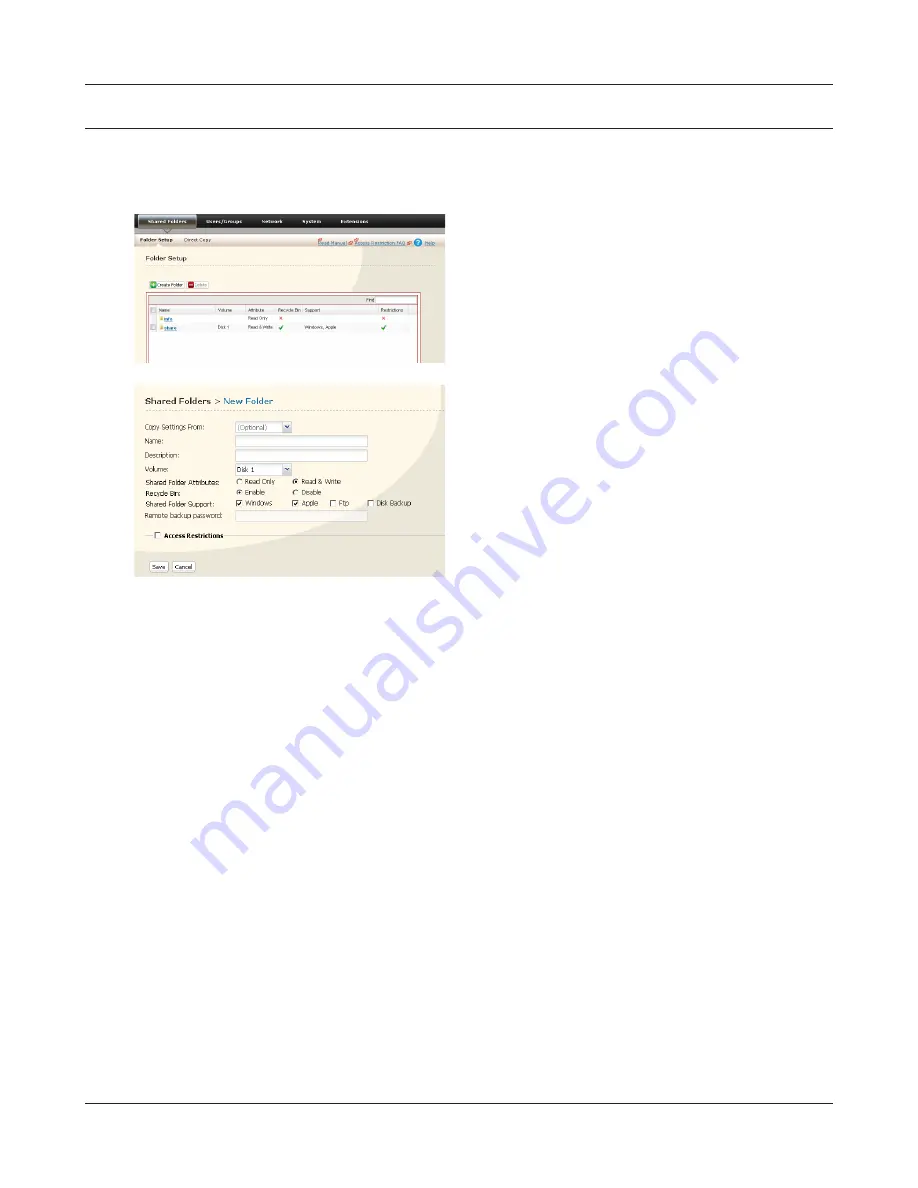
Enter desired characteristics for the new share.
Note: If you would like to copy the settings of an
existing folder, select a source folder from
the [Copy Settings From] dropdown.
2
Click [Save].
2
You have created a new share.
Adding shared folders
By default, the LinkStation includes one shared folder “share”. You may add additional folders as
follows.
1
•
Preventing accidental deletion of data
To protect your data from accidental deletion, you may enable a Recycle Bin for each shared folder.
Only SMB and CIFS connections can use a Recycle Bin. If the Recycle Bin is enabled, data that is
deleted from the shared folder is temporarily moved to the Recycle Bin folder. To restore the deleted
data, open the Recycle Bin folder and move the files back to the share.
Note:
• After the Recycle Bin is enabled, the Recycle Bin folder is created when a file or folder is deleted
from the shared folder. The Recycle Bin folder is not created immediately after it is enabled.
•
To set a shared folder to Read-Only
In the Shared Folders settings window, select Read-Only for the [Shared Folder Attributes] and click
[Apply].
Notes:
• The default setting is [Read & Write].
• Data in a shared folder that is set to Read-Only can be written only by users and groups with write
access.
• Read-Only shared folders and NTFS/HFS+ formatted USB hard drives will have “(Read Only)” added
to the shared folder description.
1
In the Web Admin interface, click [Shared
Folders] - [Folder Setup].
2
Click [Create Folder].


