2-2
Connecting Peripherals
Connecting Peripherals
This section describes how to get your system connected and powered
up. You should have already unpacked your printer, using the
instruction sheet included in the shipping box.
You connect your keyboard and your mouse, if you have one, and then
the power cord, to begin setting up your system. (The USB connection is
discussed in
Placing Your System Online
on page 12-4.)
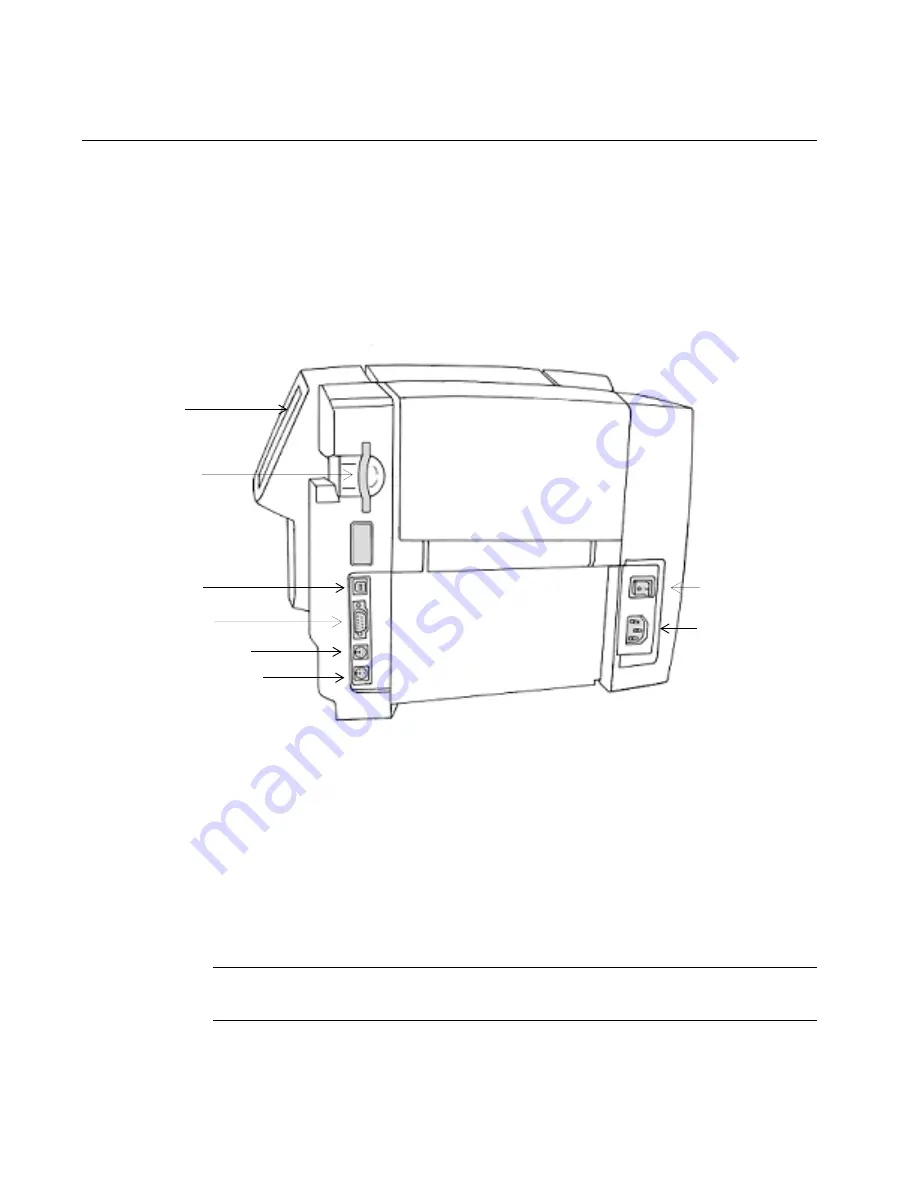
Figure 2-1. The label printer, side view.
Step 1:
Plug the keyboard cable into the keyboard connector, shown in Figure 2-
2.
Step 2:
If you have a mouse, plug the mouse cable into the mouse connector, as
shown inFigure 2-1
Step 3:
Plug the power cord into the printer as shown in Figure 2-1. Plug the
other end of the cord into an AC power outlet.
Important!
Be sure the AC power outlet is located near the printer
and is easily accessible.
Power cord
connector
Mouse connector
Keyboard connector
Serial port
Compact
memory
flashcard port
ON/OFF
switch
Display
screen
USB port
Summary of Contents for GLOBALMARK
Page 1: ...User s Guide English...
Page 9: ...Contents 8 Cleaning the Stylus B 10...
Page 17: ...x...
Page 37: ...2 14 Cleaning your system...
Page 57: ...3 20 Accessing Online Help...
Page 75: ...4 18 Working in Entry Screens...
Page 129: ...6 40 Setting Application Preferences...
Page 239: ...11 26 Printing Tab Options...
Page 255: ...12 16 Upgrading the Operating System...
Page 258: ...Special Characters A 3 TABLE 1 CONTINUED...
Page 259: ...A 4 Special Characters TABLE 1 CONTINUED...
Page 260: ...Special Characters A 5 TABLE 1 CONTINUED...
Page 262: ...Special Characters A 7 TABLE 2 CONTINUED...
Page 263: ...A 8 Special Characters TABLE 2 CONTINUED...
Page 264: ...Special Characters A 9 TABLE 2 CONTINUED...
Page 265: ...A 10 Special Characters...
Page 277: ...B 12 Cleaning the Stylus...
Page 285: ...www bradycorp com 2004 Brady Worldwide Inc All rights reserved Y 380527 GM EN...
Page 286: ...www bradycorp com 2004 Brady Worldwide Inc All rights reserved Y 380527 GM EN...


