


Rockwell Automation Publication 2198-UM004A-EN-P - October 2019
353
Motion Control Applications
Chapter 12
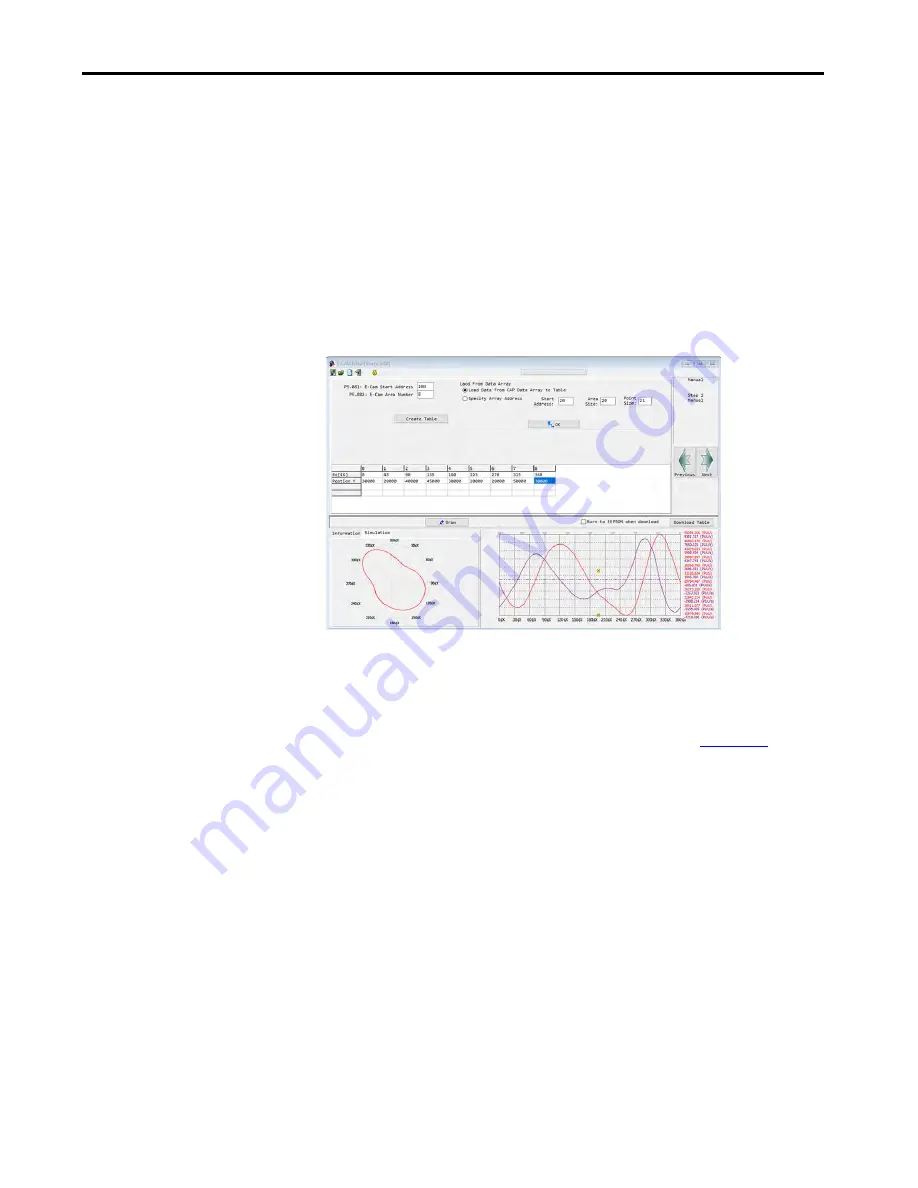
The position corresponding to each segment angle is filled in the table in
units of PUU. When you click Draw, the software automatically plots the
E-Cam simulation curve and the position, velocity and acceleration curves.
Pay special attention to the continuity of the slave axis speed in manual
creation to avoid the machine vibration or overloading the motor.
4.
After confirming that the curve is correct, click Download Table, to write
the E-Cam curve to the data array.
If you have selected ‘Burn to EEPROM when download’, when you click
the Download, the data array is written to the EEPROM that can be held
after the power is turned off.
Figure 178 - E-Cam Table Manual Creation
Import Points
If you use the third-party software (such as: Excel) to create the table, you must
save the position of each point as a text file (.txt). Separator symbol between each
point should be indicated by Space, Tab, Enter, ‘|’ or comma.
illustrates the following steps.
1.
Open the E-Cam editor in KNX5100C software, selecting the manual
table and specify the number of E-Cam segments (ID370 (P5.082)).
2.
Click Create Table, the table displays the E-Cam phase corresponding to
each E-Cam segment.
3.
Right-click the form and select Import Points.
The import points dialog box appears.
4.
Click Browse to open the stored text file, and select the separator symbol
you used in the text file.
5.
Click OK, to import the data points in the text file.
6.
Click Draw and the software draws the designed E-Cam curve according
to the data points.
Summary of Contents for Kinetix 5100 2198-E1004-ERS
Page 499: ......