EN - Additional sheet: flush mounted box V2
Index: 03
Change date: 01/12/2017
BA-Nr.: BB DW 001-03 Montage Unterputzdose V2 DE EN RU.docx
Page
1
of
2
Assembly and sealing of the flush mounted box V2 for push button plates
CAUTION !
Before starting to work, make the electrical lines volt free and protect
them against new connection! Wear protective clothes!
1
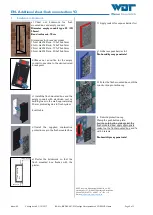
Assembly in building panels
a) Install the empty conduit at the
required place!
Diameter empty conduit type 32 (ID
25mm)
Bend radius min. 10cm
b) Cut out construction plate
Dimensions:
1-fold: HxWxD min. 100x67x55mm
2-fold: HxWxD min. 133x 67x55mm
3-fold: HxWxD min. 166x 67x55mm
4-fold: HxWxD min. 200x 67x55mm
c) Cut a recess to sink the sealing flange
with a depth of 3mm
Dimensions:
1-fold: HxW min. 130x97mm
2-fold: HxW min. 163x97mm
3-fold: HxW min. 196x97mm
4-fold: HxW min. 229x97mm
d) Break out an orifice for the empty
conduit connection at the desired rated
break point
e) Install the flush mounted box and fix
with 4 screws if necessary
f) Connect the empty conduit onto the
flush mounted box and insert cables
g) Place the supplied construction
protection cap in the flush mounted box
h) Apply sealant for vapour barrier foil
i) Adapt and adhere the vapour barrier
foil
No humidity may penetrate!
j) Tile the flush mounted box until the
construction protection cap
k) Take out the protection cap
Clamp the push button plate.
Seal the push button plate against the
flush mounted box: apply appropriate
sealant on the flush mounted box and fix
with 4 screws
No humidity may penetrate!


