Configuration
55
© 2006 Vision Engraving Systems
Press
1
and then
ENTER
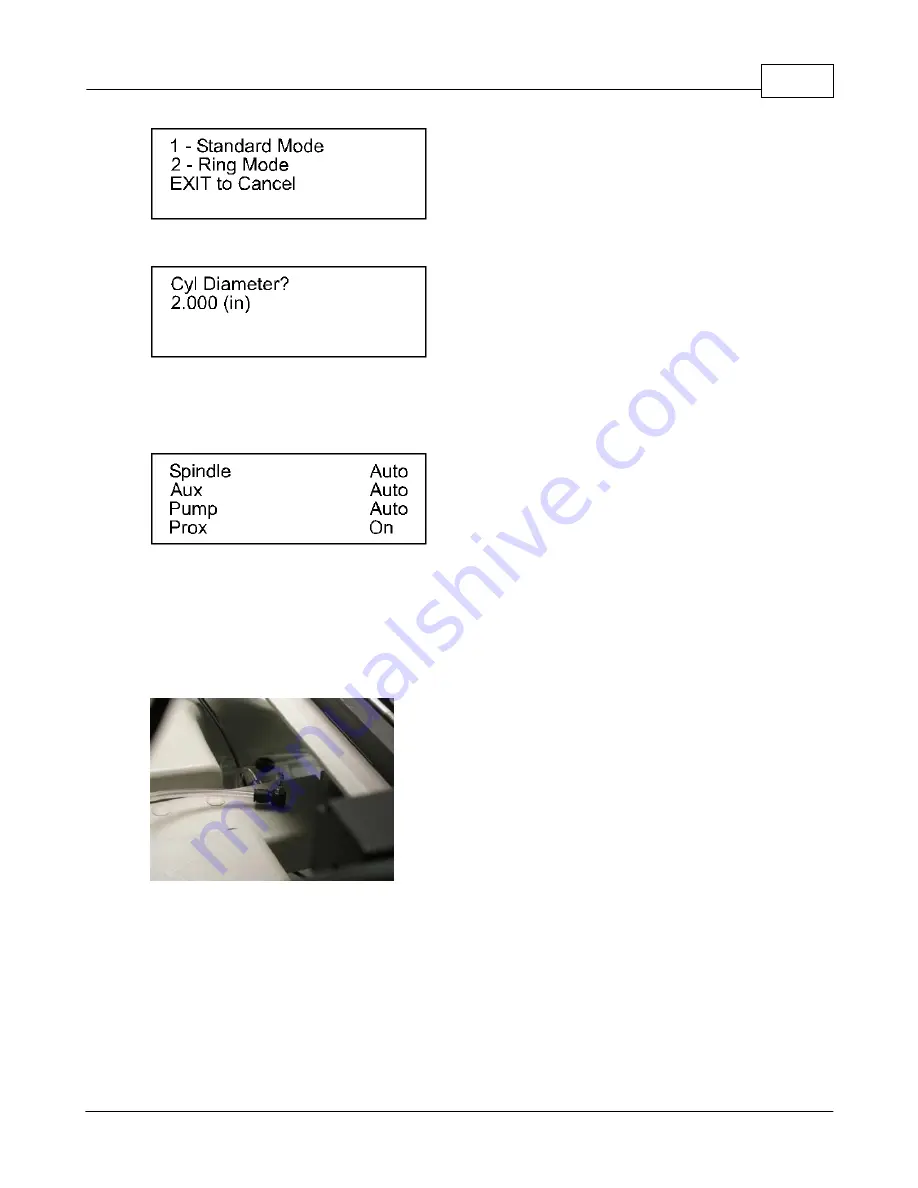
. The following screen will appear.
You can leave the diameter at the value that is shown and press
ENTER
. The spindle will
move out over the center of the vice.
Press the
Menu
button on the pendant. The following will display on the LCD.
Make sure that the water hose that is plugged into the water flow valve is plugged into the
water nose cone on the spindle. Press the
Y Down
button until the cursor is flashing on
Pump. Press the
Shift
button. The light on the button will illuminate. Press the
Enter
button. This will turn the pump on. The water will start to flow out of the water nose cone at
the spindle. If there is no water flowing, the water flow is too slow or too fast, turn the
thumbscrew on the water flow valve shown below. Turning it clockwise slows the flow down
and turning it counter-clockwise increases the flow.
Once the flow is adjusted properly, tighten the small locking thumbscrew located under the
thumbscrew that was used to adjust the flow.
Содержание MaxPro
Страница 5: ...Chapter I ...
Страница 11: ...Chapter II ...
Страница 23: ...Configuration 19 2006 Vision Engraving Systems 3 Click on the IP Address tab ...
Страница 60: ......
Страница 61: ...Chapter III ...
Страница 100: ...Vision MaxPro 96 2006 Vision Engraving Systems Mounting the item to be engraved ...
Страница 114: ...Vision MaxPro 110 2006 Vision Engraving Systems Select Finish The Plate Size screen will appear ...
Страница 137: ...Operations 133 2006 Vision Engraving Systems If No is clicked the program returns to the Flat plate dimension screen ...
Страница 179: ...Operations 175 2006 Vision Engraving Systems The Plot screen below will appear ...
Страница 182: ......
Страница 183: ...Chapter IV ...
Страница 191: ...Chapter V ...
Страница 202: ...Vision MaxPro 198 2006 Vision Engraving Systems W Windows 2000 15 Windows 98 18 Windows XP 12 ...
Страница 203: ......


