Vision MaxPro
168
© 2006 Vision Engraving Systems
easier): Click on the point to delete and press the Delete key on the keyboard or press
and hold the right mouse button down and drag the mouse cursor to the trash can icon.
Moving control points
(for reshaping or correcting the vector artwork): Select the
control point with the mouse and either drag the point with the left mouse button or use
the cursor keys and the keyboard to nudge the control point in the desired direction.
Step 4 - Sizing and Filling the Vector Image
Once the vectors have been checked and edited as required, the image is almost ready to
be filled. This is required if you wish the logo to be engraved as a solid object and not as an
outline image. Typically most logos will need to be filled before engraving.
Before the image can be filled, we need to instruct Vision Pro that the collection of vectors
that appear on screen are in fact part of the same object and not unrelated images. This is
done by selecting all the vectors that comprise the image and selecting the
Make Path
command from the
Arrange
menu. This command will combine all the selected vectors into
a single object and the software will determine which lines are outside edges and which lines
are inside edges. All vectors must be closed contours (no open line segments) to use this
command properly.
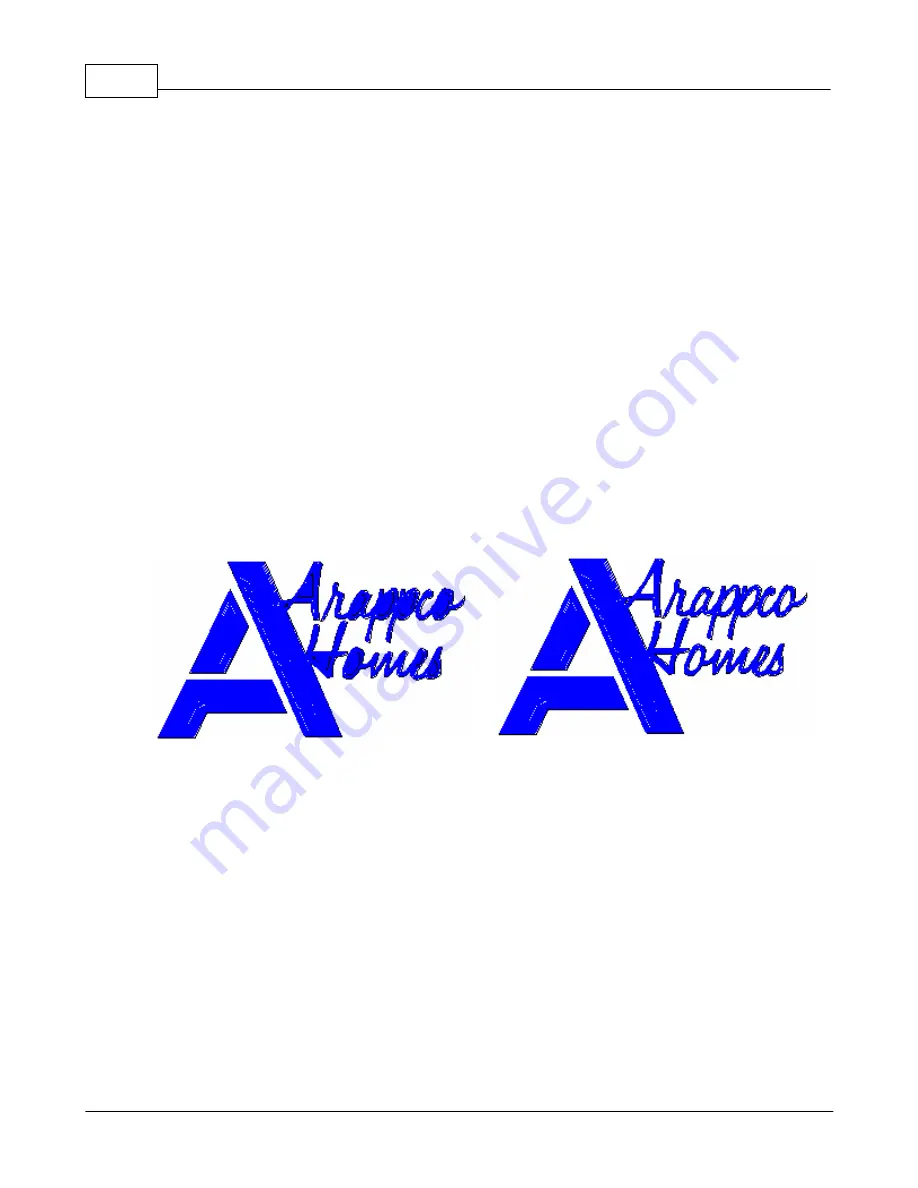
The pictureOn the following page is shown the Arappco logo filled without using the Make
Path command and then filled after using the Make Path command:
Without Make Path command
With Make Path command
The last step necessary before actually filling the logo is to size the image to the size you
intend to engrave it. While the image can be resized after filling the fill lines will scale with
the image and you will loose the cutter size definition that you specified when you filled the
design. You should therefore always size the image BEFORE applying a fill to the graphic.
There are at least 4 ways to resize a graphic in Vision Pro:
1) Drag a corner of the image with the mouse to resize while maintaining correct
proportions
2) Select the image and use the Layout/Size... command. Type in the correct X or Y
dimension and press the Apply button to resize the object. Then press Close to exit the
dialog.
3) Select the object and then right mouse click on any of the square selection handles to
Содержание MaxPro
Страница 5: ...Chapter I ...
Страница 11: ...Chapter II ...
Страница 23: ...Configuration 19 2006 Vision Engraving Systems 3 Click on the IP Address tab ...
Страница 60: ......
Страница 61: ...Chapter III ...
Страница 100: ...Vision MaxPro 96 2006 Vision Engraving Systems Mounting the item to be engraved ...
Страница 114: ...Vision MaxPro 110 2006 Vision Engraving Systems Select Finish The Plate Size screen will appear ...
Страница 137: ...Operations 133 2006 Vision Engraving Systems If No is clicked the program returns to the Flat plate dimension screen ...
Страница 179: ...Operations 175 2006 Vision Engraving Systems The Plot screen below will appear ...
Страница 182: ......
Страница 183: ...Chapter IV ...
Страница 191: ...Chapter V ...
Страница 202: ...Vision MaxPro 198 2006 Vision Engraving Systems W Windows 2000 15 Windows 98 18 Windows XP 12 ...
Страница 203: ......


