BASIC SYSTEM FEATURES
Section 6-5
on the right hand side. This process can be done with any available anchor
cted the image will move
in reference to the location of the focus carriage’s red LED.
File
the date and time it was stored on
r
2.
If you would like to move the graphic to the upper left hand corner select the top left
hand anchor point and type in your desired X Y coordinates into the boxes that
appear
point.
3.
Enter the XY menu on your PLS keypad. Using your motion control keys move the
focus carriage to your desired location where you would like the image to be placed.
Use the red LED as a reference point. Go back to the UCP and click on the TO
CARRIAGE button. According to the anchor point you sele
Management
Displays the name of current job, the number of files stored,
your hard drive, and the run time nea the top of the window.
o
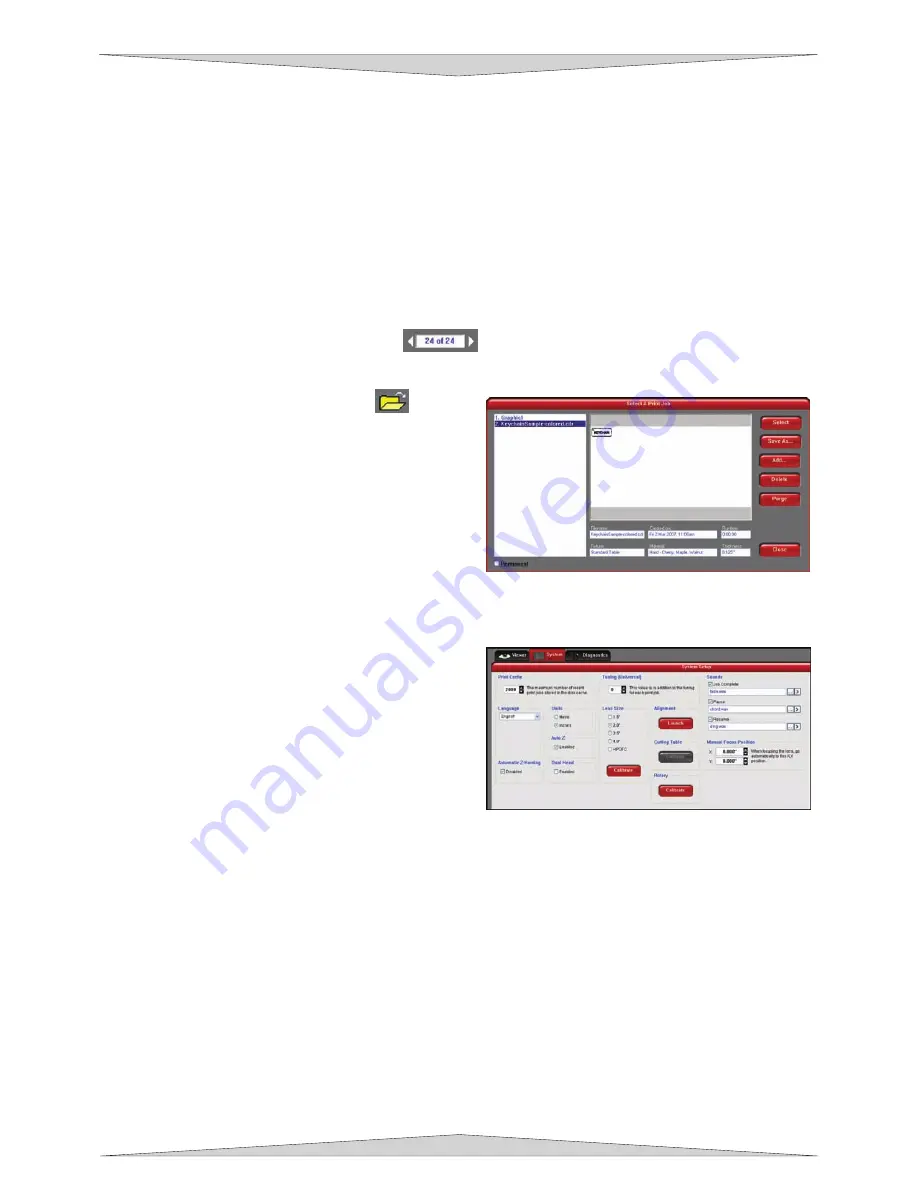
The print job navigation buttons
allow you to preview the print jobs stored on your
hard drive. If you navigate through the files using the UCP the file name on the Keyboard
display changes accordingly and visa versa.
o
The “open folder” button
displays
and allows you to select your print jobs in
a file management style. It also allows you
to delete print jobs stored from your hard
print jobs stored on your hard
be deleted from your hard drive even
after clicking the PURGE button.
the software will
aving table will home at start up. To have this
MATIC Z-HOMING. Disabling this feature can
inciple is based on the material thickness
, as your system gets broken in, it may be necessary to change this
assembly on the front of your PLS Focus Carriage. If you change lenses (available accessory) other
than the standard 2.0, then you
MUST
select the value that matches your installed lens and calibrate
drive, and save print jobs as .efm files.
The PURGE button deletes
ALL
cached
drive.
If the Permanent box is marked this
indicates that the selected file will not
System Tab
Selecting this tab will allow the configuration of certain
features of the laser system.
•
The PRINT CACHE number is adjustable. It
indicates the maximum number print jobs that you
would like to be stored on your hard drive. If you
exceed the number shown,
automatically begin deleting the oldest jobs as
newest ones enter the cache.
•
LANGUAGE allows you to switch between multiple
languages according to your preference.
•
If the laser machine was improperly shut down the engr
feature turned off, check the Disable box under AUTO
also be helpful when troubleshooting Z-Axis problems.
•
UNITS allow you to choose between Metric or Inches.
•
AUTO Z should be enabled if you would like the device to focus the laser beam by automatically
adjusting the height of the Z-axis table. This operating pr
that you specify in the PLS Printer Driver (Section 6-9). If it is disabled, you will need to set focus
manually by using the included Focus Tool (Section 9-17).
•
When running the Dual Head accessory, please enable the DUAL HEAD feature in the System Tab.
If this feature is not enabled the laser system will not properly process the job.
•
The TUNING (UNIVERSAL) number is a value set by the PLS manufacturing factory for your
particular machine. In the future
value to sharpen the resulting image. Do not change this number unless instructed to do so by our
Technical Support Department.
•
The LENS SIZE selected from the list should be the same as the number printed on the lens
Содержание PLS3.60
Страница 8: ......
Страница 20: ...SAFETY Section 1 12 ...
Страница 21: ...Part 1 Initial Setup ...
Страница 22: ......
Страница 30: ...INSTALLATION Section 2 10 ...
Страница 44: ...GRAPHICS SOFTWARE SETUP Section 3 14 ...
Страница 58: ...MAKING A SAMPLE Section 5 4 ...
Страница 59: ...Part 2 Laser System Essentials ...
Страница 60: ......
Страница 70: ...BASIC SYSTEM FEATURES Section 6 12 ...
Страница 76: ...BASIC MAINTENANCE Section 7 6 ...
Страница 77: ...Part 3 Accessories ...
Страница 78: ......
Страница 95: ...Part 4 Advanced User ...
Страница 96: ......
Страница 116: ...ADVANCED SYSTEM OPERATION Section 9 22 ...


