ADVANCED SYSTEM OPERATION
Section 9-9
Rubber Stamp
This mode causes a “shouldering” effect when
raster engraving rubber stamp material or any
other material that requires a “shouldered”
engraving. The effect looks as if the laser beam
engraved the material on an angle, but in actuality
it is the precise control of laser power that creates
this appearance. This is a “raster only” feature
that only works with black colored graphics and
uses the power setting of the black color in the
printer driver. Vectors are processed normally and
can be used for vector engraving or cutting by
assigning any of the seven other printer driver
colors to the outline desired.
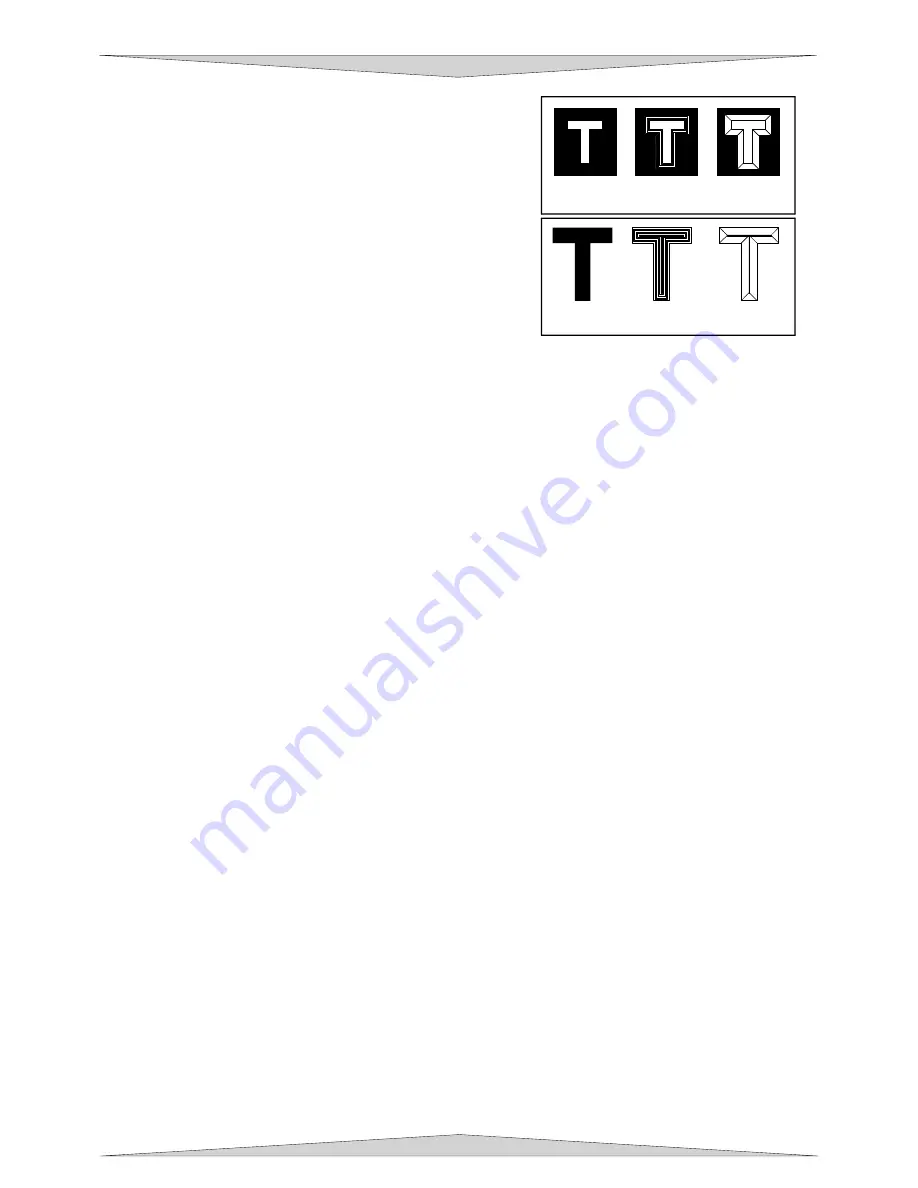
To obtain a “raised” engraving such as a rubber stamp, simply create a “negative” graphic so
that the background is black and the text or graphic objects are white. This way, the
background engraves and the text or objects remain untouched, producing a “pyramid” effect.
To obtain a “chiseled” or “sunken” engraving, create a “positive” graphic so that the
background is white and the text or objects are black. This way, the text or graphic engraves
and the background remains untouched, producing a “chiseled” effect.
Setup Button
Selecting it brings up a pop-up window so you can choose from the following settings:
Taper Selection
Choose from various types of shoulder angles. Experiment with each setting and
note the result.
Image Options
Invert Page
This converts all black objects into white and all white objects into black for the
ENTIRE PAGE. This is very useful for engraving a full sheet of rubber stamps.
Mirror Page
This mirrors the ENTIRE PAGE from left to right (horizontally). It will not mirror
individual objects or selections. This is very useful for engraving full sheets
rubber stamps because the graphics on screen are non-mirrored and can be
proof read easily.
Power
Notice that when you click on different Taper Selections, that the power table
changes. This is because the laser applies power in different profiles to produce
different styles of taper. You will notice that you cannot adjust the pre-defined Taper,
however, if you would like to create a custom taper of your own, first select the Taper
Selection that you would like to start with and then click the “NEW” button. This will
copy the taper as a “Custom Shoulder” that you can rename by typing a new name in
the dialog box and clicking “Rename”. You can also adjust the profile however you
desire. Each slider bar controls the lasers power for that step. The numbers at the
bottom of that slider bar define the width of the step in .001 inches (mils). The square
at the top of each slider bar is it activate/deactivate button. Always deactivate the
steps you are not using so that it will apply 100% power to that level.
This image...
...turns into this
image by the driver...
...and the engraved
image looks like this.
This image...
...turns into this
image by the driver...
...and the engraved
image looks like this.
Содержание PLS3.60
Страница 8: ......
Страница 20: ...SAFETY Section 1 12 ...
Страница 21: ...Part 1 Initial Setup ...
Страница 22: ......
Страница 30: ...INSTALLATION Section 2 10 ...
Страница 44: ...GRAPHICS SOFTWARE SETUP Section 3 14 ...
Страница 58: ...MAKING A SAMPLE Section 5 4 ...
Страница 59: ...Part 2 Laser System Essentials ...
Страница 60: ......
Страница 70: ...BASIC SYSTEM FEATURES Section 6 12 ...
Страница 76: ...BASIC MAINTENANCE Section 7 6 ...
Страница 77: ...Part 3 Accessories ...
Страница 78: ......
Страница 95: ...Part 4 Advanced User ...
Страница 96: ......
Страница 116: ...ADVANCED SYSTEM OPERATION Section 9 22 ...


