ASSEMBLING THE PLS
Section 4-5
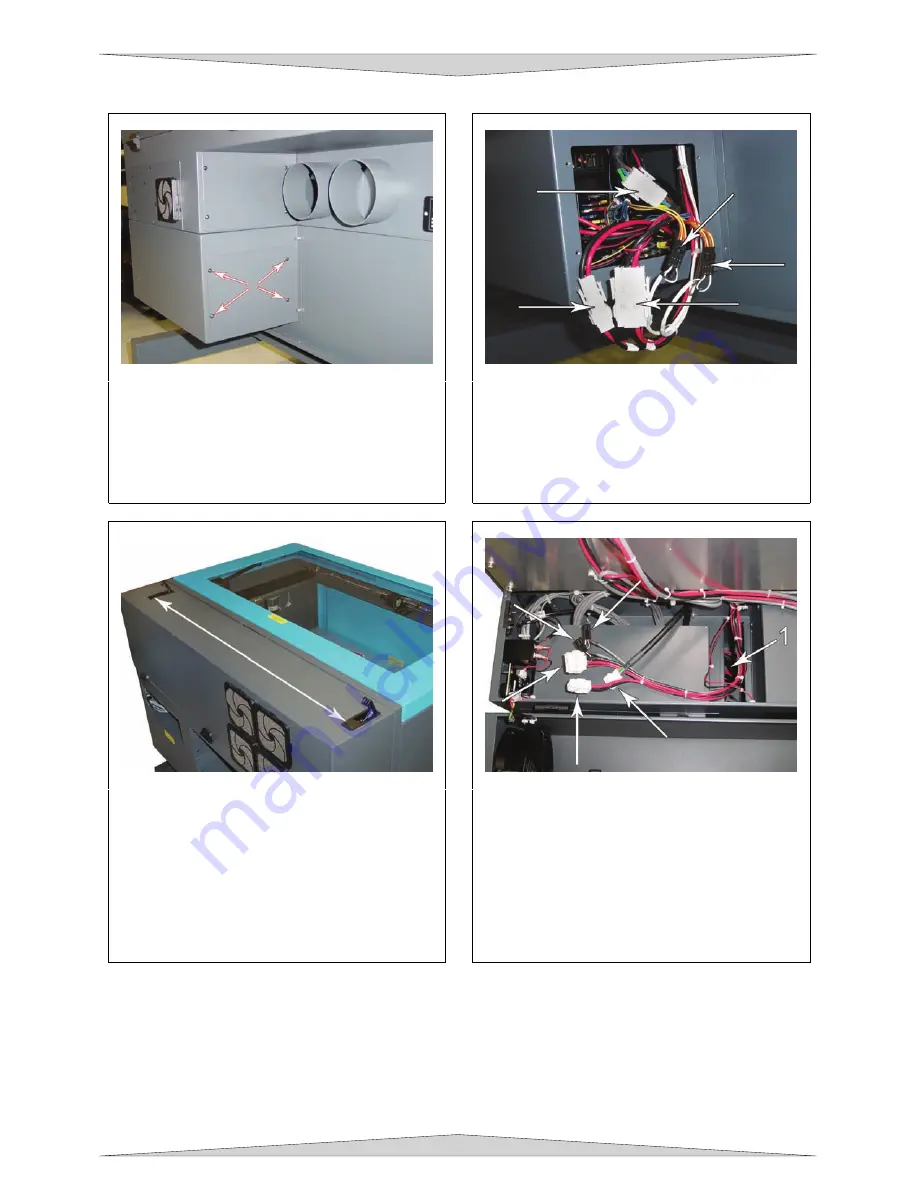
Detaching laser system from cart
1.
Make sure unit is unplugged from an
electrical outlet.
2.
At the back of the system, locate the four
screws; remove them and the cover plate.
3.
Locate the three white connectors and the
two black connectors. Unplug all five
connectors. They are held in place by
latches so you will squeeze on the sides in
order to release the latches to pull the
connectors off.
4.
Open the rear cover by pressing down on
the button part of the latches until the
latches pop up.
5.
Fold the rear cover down to a resting
position.
6.
Locate the cavity (1) where the cables
reside. Gently pull the cables upwards and
rest them on top as the diagram indicates.
7.
Close and re-latch the rear cover.
8.
Remove any packing materials or
accessories from inside the laser system.
9.
Using strong shipping tape or rope, tape the
front door closed so that it does not open up
when you tilt it.
Содержание PLS3.60
Страница 8: ......
Страница 20: ...SAFETY Section 1 12 ...
Страница 21: ...Part 1 Initial Setup ...
Страница 22: ......
Страница 30: ...INSTALLATION Section 2 10 ...
Страница 44: ...GRAPHICS SOFTWARE SETUP Section 3 14 ...
Страница 58: ...MAKING A SAMPLE Section 5 4 ...
Страница 59: ...Part 2 Laser System Essentials ...
Страница 60: ......
Страница 70: ...BASIC SYSTEM FEATURES Section 6 12 ...
Страница 76: ...BASIC MAINTENANCE Section 7 6 ...
Страница 77: ...Part 3 Accessories ...
Страница 78: ......
Страница 95: ...Part 4 Advanced User ...
Страница 96: ......
Страница 116: ...ADVANCED SYSTEM OPERATION Section 9 22 ...


