ADVANCED SYSTEM OPERATION
Section 9-20
Step 3 – Printing to the Laser System (Manual Control Tab)
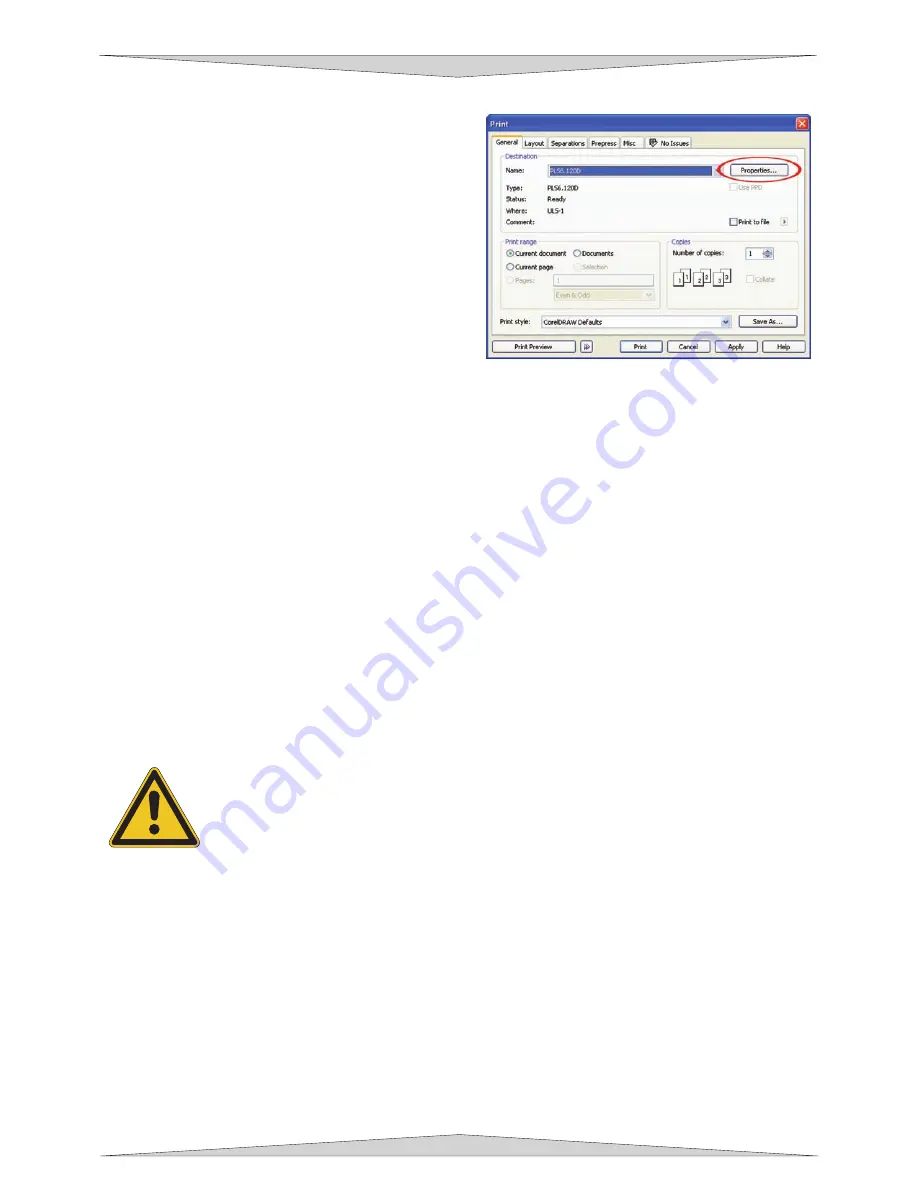
When you are ready to print the file to the laser
system, click FILE and then click PRINT. Make sure
that the laser system appears in the DESTINATION
NAME dropdown list, and then click PROPERTIES
(Figure 3) to display the ULS printer driver settings.
Once you have completed entering the desired
parameters on the Manual Control Tab, as described
in the previous pages, click OK to accept the changes
made. The printer driver closes and reverts back to
the Print Dialog box (Figure 3). Now click on PRINT
button to begin printing to the laser system.
Normally, Windows will spool the print file (the little
printer icon located in the lower right-hand side
taskbar) so it may take several seconds or even
minutes, depending on your file size and the speed of
your computer, before the entire file completely loads into the laser system. Assuming that you have no
other files loaded into the laser system, once this file is downloaded, it will automatically appear in the
Keypad display of the laser system. If you already have other files loaded into the laser system, the file
that you just sent will not appear until you enter the FILE Menu on the Keypad display and press the
RIGHT button. Use the RIGHT and LEFT buttons to toggle through your files until you find the one you
want to print.
Step 4 – Focusing your system
Choose from one of the three Focusing Methods mentioned in Section 9-17. We suggest you use your
focus tool as a starting point.
Step 5 – Starting the Engraving Process
•
Turn ON the exhaust system and PLS machine. Laser tube fans will stop spinning once the laser
system has been turned on. This is normal and the fans will start spinning once engraving has
started.
•
Make sure the material is positioned correctly within the engraving area.
•
Make sure the system is properly focused.
•
Make sure the top door is closed.
•
Press the green START button on the PLS keypad to begin laser processing.
WARNING:
Observe that the laser system is functioning as desired. If any abnormalities
are present, including but not limited to, flaming, sparking, melting, or excessive smoking
of the material you are engraving,
STOP THE ENGRAVING PROCESS IMMEDIATELY
BY EITHER PRESSING THE PAUSE BUTTON OR OPENING THE TOP DOOR!
Re-
check the settings in the printer driver as well as the laser system. If everything seems to
be correct, the material is not suitable for laser engraving or cutting and you
MUST
DISCONTINUE
processing this material or any material that may cause damage to the laser system.
NEVER LEAVE THE LASER SYSTEM UNATTENDED DURING THE ENGRAVING OR CUTTING
PROCESS.
While the laser system is processing the material, you may stop the process by pressing the PAUSE
button and waiting for the system to finish what it was doing and move to the home position (upper right
corner). As long as you do not move the material inside the laser system, you can resume processing by
pressing the PAUSE button again.
As a safety feature, if at any time you open either the top or front
door, the laser beam will shut off first, and then the focus carriage will pause and move to the
home position.
However, this method of stopping the process may ruin your application material
because you will be unable to resume operation exactly where it paused.
Figure 3
Содержание PLS3.60
Страница 8: ......
Страница 20: ...SAFETY Section 1 12 ...
Страница 21: ...Part 1 Initial Setup ...
Страница 22: ......
Страница 30: ...INSTALLATION Section 2 10 ...
Страница 44: ...GRAPHICS SOFTWARE SETUP Section 3 14 ...
Страница 58: ...MAKING A SAMPLE Section 5 4 ...
Страница 59: ...Part 2 Laser System Essentials ...
Страница 60: ......
Страница 70: ...BASIC SYSTEM FEATURES Section 6 12 ...
Страница 76: ...BASIC MAINTENANCE Section 7 6 ...
Страница 77: ...Part 3 Accessories ...
Страница 78: ......
Страница 95: ...Part 4 Advanced User ...
Страница 96: ......
Страница 116: ...ADVANCED SYSTEM OPERATION Section 9 22 ...


