September
2017
Sentinel V SC and RT Operation Manual
Page 142
EAR-Controlled Technology Subject to Restrictions Contained on the Cover Page.
2. Connect the internal power I/O cable to the jack on the top board (see Figure 71). After power is
applied (long beep), there is a 10 to 15 second delay before the network is available (short beep).
The LAN is available after power up for five minutes.
You can only change to/from Ethernet or to/from Wireless by repowering the Sentinel V. If
you are using an internal battery, this means disconnecting the internal battery in addition to
removing the AC Adapter power if applicable.
Steps 3 and 4 must be completed in five minutes to connect to the ADCP. After five minutes,
the ADCP’s LAN will turn off. In the event that the ADCP’s LAN turns off before the
connection is complete, simply start from step 2 again.
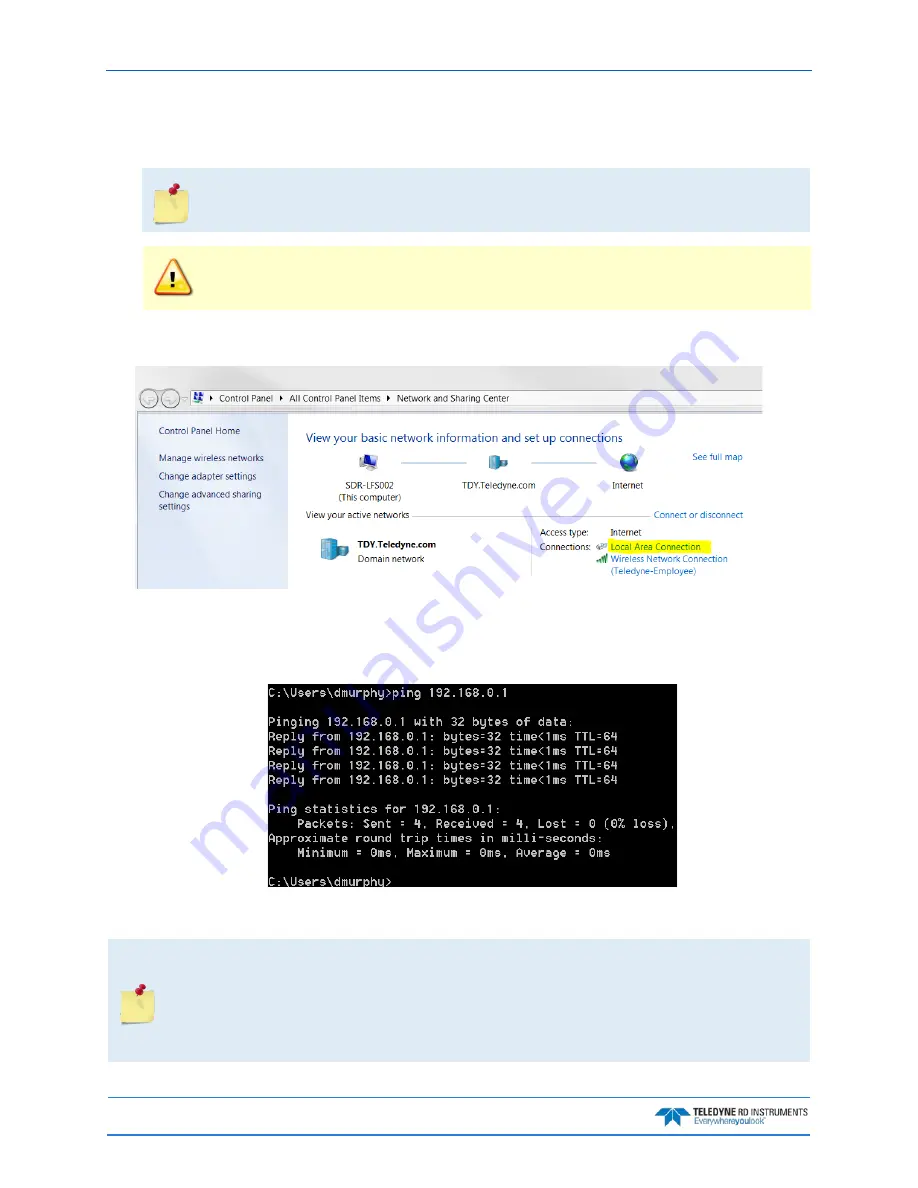
3. Verify that you have the Local Area Connection displayed under connections (~15 seconds) after
you repower.
4. While using Ethernet as a troubleshooting tool, unplug the laptop from any network and connect
the Ethernet cable directly from the laptop to the ADCP.
Ping address 192.168.0.1; if the response is good (as shown below) then ReadyV should open and
work as normal.
Open a browser on the laptop (Internet Explorer
®
, FireFox
®
, Google Chrome
®
, or other browser).
Enter the ADCP’s IP address 192.168.0.1 into the address bar.
The Ethernet Port is 192.168.0.
1
and the Wireless Port is 192.168.0.
2
. Make sure to use the
Ethernet address.
When using the Ethernet cable to connect to the Sentinel V it is best to not look at the
wireless manager as the ADCP only supports the current type of connection (in this case
Ethernet) and so the wireless status will not be meaningful and perhaps can even be
confusing.


