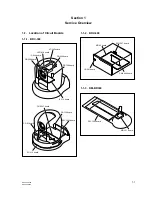
1-7
BRC-300/300P
BRU-300/300P
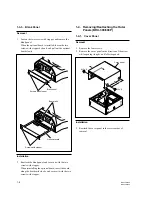
Blank panel
Optional board
Screws with stopper
Screws with stopper
Board rails
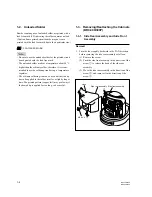
1-4-2. Blank Panel
Removal
1.
Loosen the two screws with stopper, and remove the
blank panel.
When the optional board is installed, loosen the two
screws with stopper by hand, and pull out the optional
board slowly.
Installation
2.
Reattach the blank panel, and secure it with the two
screws with stopper.
When reinstalling the optional board, insert the board
along the board rails slowly, and secure it with the two
screws with stopper.
1-5. Removing/Reattaching the Outer
Assembly (RM-BR300)
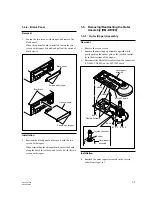
1-5-1. Outer (Upper) Assembly
Removal
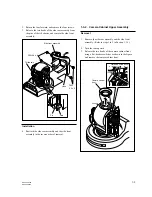
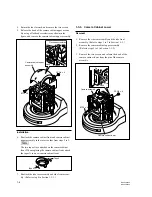
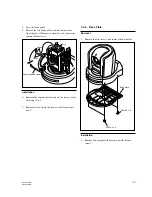
1.
Remove the seven screws.
2.
Remove the outer (upper) assembly upward while
gently pushing the rubber part on the joystick control-
ler in the directions of the arrows.
3.
Disconnect the flexible flat cables from the connectors
(CN5001, CN5002) on the SW-1205 board.
Installation
4.
Reattach the outer (upper) assembly in the reverse
order from steps 1 to 3.
B3
x
8
CN5001
Outer (upper)
assembly
SW-1205 board
CN5002
B3
x
8
B3
x
8
B3
x
5
Outer (upper)
assembly
Rubber
Joystick controller
Flexible flat cable

