64 95 142 D3632
D3632
.
031.01.02
.
02 03.2016
189
Sirona Dental Systems GmbH
12 Startup, measurements and tests (for USA/Canada only)
Installation Manual ORTHOPHOS SL
12.8 Checking the laser light localizers
båÖäáëÜ
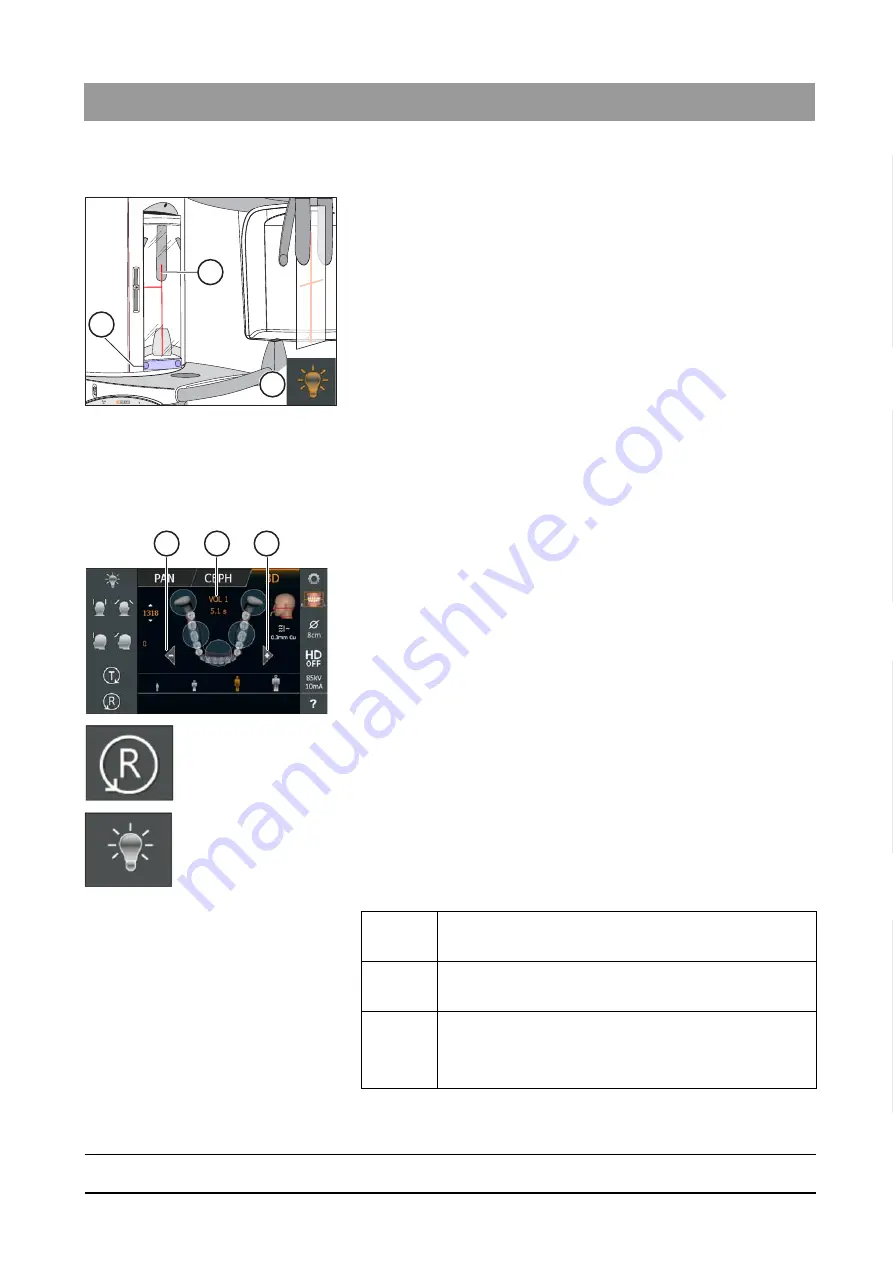
Checking the PAN laser beam
1. Affix a piece of white cardboard between the temple supports.
2. Rotate the mirror by pressing into the left depression (D) of the
toolbar.
3. Touch the light localizer key (E) on the touchscreen.
The light localizers are switched on.
The laser beam is displayed on the cardboard by a red line.
The vertical laser beam (G) must be displayed in the center of the
forehead support and the bite block holder. If this is not the case,
adjust the laser light localizer.
The horizontal laser beam must be displayed horizontally. If this
is not the case, adjust the laser light localizer.
4. Press on the light localizer key again.
The light localizer is switched back off again.
Checking the 3D laser beam
1. Touch the 3D symbol at the top of the touchscreen.
The 3D program group is selected.
2. Select the exposure program. Press the arrow keys + (C) and - (A).
The exposure program is displayed in the program display (B).
3. Touch the R key on the touchscreen.
The diaphragm and the sensor move into the starting position for
volume exposures.
4. Touch the light localizer key on the touchscreen.
The light localizers are switched on.
Depending on a preselected program and collimation, the light
beams show the upper and lower edges of the volume.
G
E
D
A
C
B
Select region of exposure
VOL1
VOL1 HD
Volume exposure with a diameter of approx. 8 cm and a
height of approx. 8 cm or 5.5 cm collimated.
VOL2
VOL2 HD
Volume exposure with a diameter of about 5 cm and a
height of about 5.5 cm for upper or lower mandible
VOL3
VOL3 HD
Volume exposure with a diameter of about 11 cm and a
height of about 10 cm or selection of upper quadrant
collimated to 7.5 cm and selection lower quadrant
collimated to 8.0 cm


