


7
CONNECTING THE MACHINE
CONNECTING TO A NETWORK
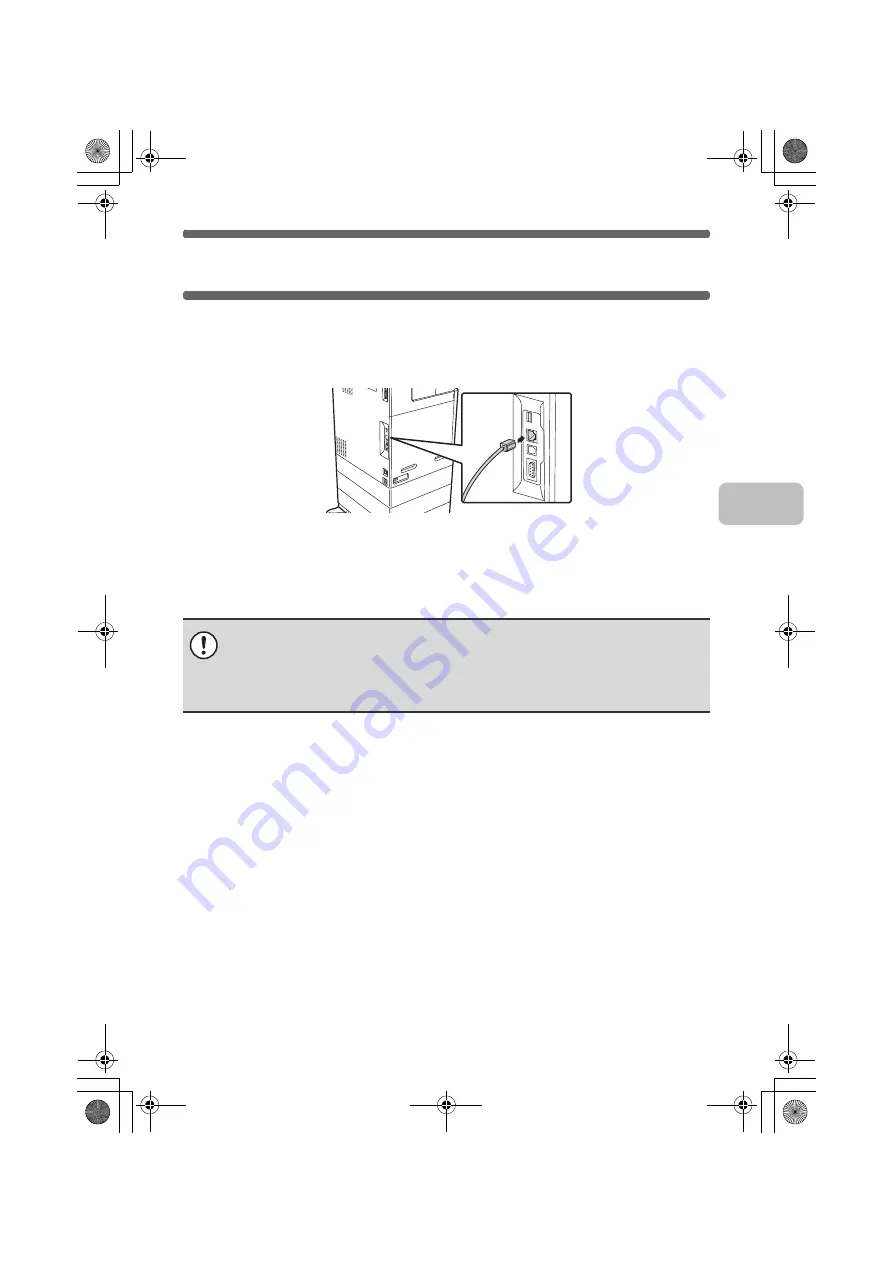
To connect the machine to a network, connect the LAN cable to the machine's
network connector. Use a shielded LAN cable.
After connecting the machine to a network, be sure to configure the IP address
and other network settings before installing the software. (The factory default
setting for the IP address is to receive the IP address automatically when the
machine is used in a DHCP environment.)
Network settings can be configured using "Network Settings" in the system
settings (administrator) on the machine.
X
Checking the IP address of the machine
You can check the IP address of the machine by printing out the "All Custom Setting List"
in the system settings. Follow these steps to print out the "All Custom Setting List".
Press the [SYSTEM SETTINGS] key, touch the [List Print (User)] key, and then
touch the [Print] key of "All Custom Setting List".
CONNECTING THE MACHINE WITH A USB
CABLE (Windows)
The machine can be connected to a computer using a USB cable if the
computer is a Windows computer. (The USB interface on the machine cannot
be used in a Macintosh environment.)
The machine and computer should be connected while the printer driver is
being installed. If a USB cable is connected before the printer driver is installed,
the printer driver will not be installed correctly. For the procedure for connecting
a USB cable, see "WHEN THE MACHINE WILL BE CONNECTED WITH A
USB CABLE" (page 22).
• If the machine is used in a DHCP environment, the IP address of the machine may
change. If this happens, printing will not be possible. This problem can be avoided by
using a WINS server or by assigning a permanent IP address to the machine.
• This manual explains how to set up the software in a Windows network
environment and in a Macintosh network environment.
!mxc381_us_ins.book 7 ページ 2008年8月19日 火曜日 午前10時42分
Содержание MX-C311
Страница 79: ...mxc401_us_saf book 76 ページ 2008年10月15日 水曜日 午前11時52分 ...
Страница 80: ...mxc401_us_saf book 77 ページ 2008年10月15日 水曜日 午前11時52分 ...
Страница 156: ...Reduce copy mistakes Print one set of copies for proofing ...
Страница 158: ...Make a copy on this type of paper Envelopes and other special media Transparency film ...
Страница 159: ...Add the date or page numbers 2010 04 04 Add the date Add a stamp 9 10 11 Add the page number ABCDEFG Add text ...
Страница 160: ...Assemble output into a pamphlet Create a pamphlet Staple output Create a blank margin for punching ...
Страница 163: ...Conserve Print on both sides of the paper Print multiple pages on one side of the paper ...
Страница 171: ...Conserve Send when the rate is lowest Check received data before printing Relay a transmission through a branch office ...
Страница 181: ...Prevent transmission to the wrong destination Check the result of transmission Check the log of previous transmissions ...
Страница 185: ...SAVE A JOB AND REUSE IT LATER Search for a file Organize my files Save an important document Print a batch of files ...
Страница 186: ...Search for a file abc Search for a file using a keyword Search by checking the contents of files ...
Страница 187: ...Organize my files Delete a file Delete all files Periodically delete files Change the folder ...
Страница 364: ...3 18 PRINTER Contents 4 Click the Print button Printing begins ...