


4-5
SETTING THE TELEPHONE LINE TYPE
The machine's dial mode setting must be set to the type of telephone line you are using.
If the setting is not correct, dialing will not be possible.
Touch the [Auto Select] key in "Dial Mode Setting" in the system settings (administrator). The machine will automatically
set the dial mode to the type of line you are using.
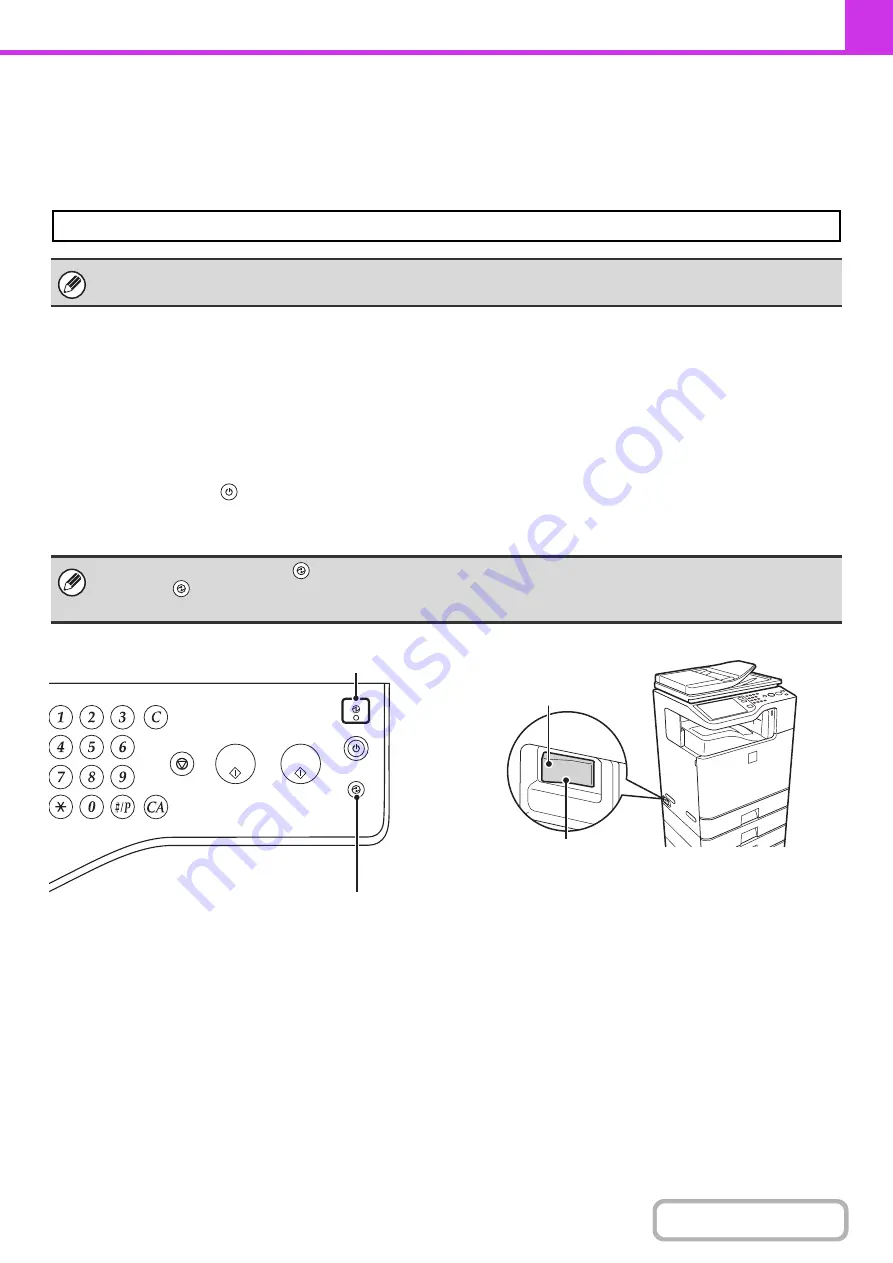
MAKE SURE THE MAIN POWER SWITCH IS IN THE
"ON" POSITION
When the main power indicator on the operation panel is lit, the main power is on.
If the main power indicator light is not lit, the main power is "off". Switch the main power switch to the "on" position and
press the [POWER] key (
) on the operation panel.
If the fax function will be used, and in particular if reception or timer transmission will take place at night, always keep the
main power switch in the "on" position.
You can also set the "Dial Mode Setting" manually.
After setting the dial mode, do not change the setting unless you have a specific reason for changing it.
When the [POWER SAVE] key (
) indicator light is blinking, the machine is in auto power shut-off mode. If the [POWER
SAVE] key (
) is pressed when the indicator is blinking, the indicator will turn off and the machine will return to the ready
state after a brief interval.
LOGOUT
Main power indicator
[POWER SAVE] key/indicator
Main power switch
"On" position
Содержание MX-C311
Страница 79: ...mxc401_us_saf book 76 ページ 2008年10月15日 水曜日 午前11時52分 ...
Страница 80: ...mxc401_us_saf book 77 ページ 2008年10月15日 水曜日 午前11時52分 ...
Страница 156: ...Reduce copy mistakes Print one set of copies for proofing ...
Страница 158: ...Make a copy on this type of paper Envelopes and other special media Transparency film ...
Страница 159: ...Add the date or page numbers 2010 04 04 Add the date Add a stamp 9 10 11 Add the page number ABCDEFG Add text ...
Страница 160: ...Assemble output into a pamphlet Create a pamphlet Staple output Create a blank margin for punching ...
Страница 163: ...Conserve Print on both sides of the paper Print multiple pages on one side of the paper ...
Страница 171: ...Conserve Send when the rate is lowest Check received data before printing Relay a transmission through a branch office ...
Страница 181: ...Prevent transmission to the wrong destination Check the result of transmission Check the log of previous transmissions ...
Страница 185: ...SAVE A JOB AND REUSE IT LATER Search for a file Organize my files Save an important document Print a batch of files ...
Страница 186: ...Search for a file abc Search for a file using a keyword Search by checking the contents of files ...
Страница 187: ...Organize my files Delete a file Delete all files Periodically delete files Change the folder ...
Страница 364: ...3 18 PRINTER Contents 4 Click the Print button Printing begins ...