


4-73
4
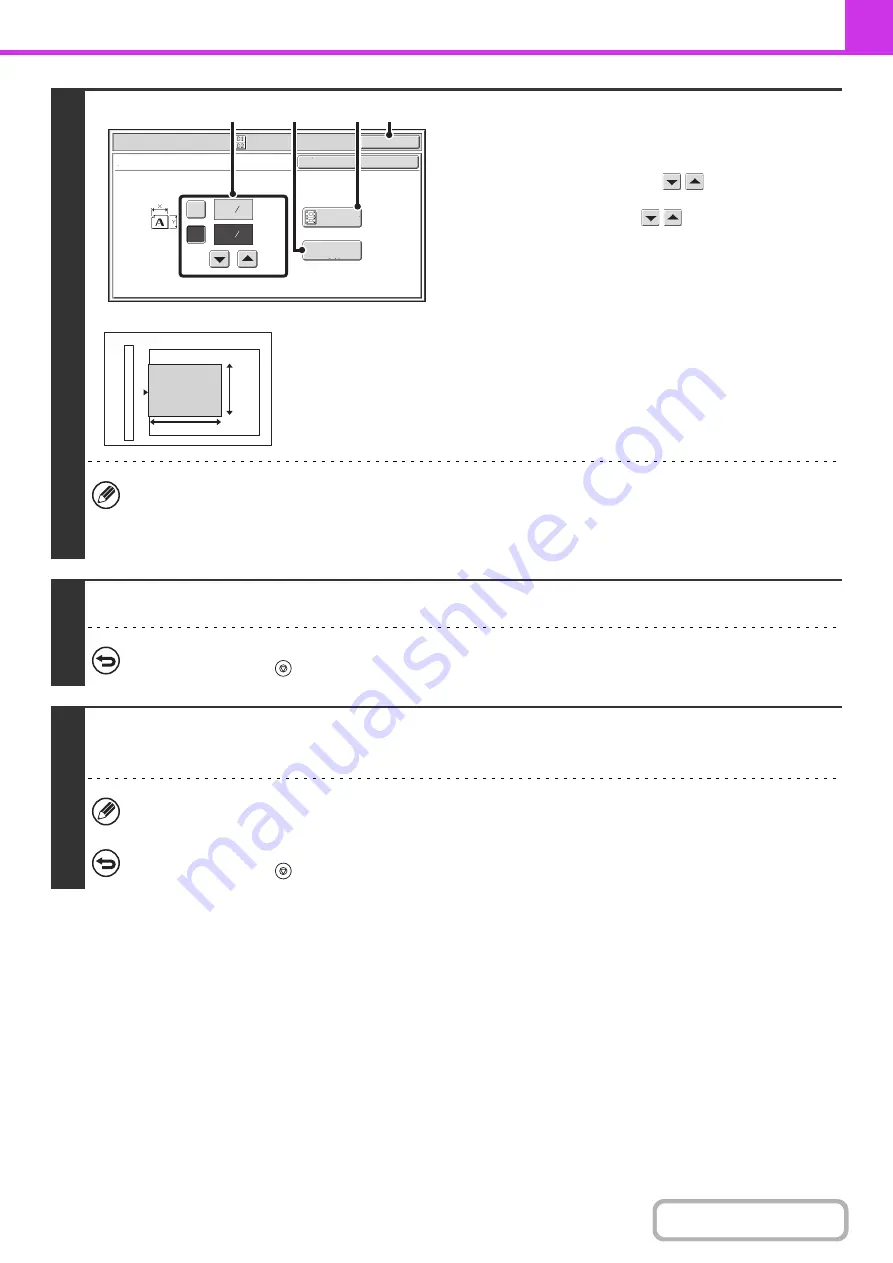
Specify the original size.
(1) Enter the original size.
• Touch the [X] key and enter the horizontal dimension
(X) of the original with the
keys.
• Touch the [Y] key and enter the vertical dimension (Y)
of the original with the
keys.
(A) To return the original size to the default size, touch
the [Size Reset] key.
(B) To automatically enlarge or reduce the image size to
the send size, touch the [Fit to Send Size] key. Do not
touch this key if you wish to scan the original at the
original size that you entered.
(2) Touch the [OK] key.
• The send size is automatically selected based on the original size you entered.
• After selecting Card Shot, you can touch the [Original] key in the base screen to change the original scan size or the
send size. In this case, the screen of step 3 appears when you touch the scan size key. For the procedure for
setting the send size, see "
Specifying the send size of the original
5
Press the [BLACK & WHITE START] key to scan the front of the card.
To cancel scanning...
Press the [STOP] key (
).
6
Turn the card over so that the back is face down, and press the [BLACK &
WHITE START] key to scan the back of the card.
Before scanning the back of the card, you can touch the [Configure] key in the touch panel to change the exposure.
To cancel scanning...
Press the [STOP] key (
).
Fax/Special Modes
OK
X
Y
Card Shot
(1~8 1/2)
inch
(1~8 1/2)
inch
OK
Cancel
Fit to
Send Size
Size Reset
3
8
3
2
8
1
(2)
(B)
(1)
(A)
X
Y
Содержание MX-C311
Страница 79: ...mxc401_us_saf book 76 ページ 2008年10月15日 水曜日 午前11時52分 ...
Страница 80: ...mxc401_us_saf book 77 ページ 2008年10月15日 水曜日 午前11時52分 ...
Страница 156: ...Reduce copy mistakes Print one set of copies for proofing ...
Страница 158: ...Make a copy on this type of paper Envelopes and other special media Transparency film ...
Страница 159: ...Add the date or page numbers 2010 04 04 Add the date Add a stamp 9 10 11 Add the page number ABCDEFG Add text ...
Страница 160: ...Assemble output into a pamphlet Create a pamphlet Staple output Create a blank margin for punching ...
Страница 163: ...Conserve Print on both sides of the paper Print multiple pages on one side of the paper ...
Страница 171: ...Conserve Send when the rate is lowest Check received data before printing Relay a transmission through a branch office ...
Страница 181: ...Prevent transmission to the wrong destination Check the result of transmission Check the log of previous transmissions ...
Страница 185: ...SAVE A JOB AND REUSE IT LATER Search for a file Organize my files Save an important document Print a batch of files ...
Страница 186: ...Search for a file abc Search for a file using a keyword Search by checking the contents of files ...
Страница 187: ...Organize my files Delete a file Delete all files Periodically delete files Change the folder ...
Страница 364: ...3 18 PRINTER Contents 4 Click the Print button Printing begins ...